So, I went ahead and ordered one of those cheap CNC/laser engraver kits from Aliexpress a while ago and just got round to using it for the first time. Though my opinion on the CNC is still nowhere near final, I’m mostly satisfied with the output considering how low powered and inexpensive the whole rig is.
Here’s a quick birthday gift project that didn’t turn out half bad, especially given the very limited time and resources I had.
On milling
Unlike 3D printers, CNC machines are used for subtractive manufacturing. That is, starting with a solid piece of stock such as wood or metal, and cutting it down into the desired shape.
Depending on the model, a part can be milled from one or more pieces of stock which are sometimes repositioned, flipped, or otherwise worked in multiple different processes using different milling tools.
CNC milling has been around the block way longer than 3D printing, though it hasn’t really been affordable until the last decade. Machines are either industrial sized, bulky and often requiring dedicated workshops, and/or just very expensive and requiring proprietary software to run.
The rising popularity of hobby 3D printers has certainly had a positive influence on the CNC scene, so there are now plenty of DIY kits, tutorials, and commercial products out there that’d get you into the hobby without breaking the bank.
Also, with no prior machining experience, I was mostly making this project up as I was going along.
Stock
Getting high quality wood stock turned out much harder than I thought. Premium ones such as oak and walnut are actually endangered over here, so I had to settle for something more basic. Being pressed for time, I decided to use a piece of soft light wood I got from the local hardware store and see how far that takes me. The stock was big enough to mill a few pieces out of, and sufficient to finish the project if I didn’t mess things up too much.
Design
I didn’t really have a particular vision for this project - just wanted it to be a box because it would be easy to model and mill.
My stock was 3/4” (19mm) in height, but that wasn’t thick enough to make the whole box in one go. I also wanted to try and make most of the work on the CNC, so any cutting with hand or power tools was out of scope.
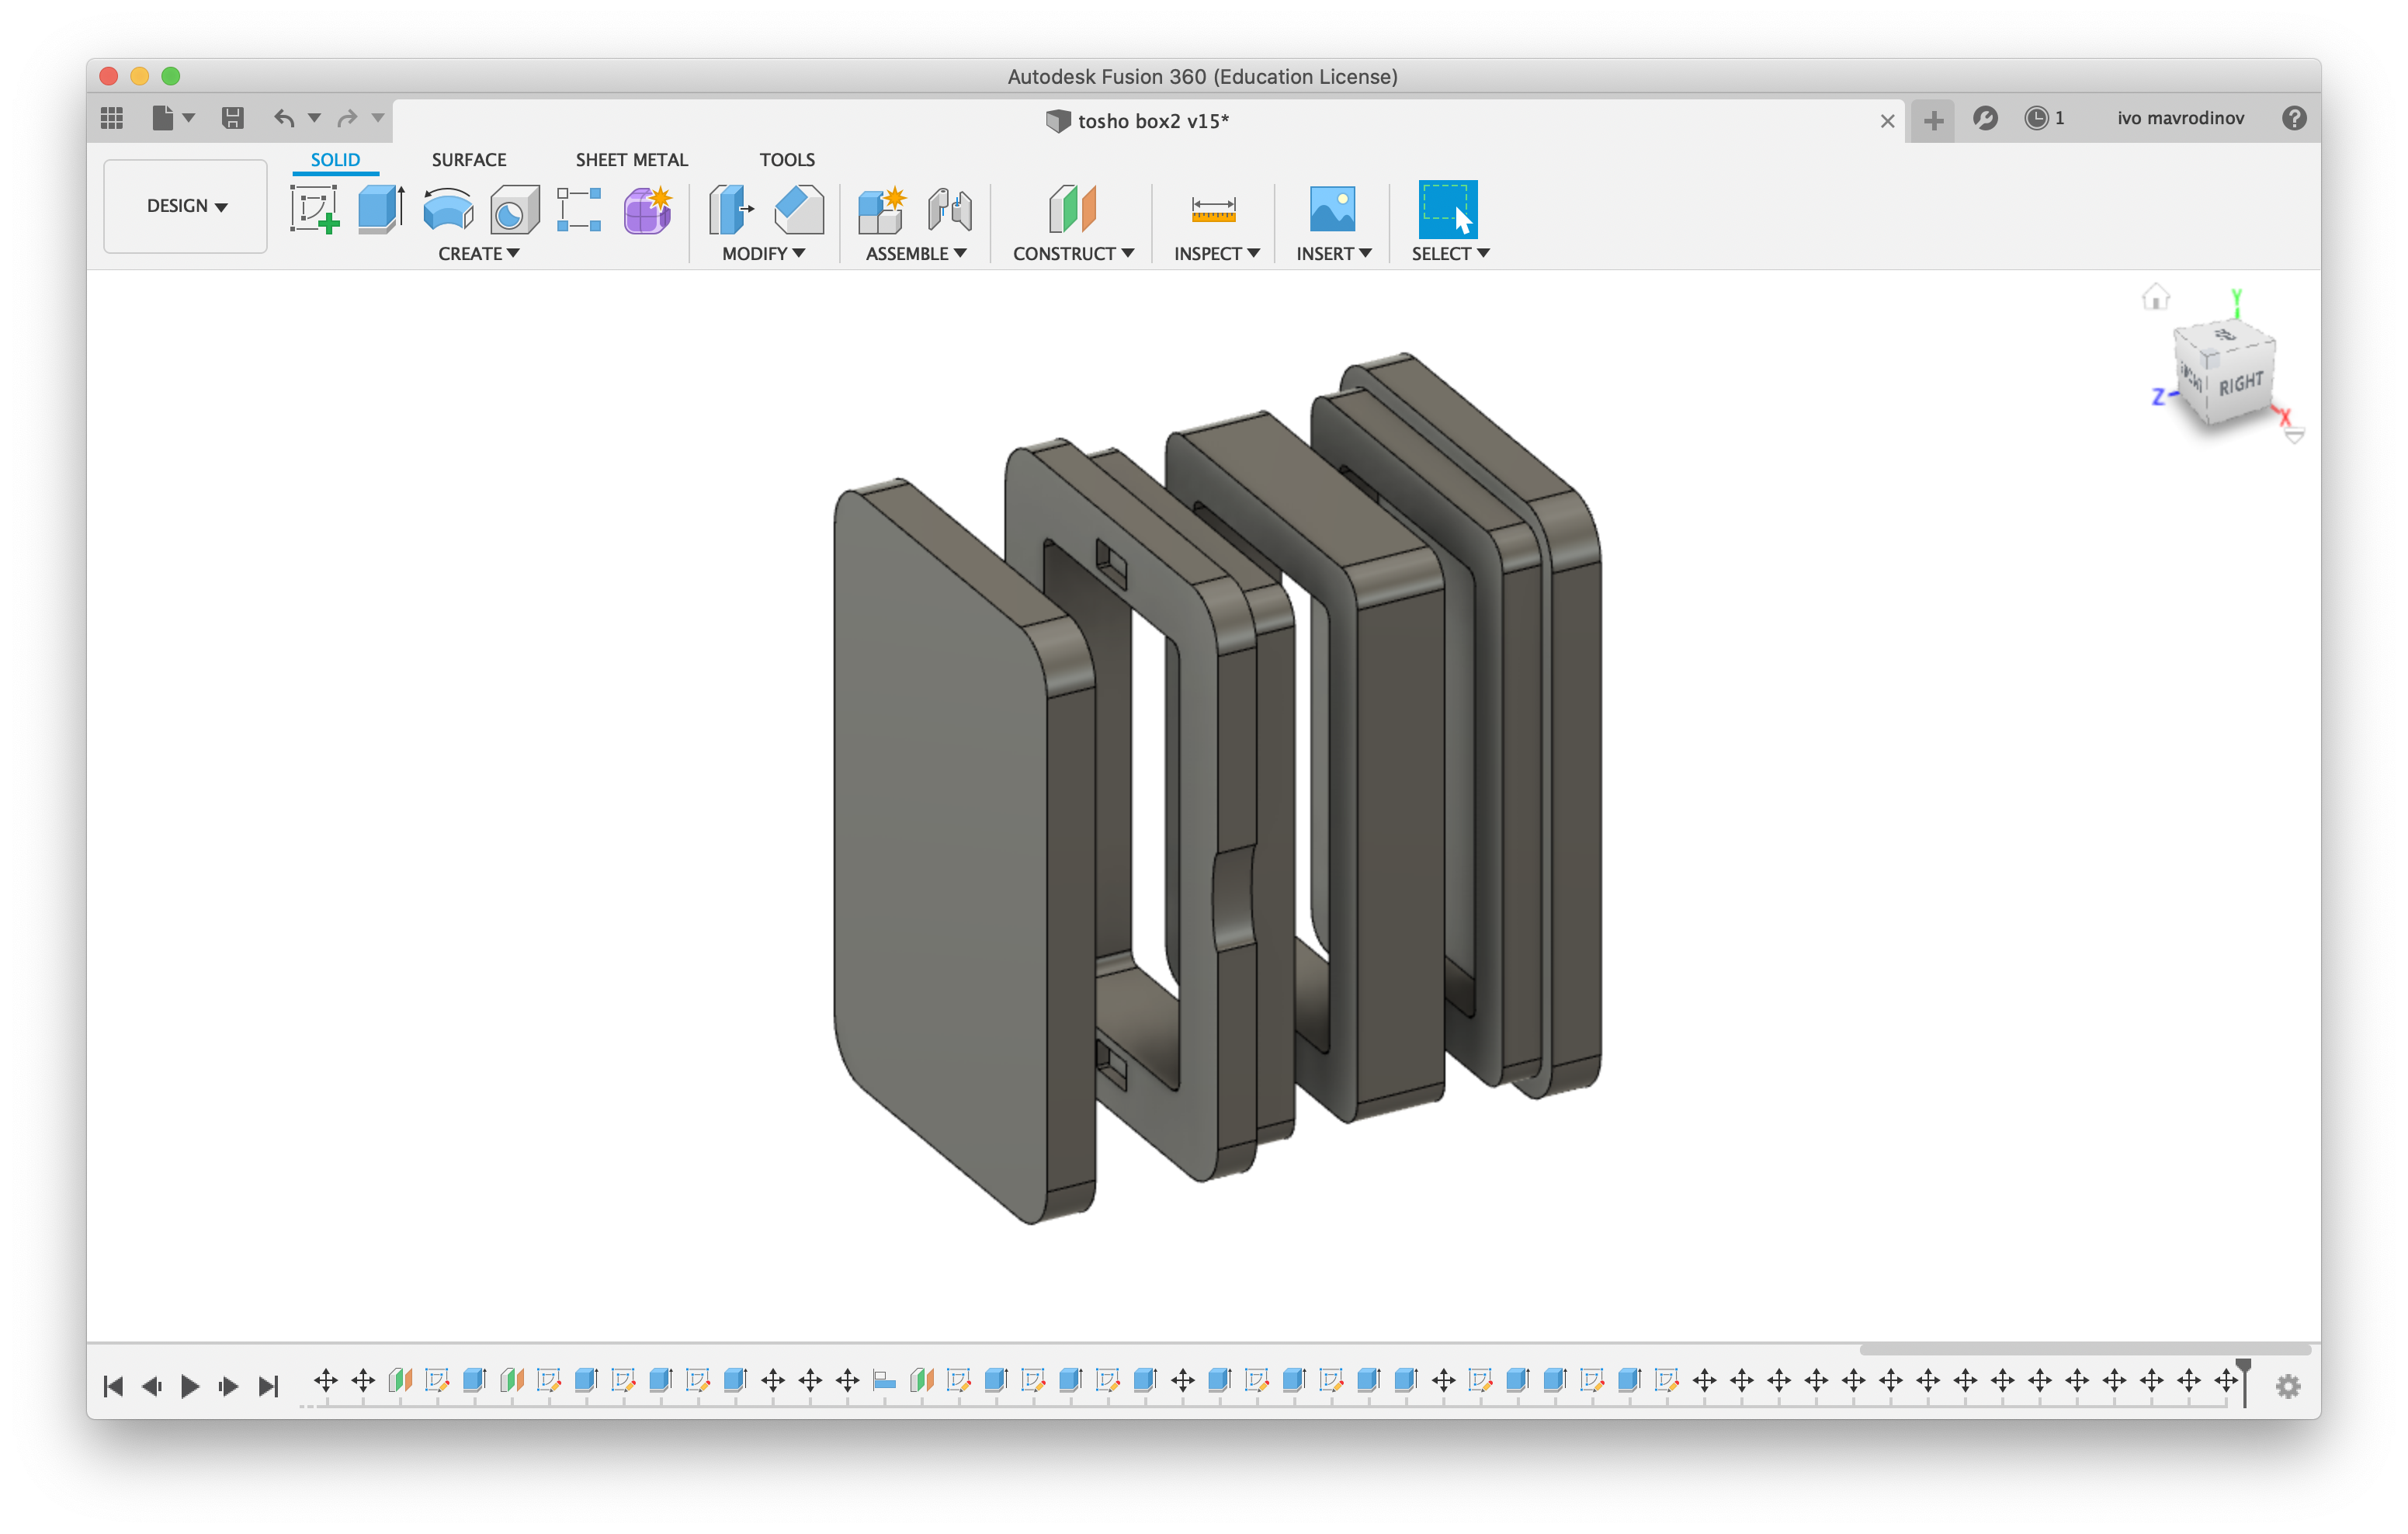
With that in mind, I whipped up a quick prototype in Fusion and sliced the box body in three equally thick pieces, with the intent of somehow joining them together using screws or glue.
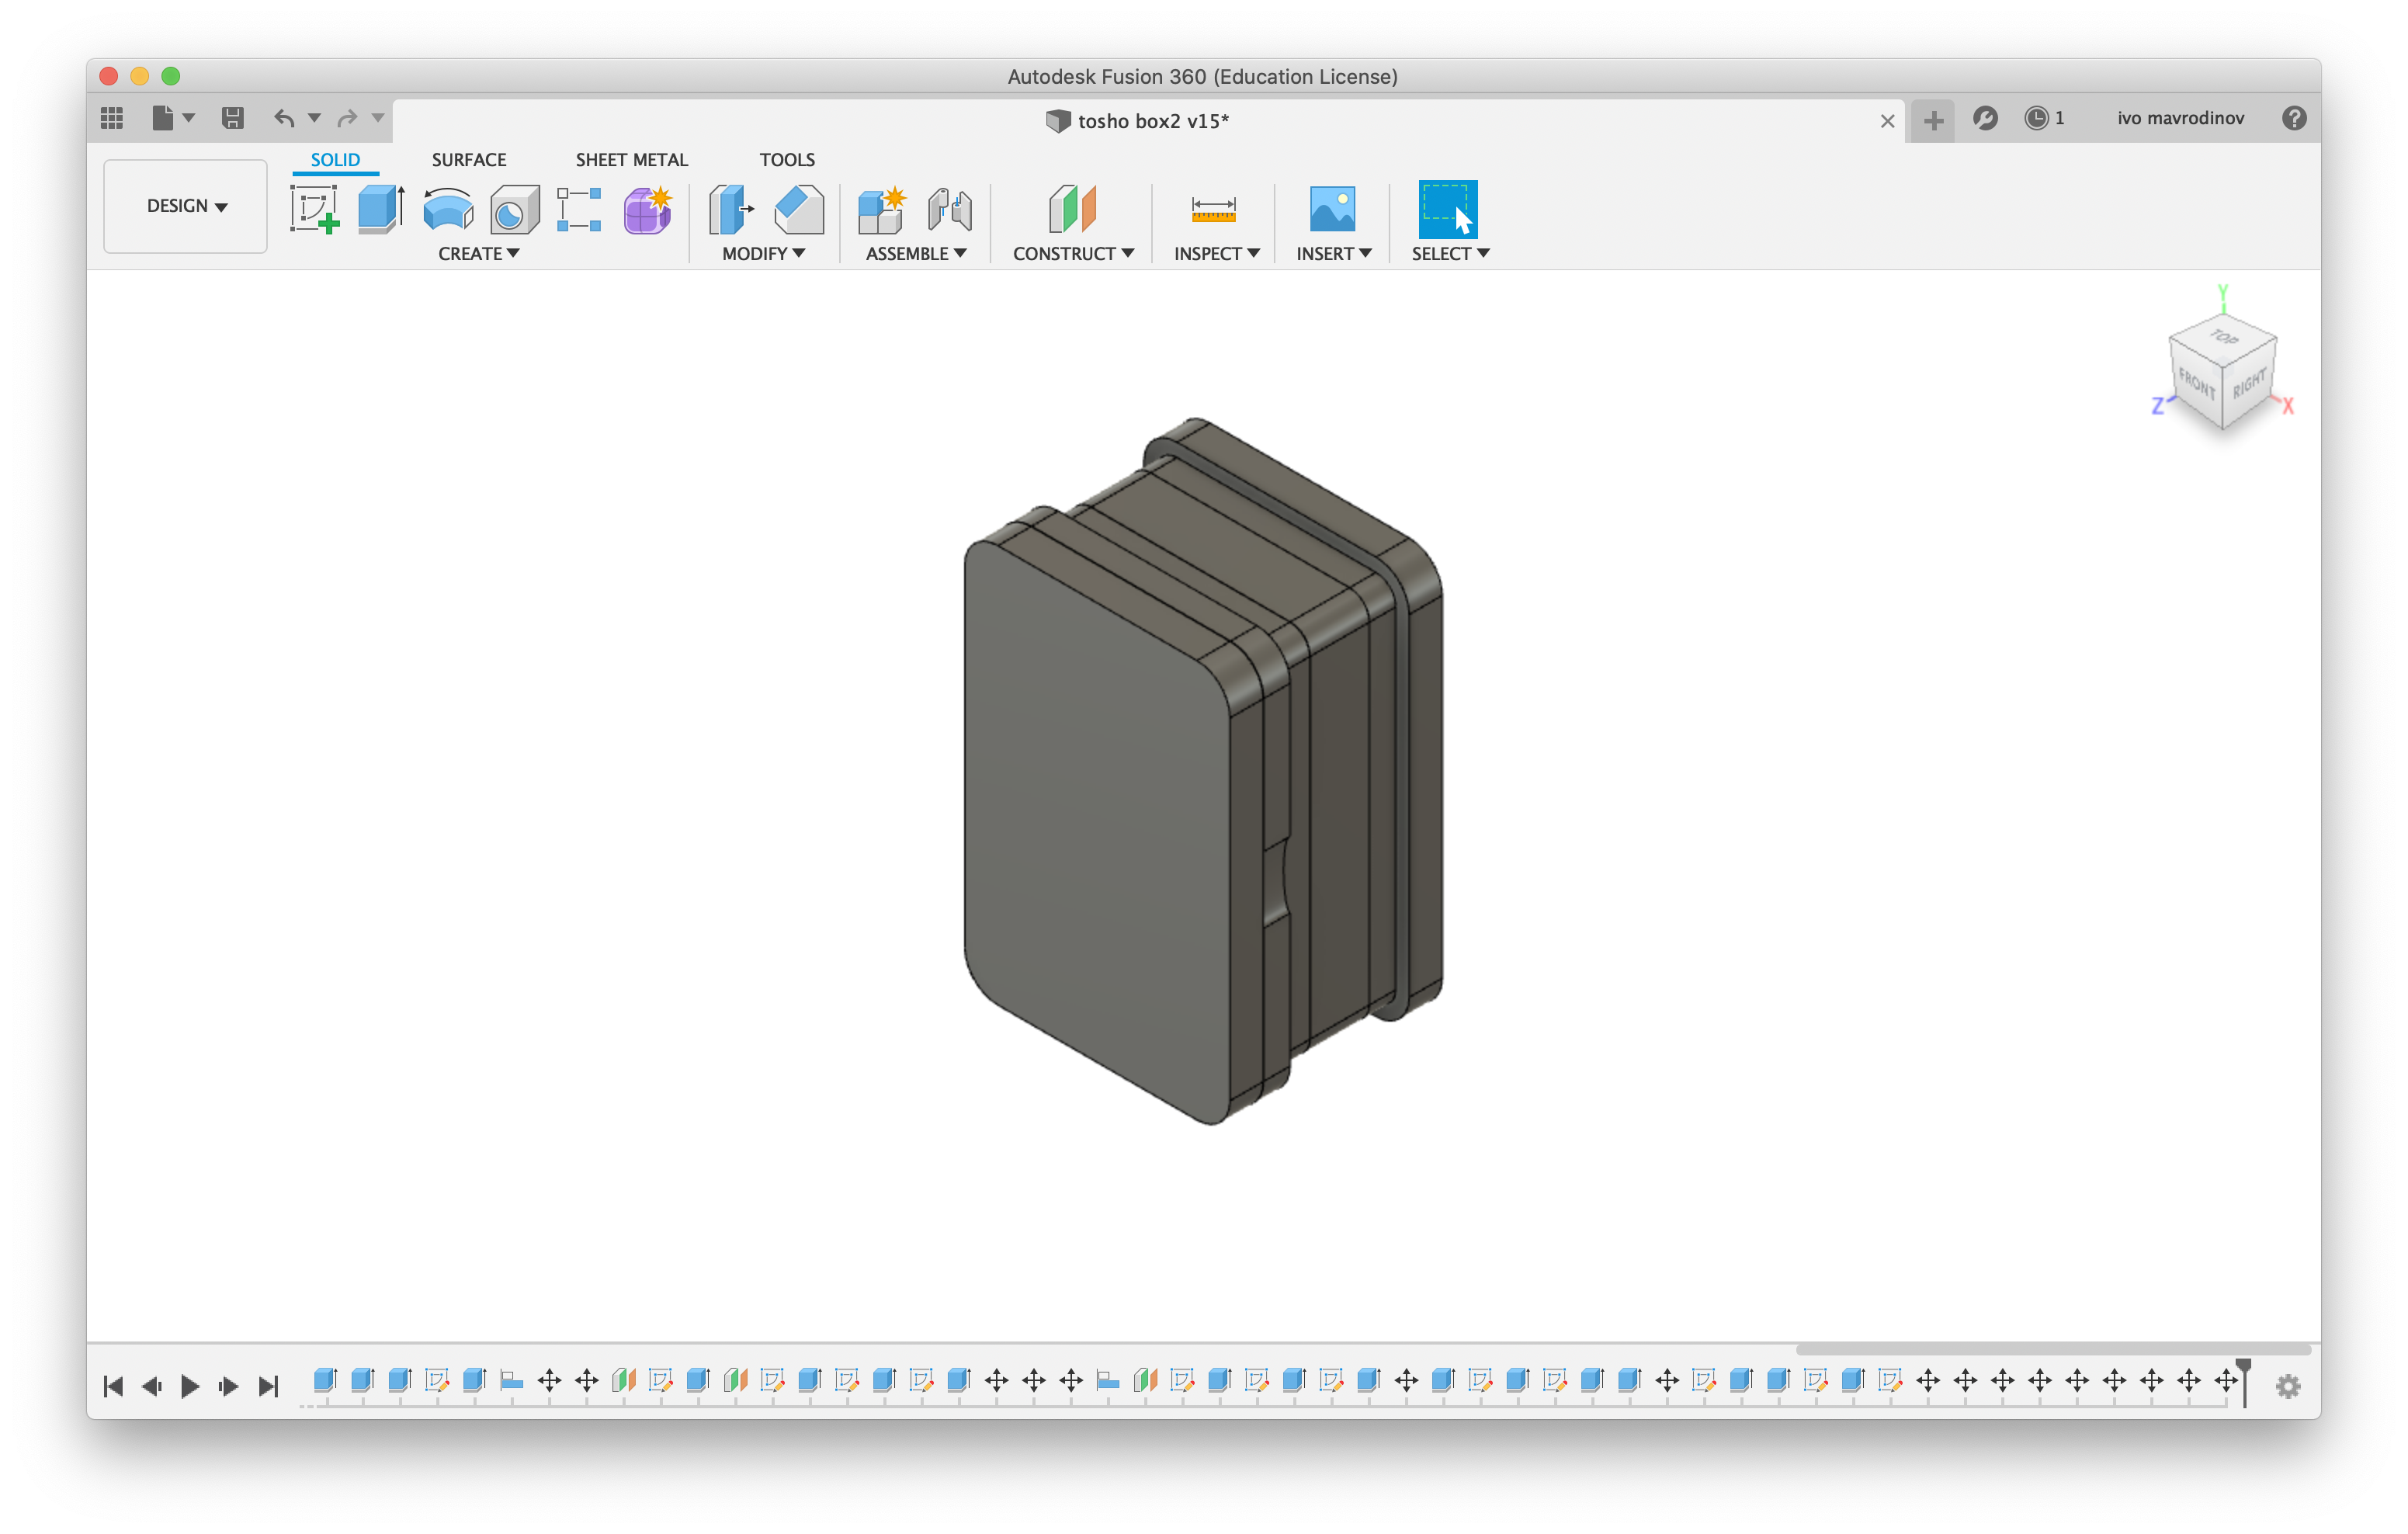
Upon closer inspection, it turned out that the stock was not a solid piece of wood, but instead a board made out of glued pieces. The face didn’t look too bad, but the sides were messy with wood grain running in every direction.
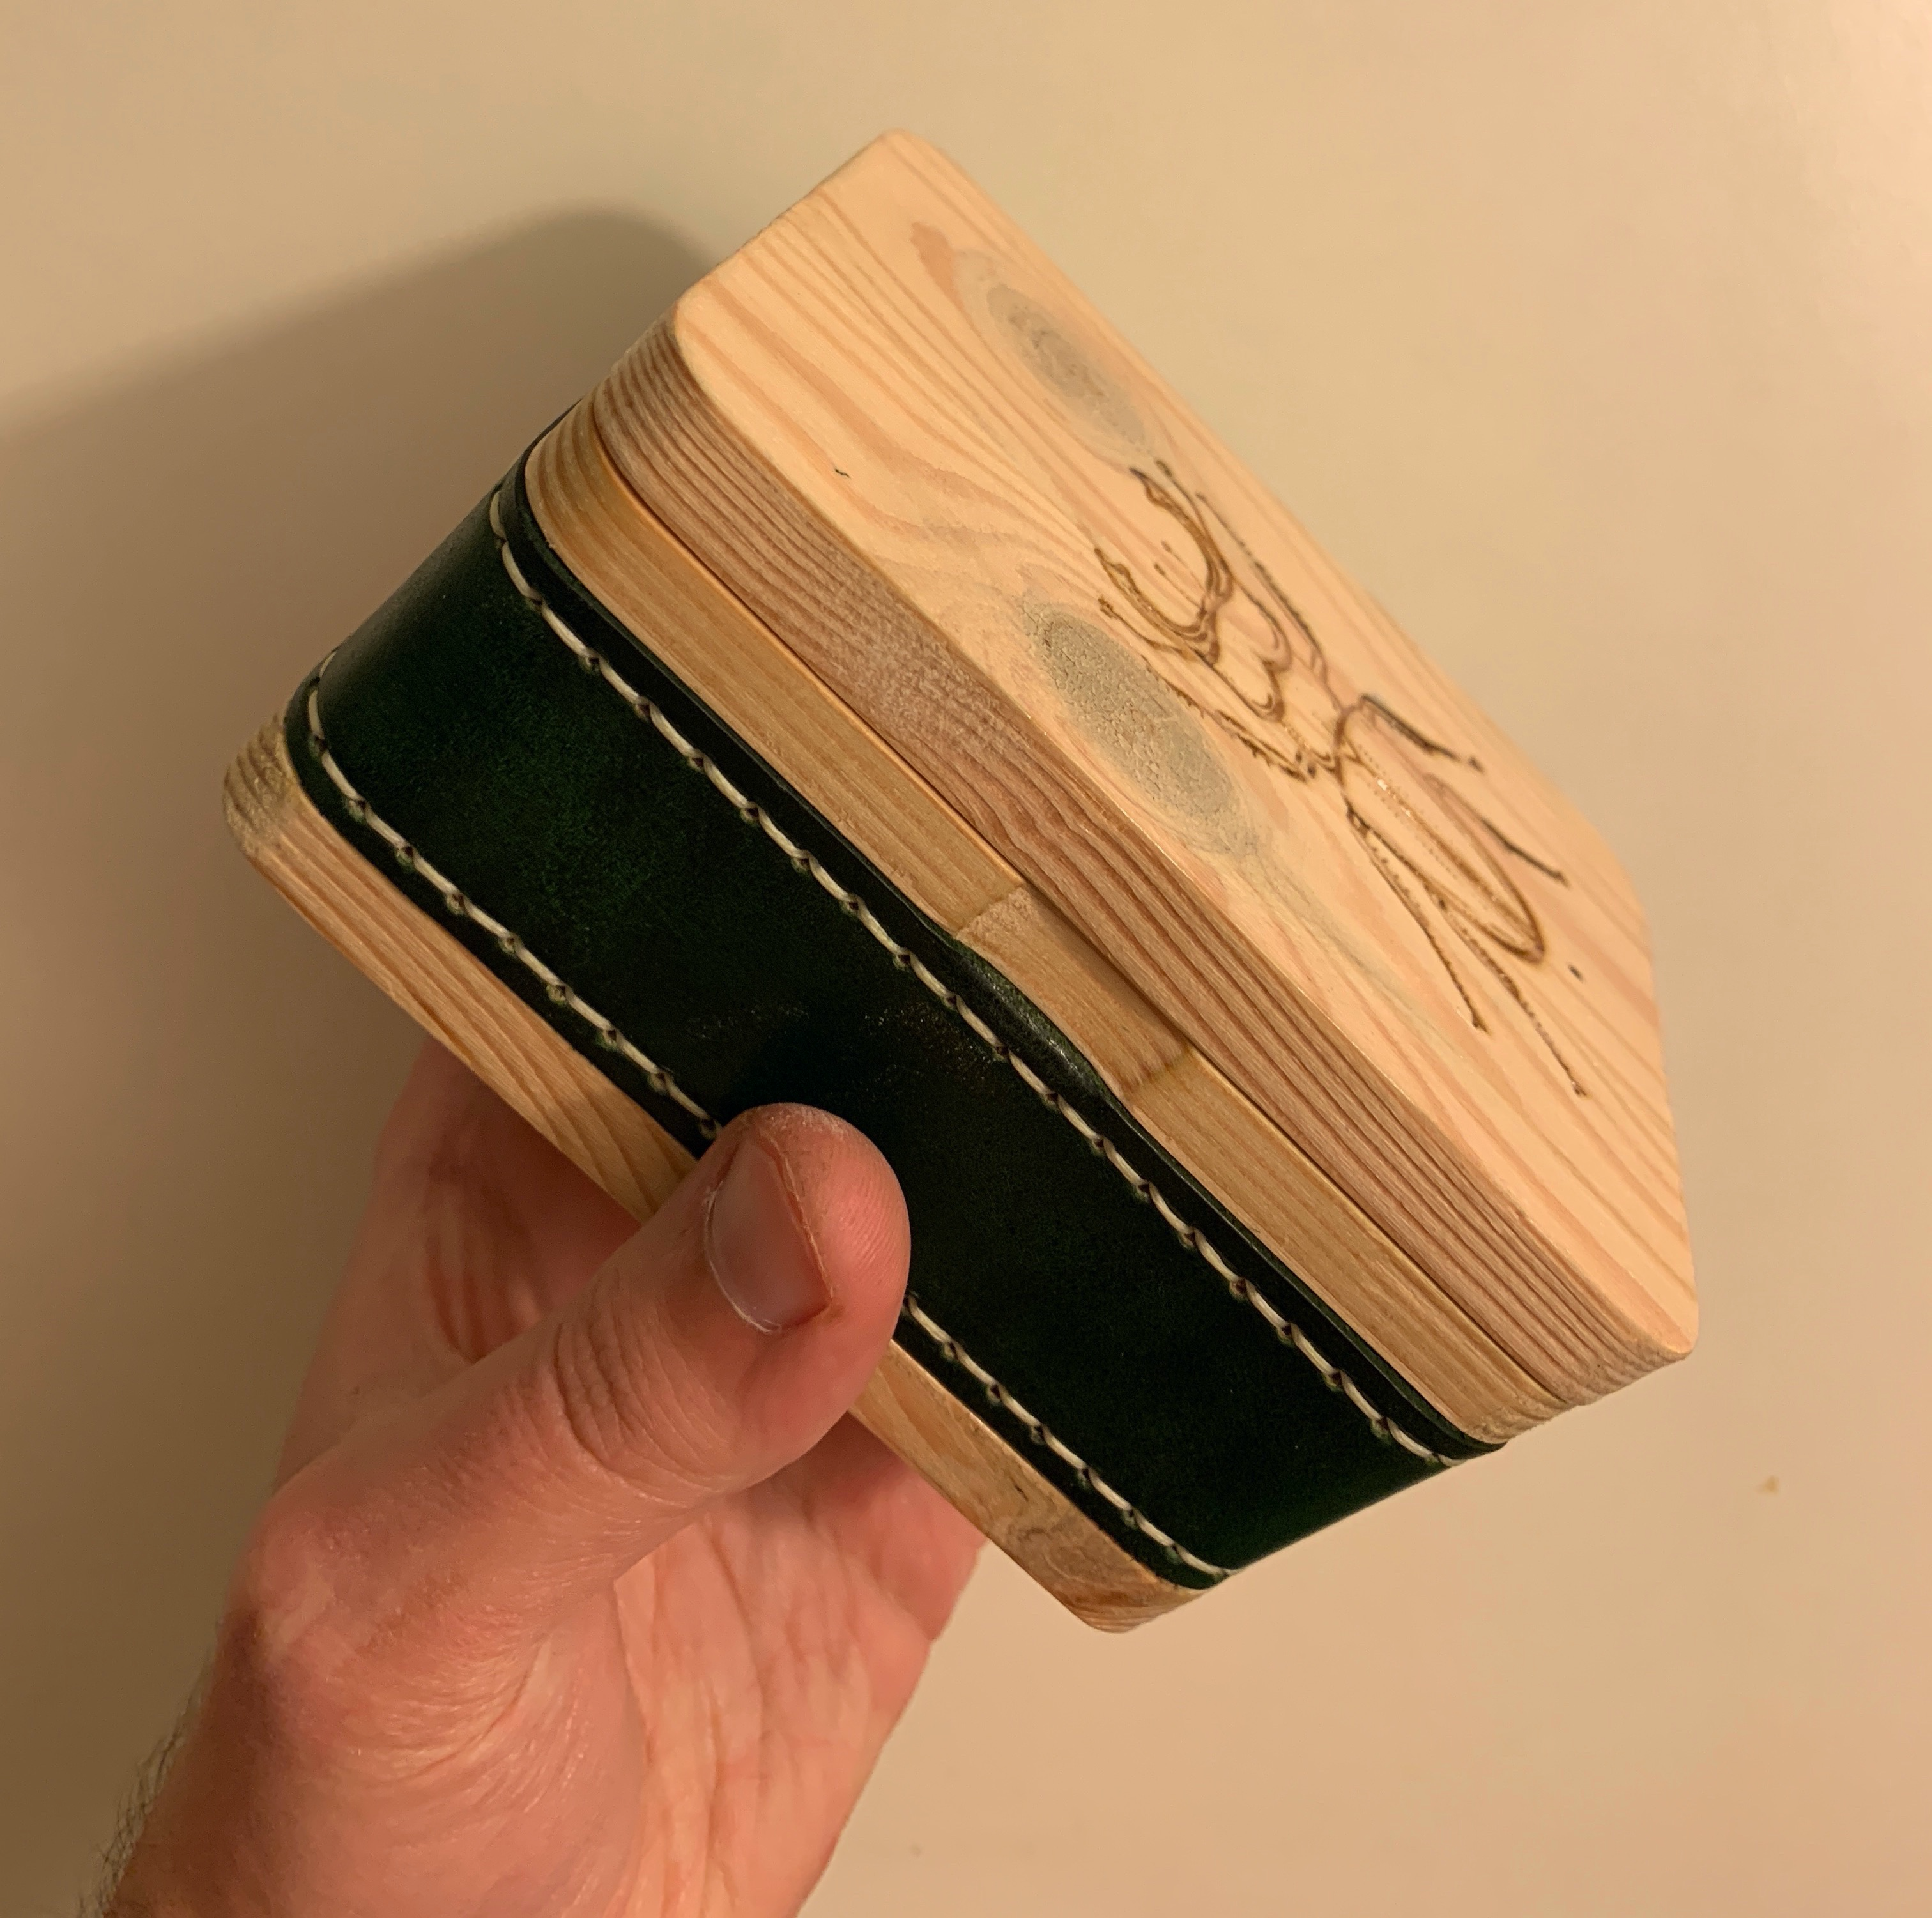
So, in a bind, I decided to flare the top and bottom edges of the box and have the middle (potentially misaligned) section covered with a strip of leather.
Spoiler alert - I managed to machine the outside in a way that this doesn’t show up, but the inside still had misaligned grain.
In hindsight, the overall proportions made the box look a bit like a sarcophagus, but I had to stick to this depth to avoid wasting too much time thinning stock.
CAM
CAM was prepared in Fusion - it’s great to be able to switch between designing and machining all in one app, and most of the settings are automagically taken care of.
This box was fairly easy to mill - the middle ring section was basically a perimeter cut of the inside and outside outlines, though I left a few small tabs at the bottom of the stock to keep the cut piece from flying off the work table.
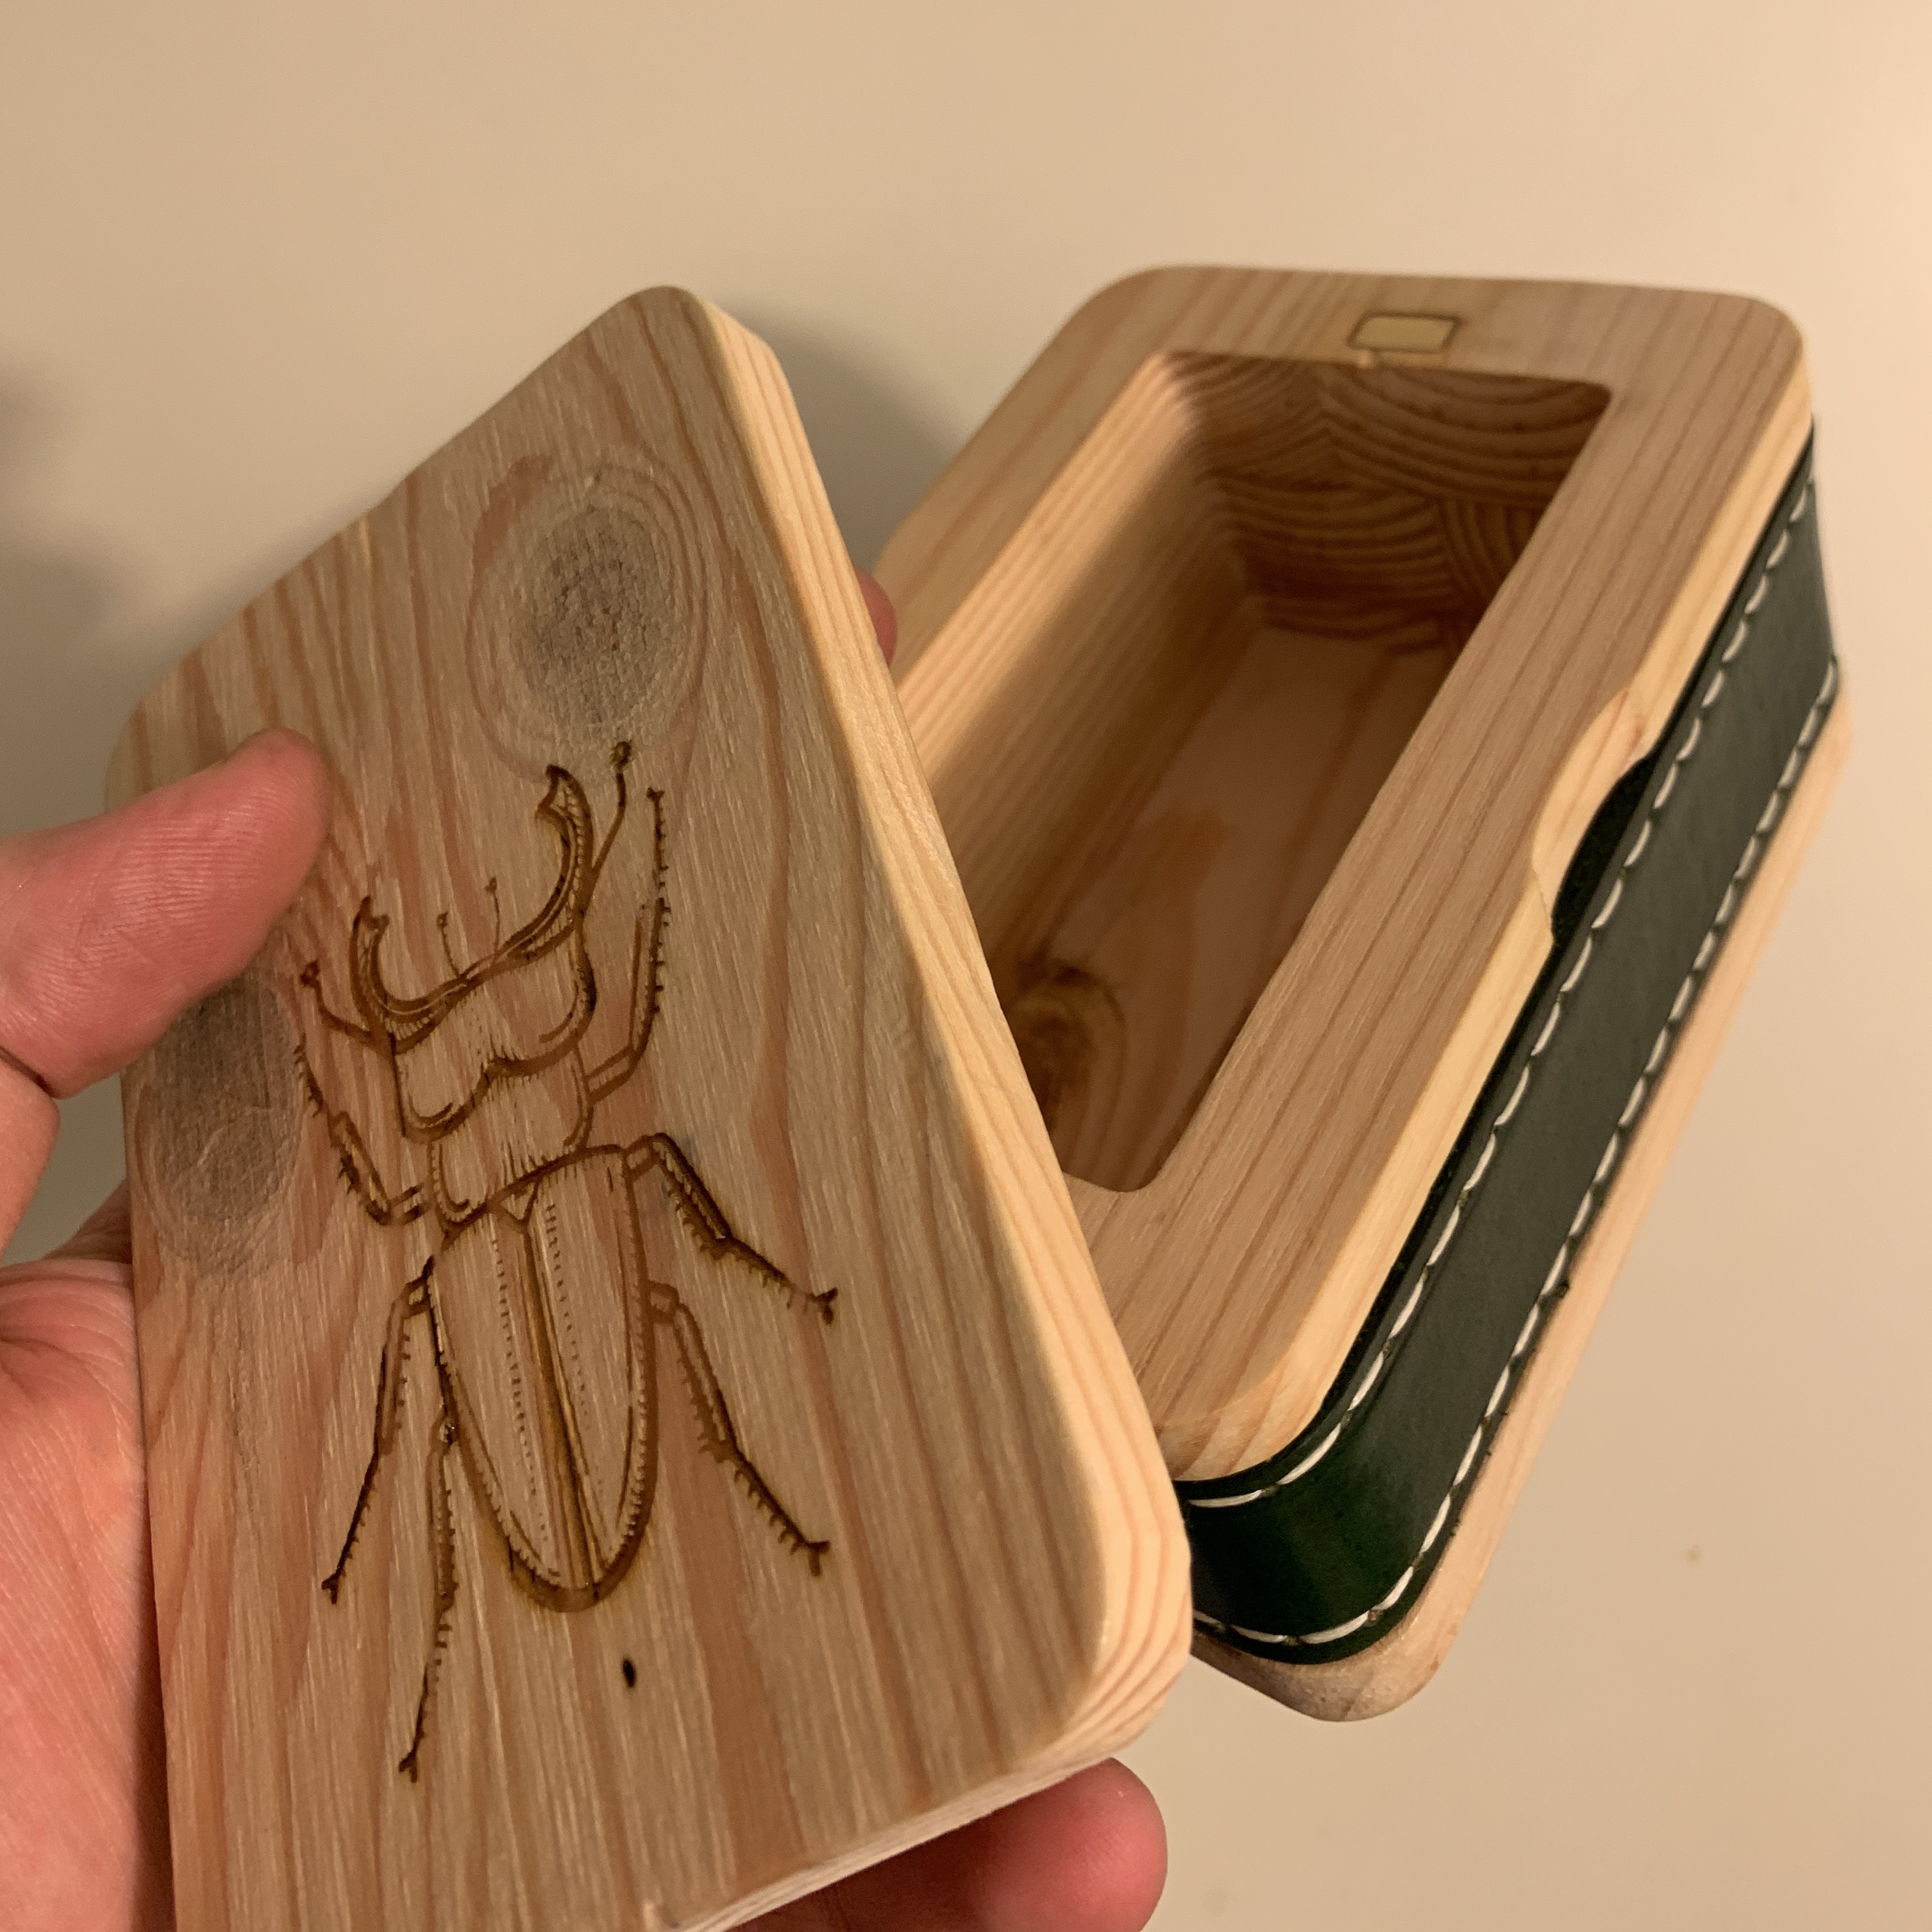
The box bottom was also an outline cut on the outside, though the inside was pocketed - half of the stock height was milled off to create a cavity.
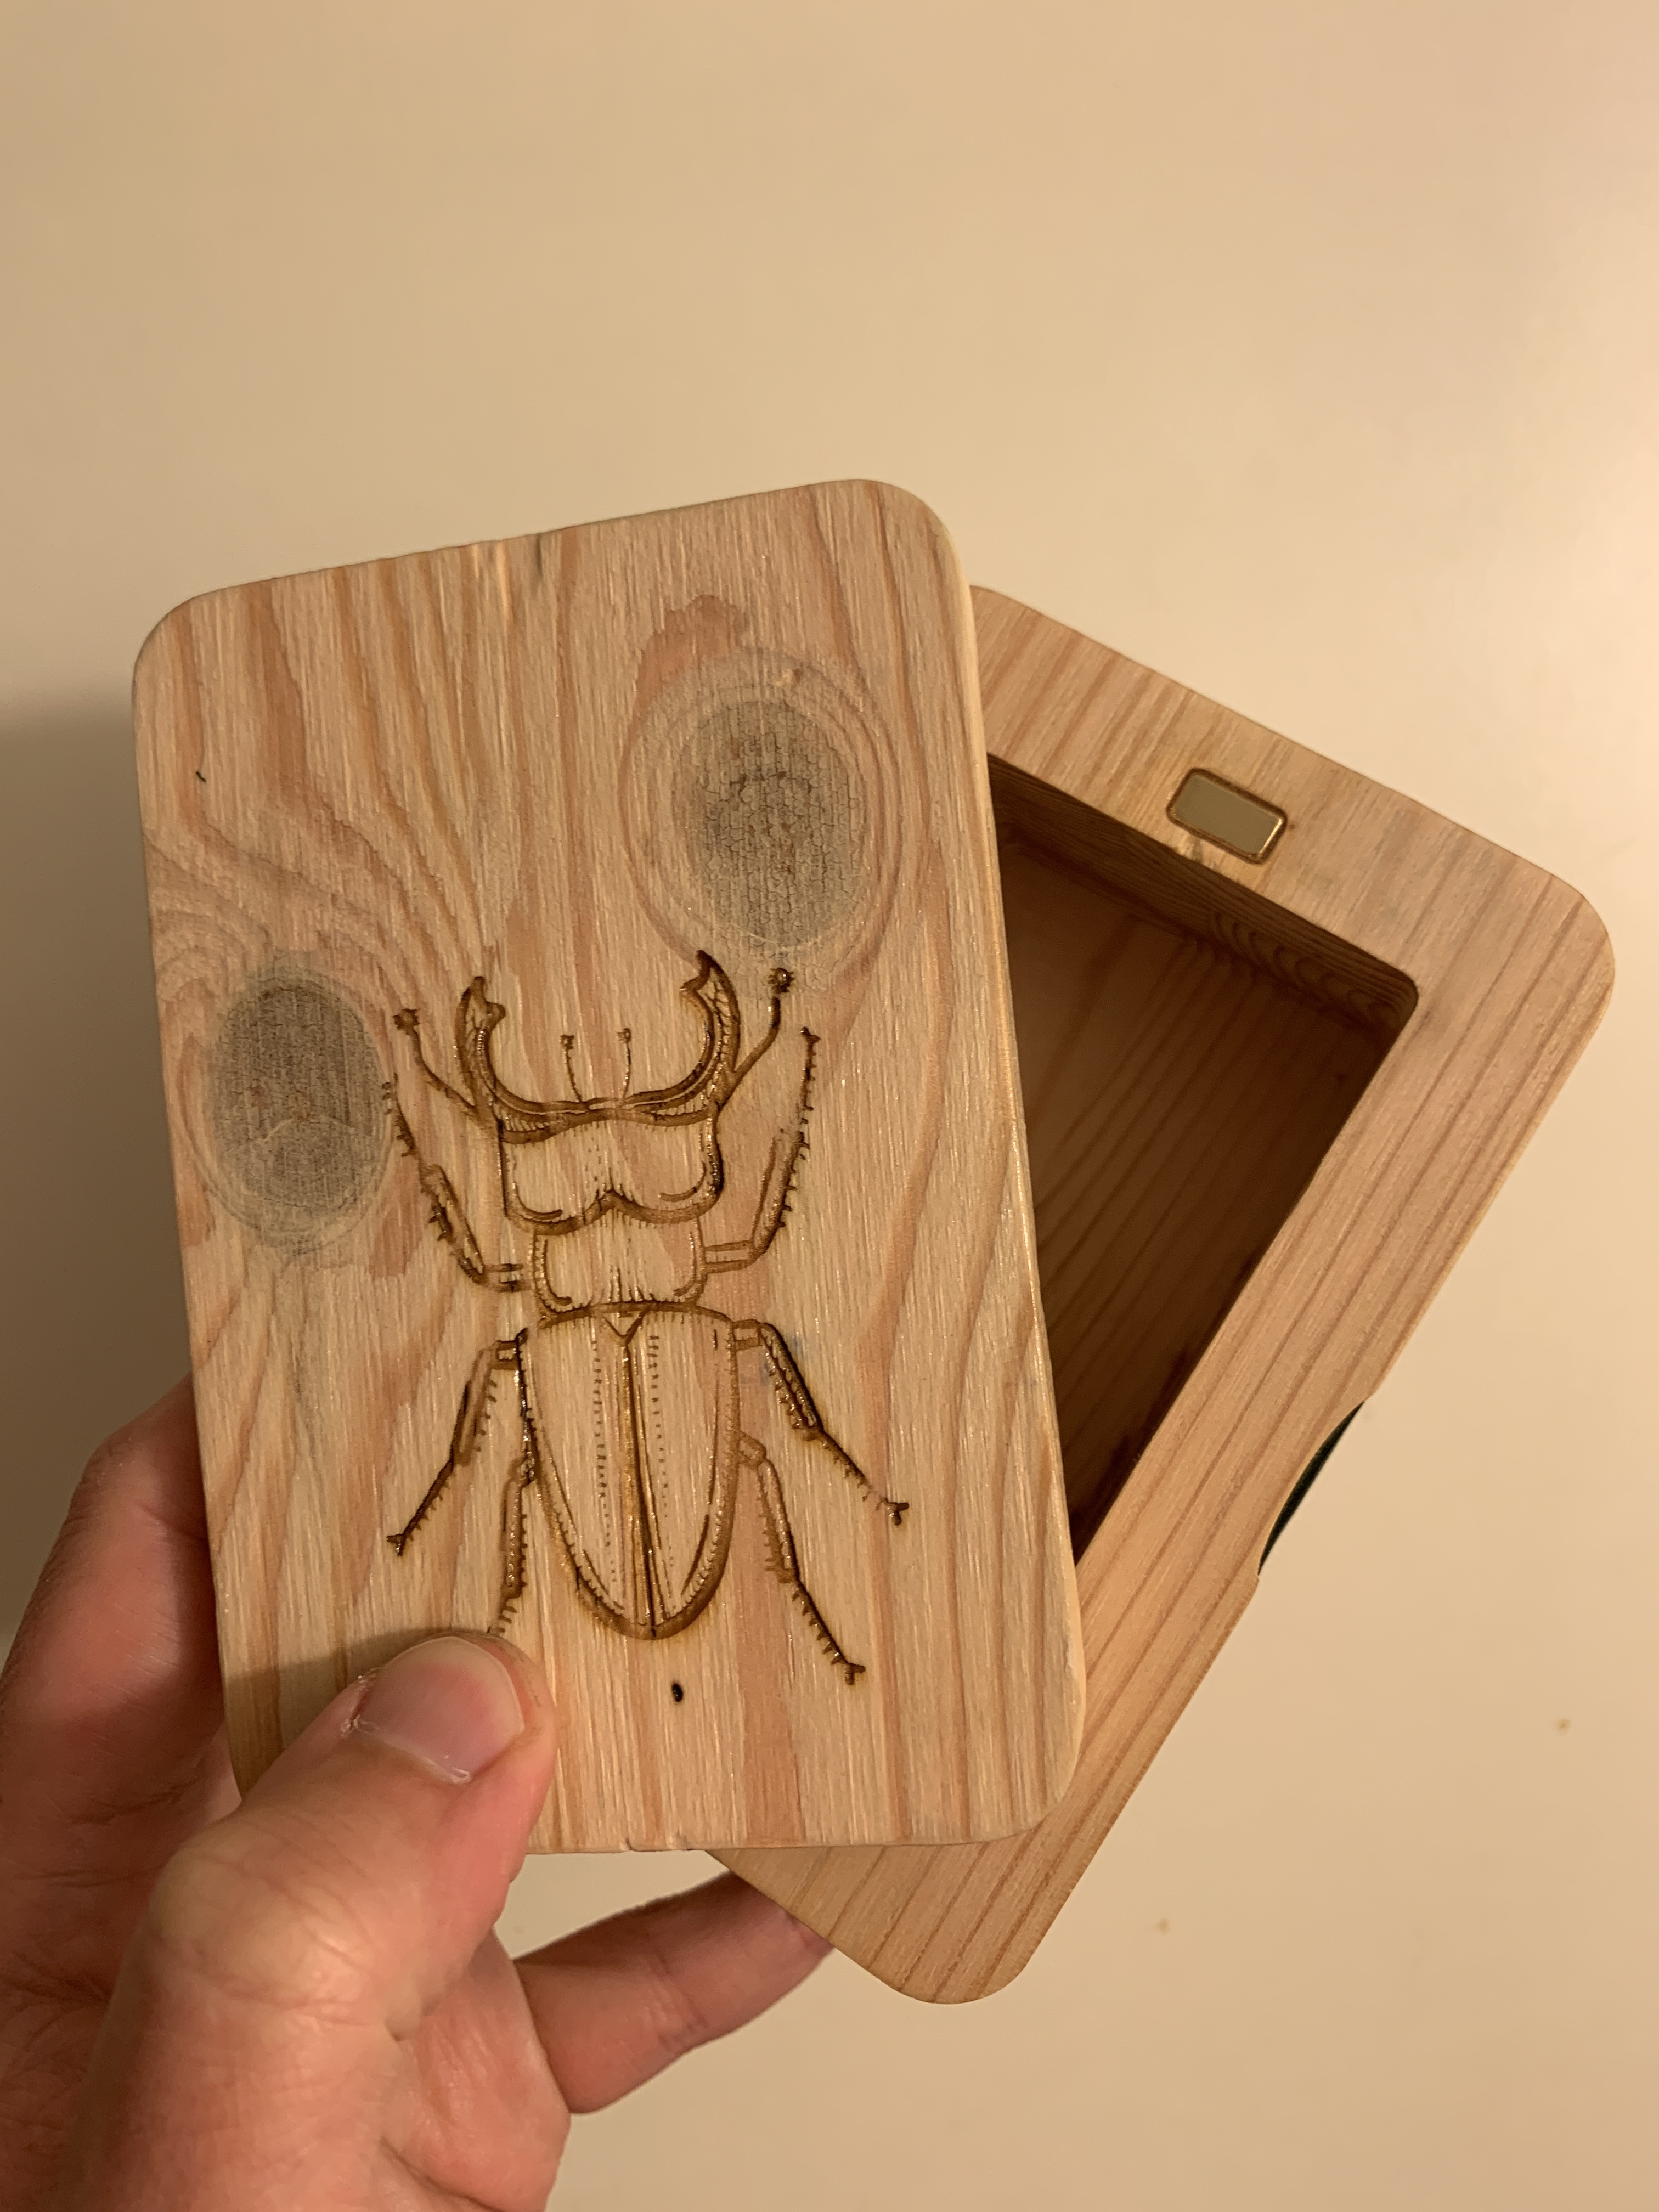
The lid was basically the same deal, though I wanted the overall height to be much smaller, so I faced (thinned) half of the board before cutting it.
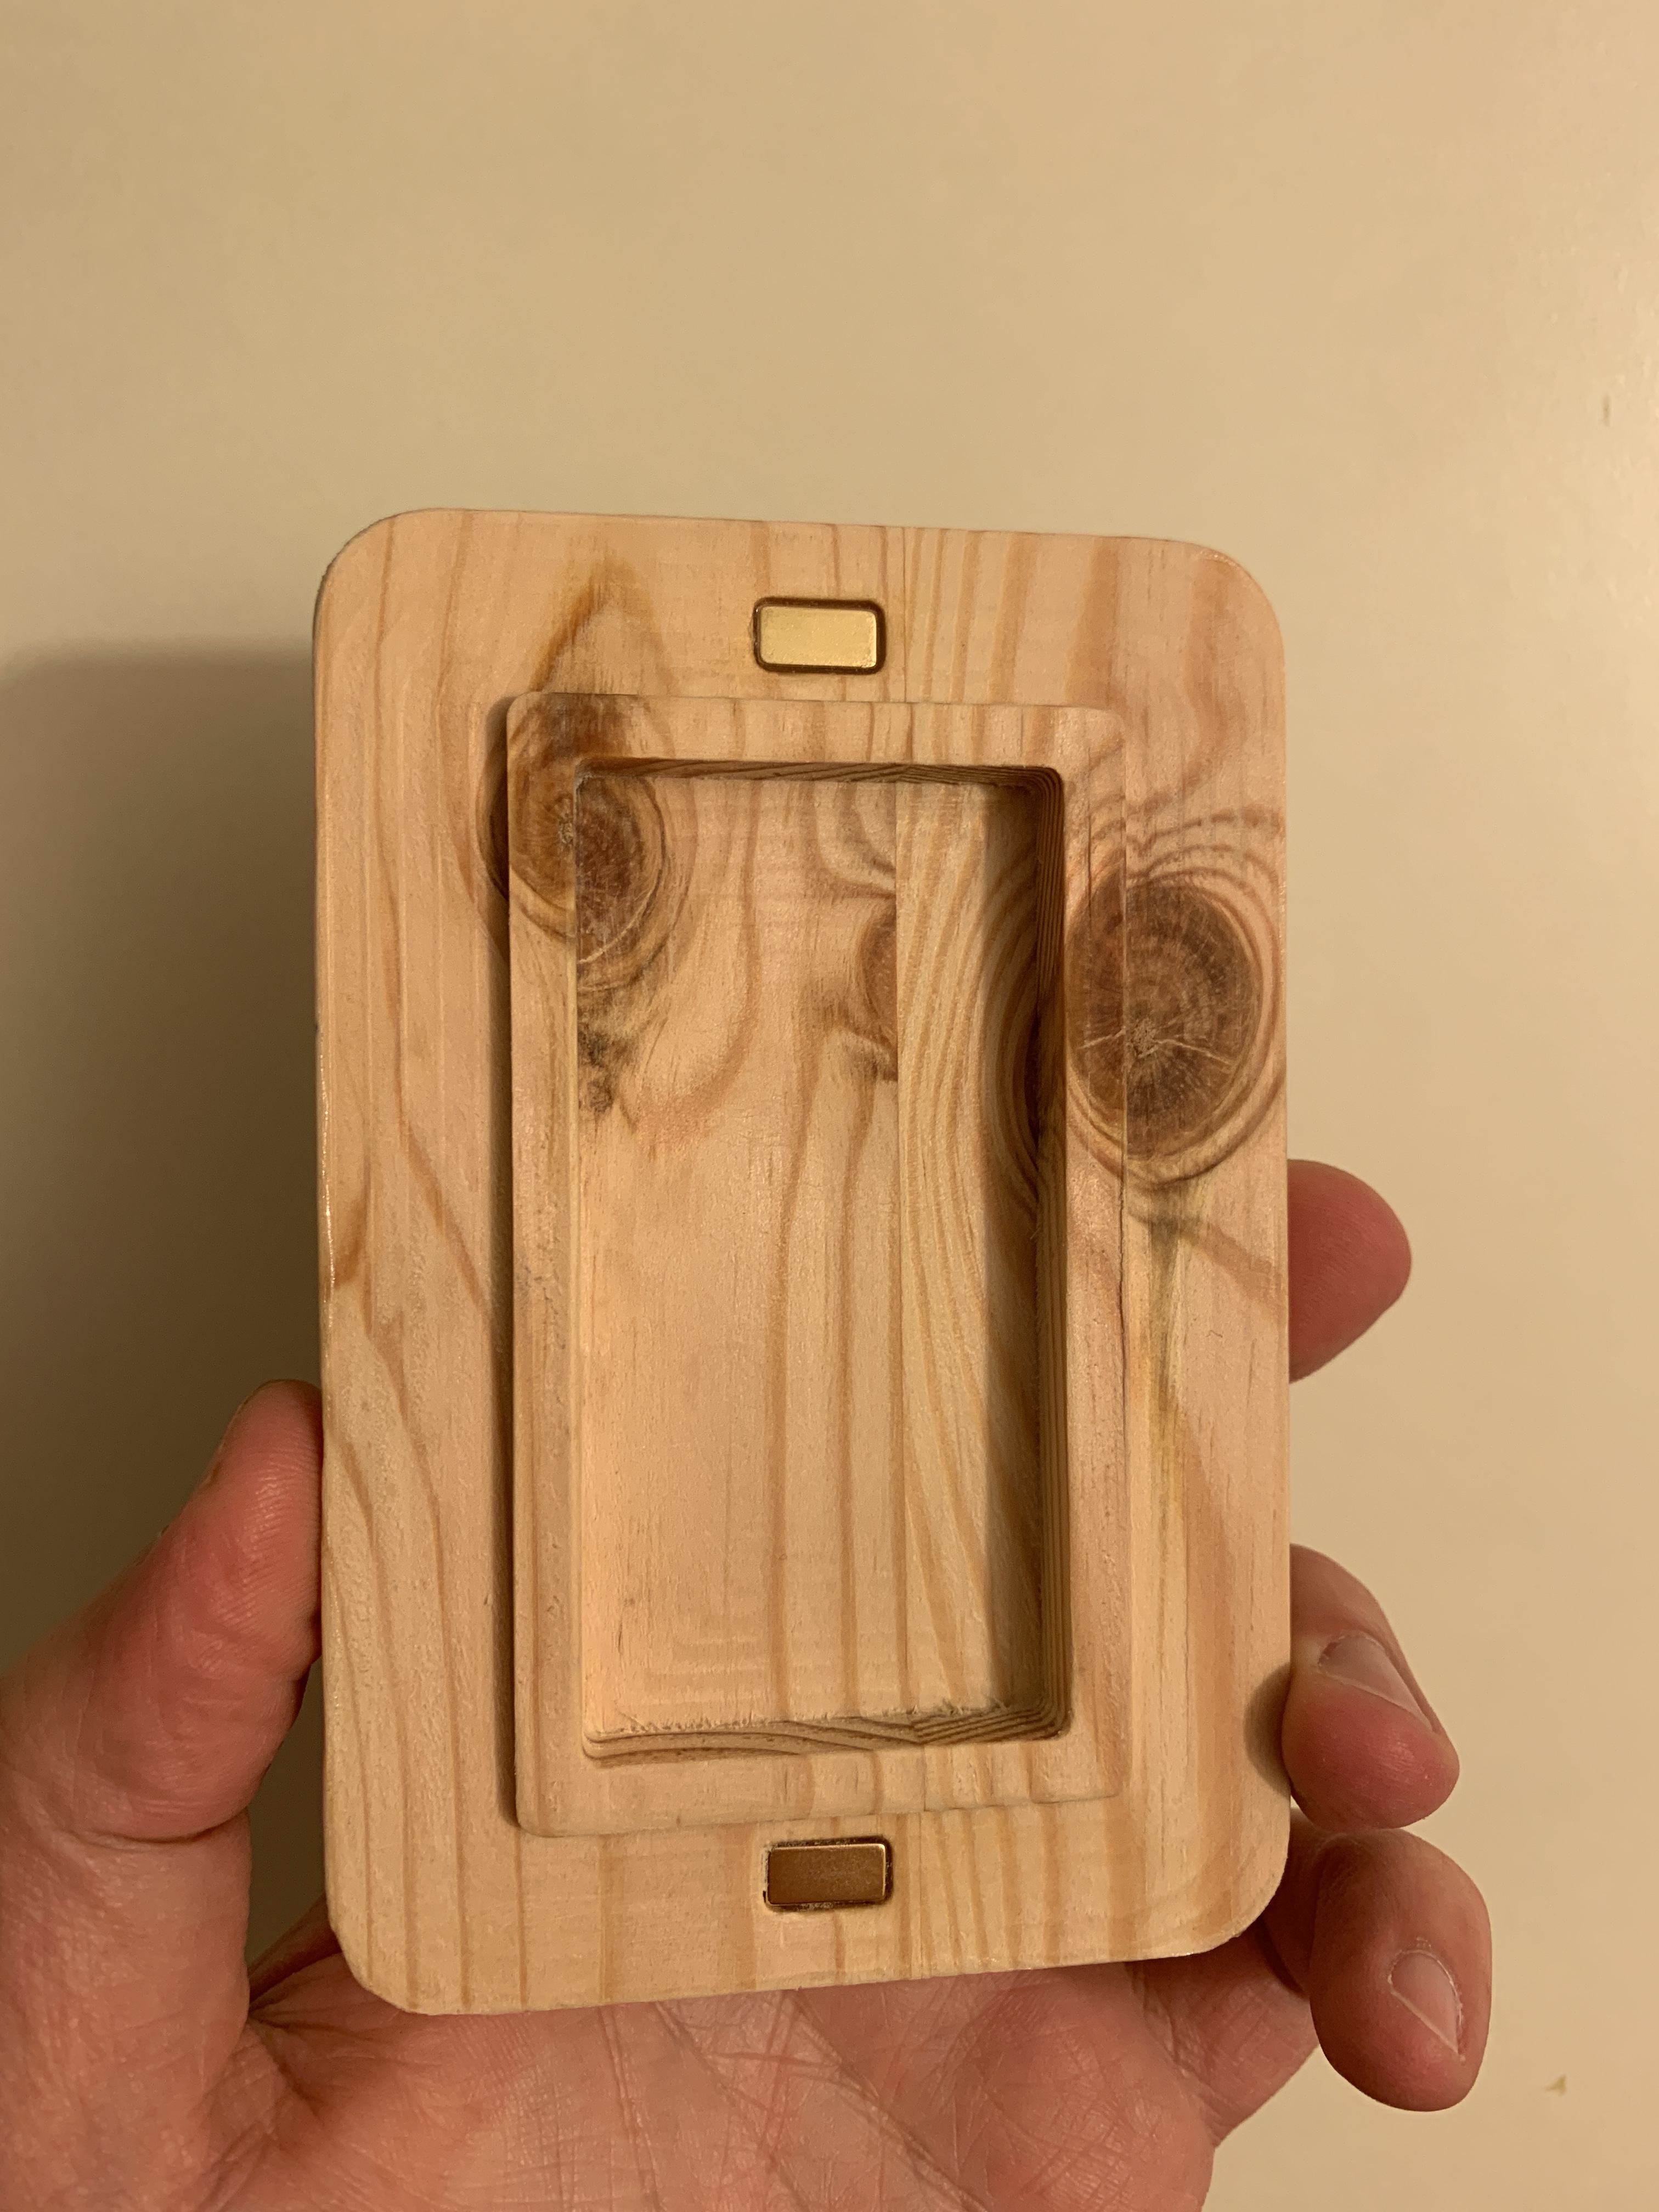
Magnets to the rescue once again, but this time I used rectangular ones to better match the design.
Fusion’s Manufacturing environment has a very extensive simulation mode that’s super handy for checking how parts would be machined later on. It can even detect possible issues such as tool collisions or incorrect process sequencing. My cuts were just simple outlines and I got them right the first time.
Here’s a little snippet showing the inner perimeter cut:
And the outer one:

Assembly
Putting everything together was very simple - I just epoxied the three box pieces together and set them aside to dry for a couple of hours.
The lid was mostly good to go - just some light sanding before glueing the magnets in.
Once the epoxy settled, I measured the circumference of the middle area and cut a strip of leather to fit. Also added some stitching along the leather for good measure and tied both ends together. The flare was designed with the leather thickness in mind, so all sides were perfectly flush after assembly.
Sadly, I didn’t get any footage of the end result, so all of the photos are before or in between the two coats of acrylic finish, still showing areas where the wood grain got fuzzy.


Engraving
There were no wood leftovers after milling, so I was really nervous to do any engraving at first. However, the box was already looking very Mother Nature-y so far, and I really wanted to engrave something on the lid as a finishing touch.
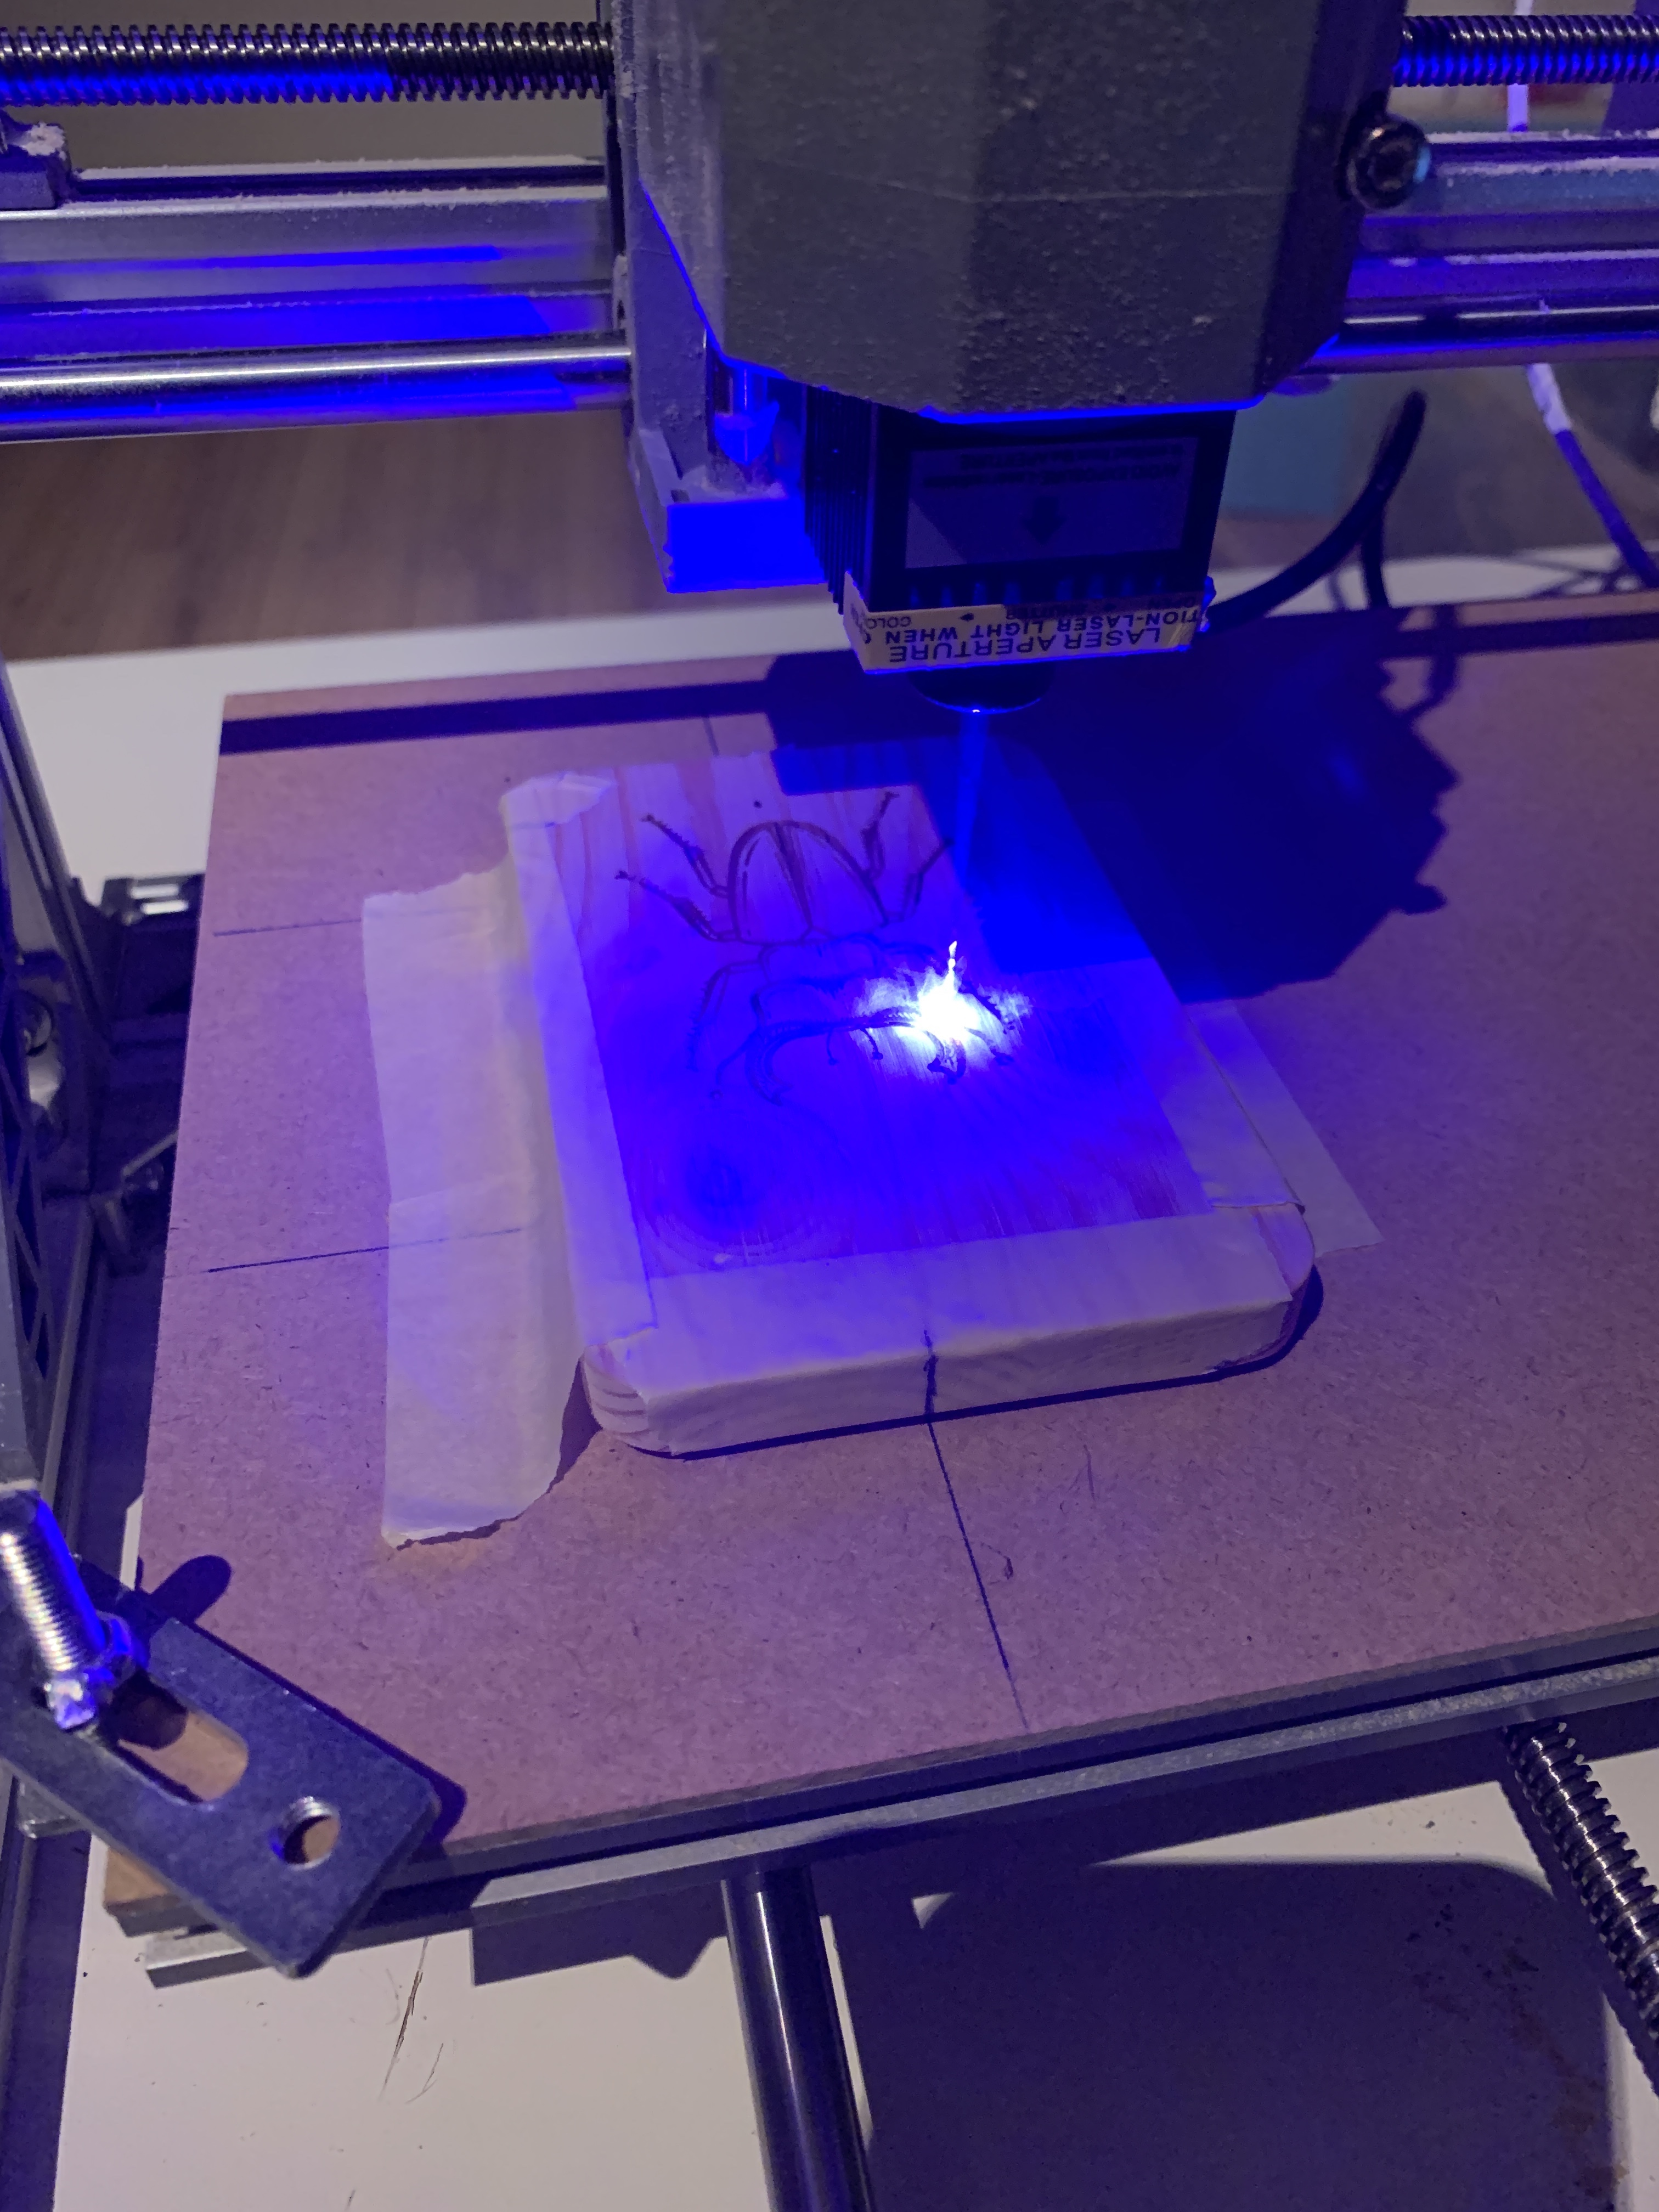
My strategy was to hook up the laser module and do a test run on scrap MDF to see if I can even pull off any kind of engraving, and then potentially do the lid if all went well.
5.5 Watts might not sound like a lot of power, but is enough for a laser diode to burn through paper, wood, and retinas. Safety first - I got my laser shielding googles on, opened all windows, and kept anything reflective away from the machine.
Switching modes is as simple as unplugging the spindle motor and dropping in the laser in its place. Focusing, on the other hand, was tricky because the beam has to be set just right to work. Easier said than done - keeping the beam on at one spot for more than a few seconds started a small fire on the MDF board, but I eventually managed to focus it.
Fortunately for the software side of things, LightBurn made most of the setup fairly simple, so I blasted a couple of test pieces to get the hang of it.
The lid had a couple of wood knags that were best avoided, so the final engraving was not centered on purpose.
Engraving the beetle took around 40 minutes for two passes side by side at 60% PWM laser power at fairly low speed. All cuts turned out very sharp with no residual burns or scarring around the lines.
Wrap up
Overall, I’m mostly happy with how the box turned out. It’s definitely not perfect, but the leather banding concealed most of the errors. For my next box, I’d definitely find better hardwood and use thick enough stock to avoid dealing with end grain matching.
Doing some more engraving wouldn’t hurt either - it’s not as complicated as I initially expected, and this particular laser module gives great results at lower speed.
Until next time!