Disclaimer: This blog post goes through the recreation of a commercial board game that is still being sold. Although there are already a number of fan designed models out there, I strongly discourage downloading and printing the set without actually owning the original first. Hive is a great and highly strategical board game, so do yourself a favor and buy an original copy of it right now.
‘Tis the season of weddings
To tell a long story short - a couple of friends of mine are getting married next week and I got a postcard in my mailbox informing me I’m formally invited to attend their holy matrimony.
So, I’m not a huge fan of weddings - they’re usually noisy, have the potential to go south, and you’re forced to socialize with people you might not know very well/at all. Smalltalk is not my strongest trait.
Oh God, not another toaster for their wedding gift stockpile
It goes without saying that attending weddings implies bringing a gift to the event. Gone are the days of newlyweds hoarding toasters, fancy dinner sets, and every other useless kitchen appliance in between.
Still, I really wanted to make something cool for both of them, and it didn’t take me too long to figure out what exactly.
His
The soon-to-be groom is one of my Magic The Gathering buddies and he REALLY liked my custom made leather card box I made a few months ago. You know, these ones.
I tweaked my last design version a bit and made one for him.
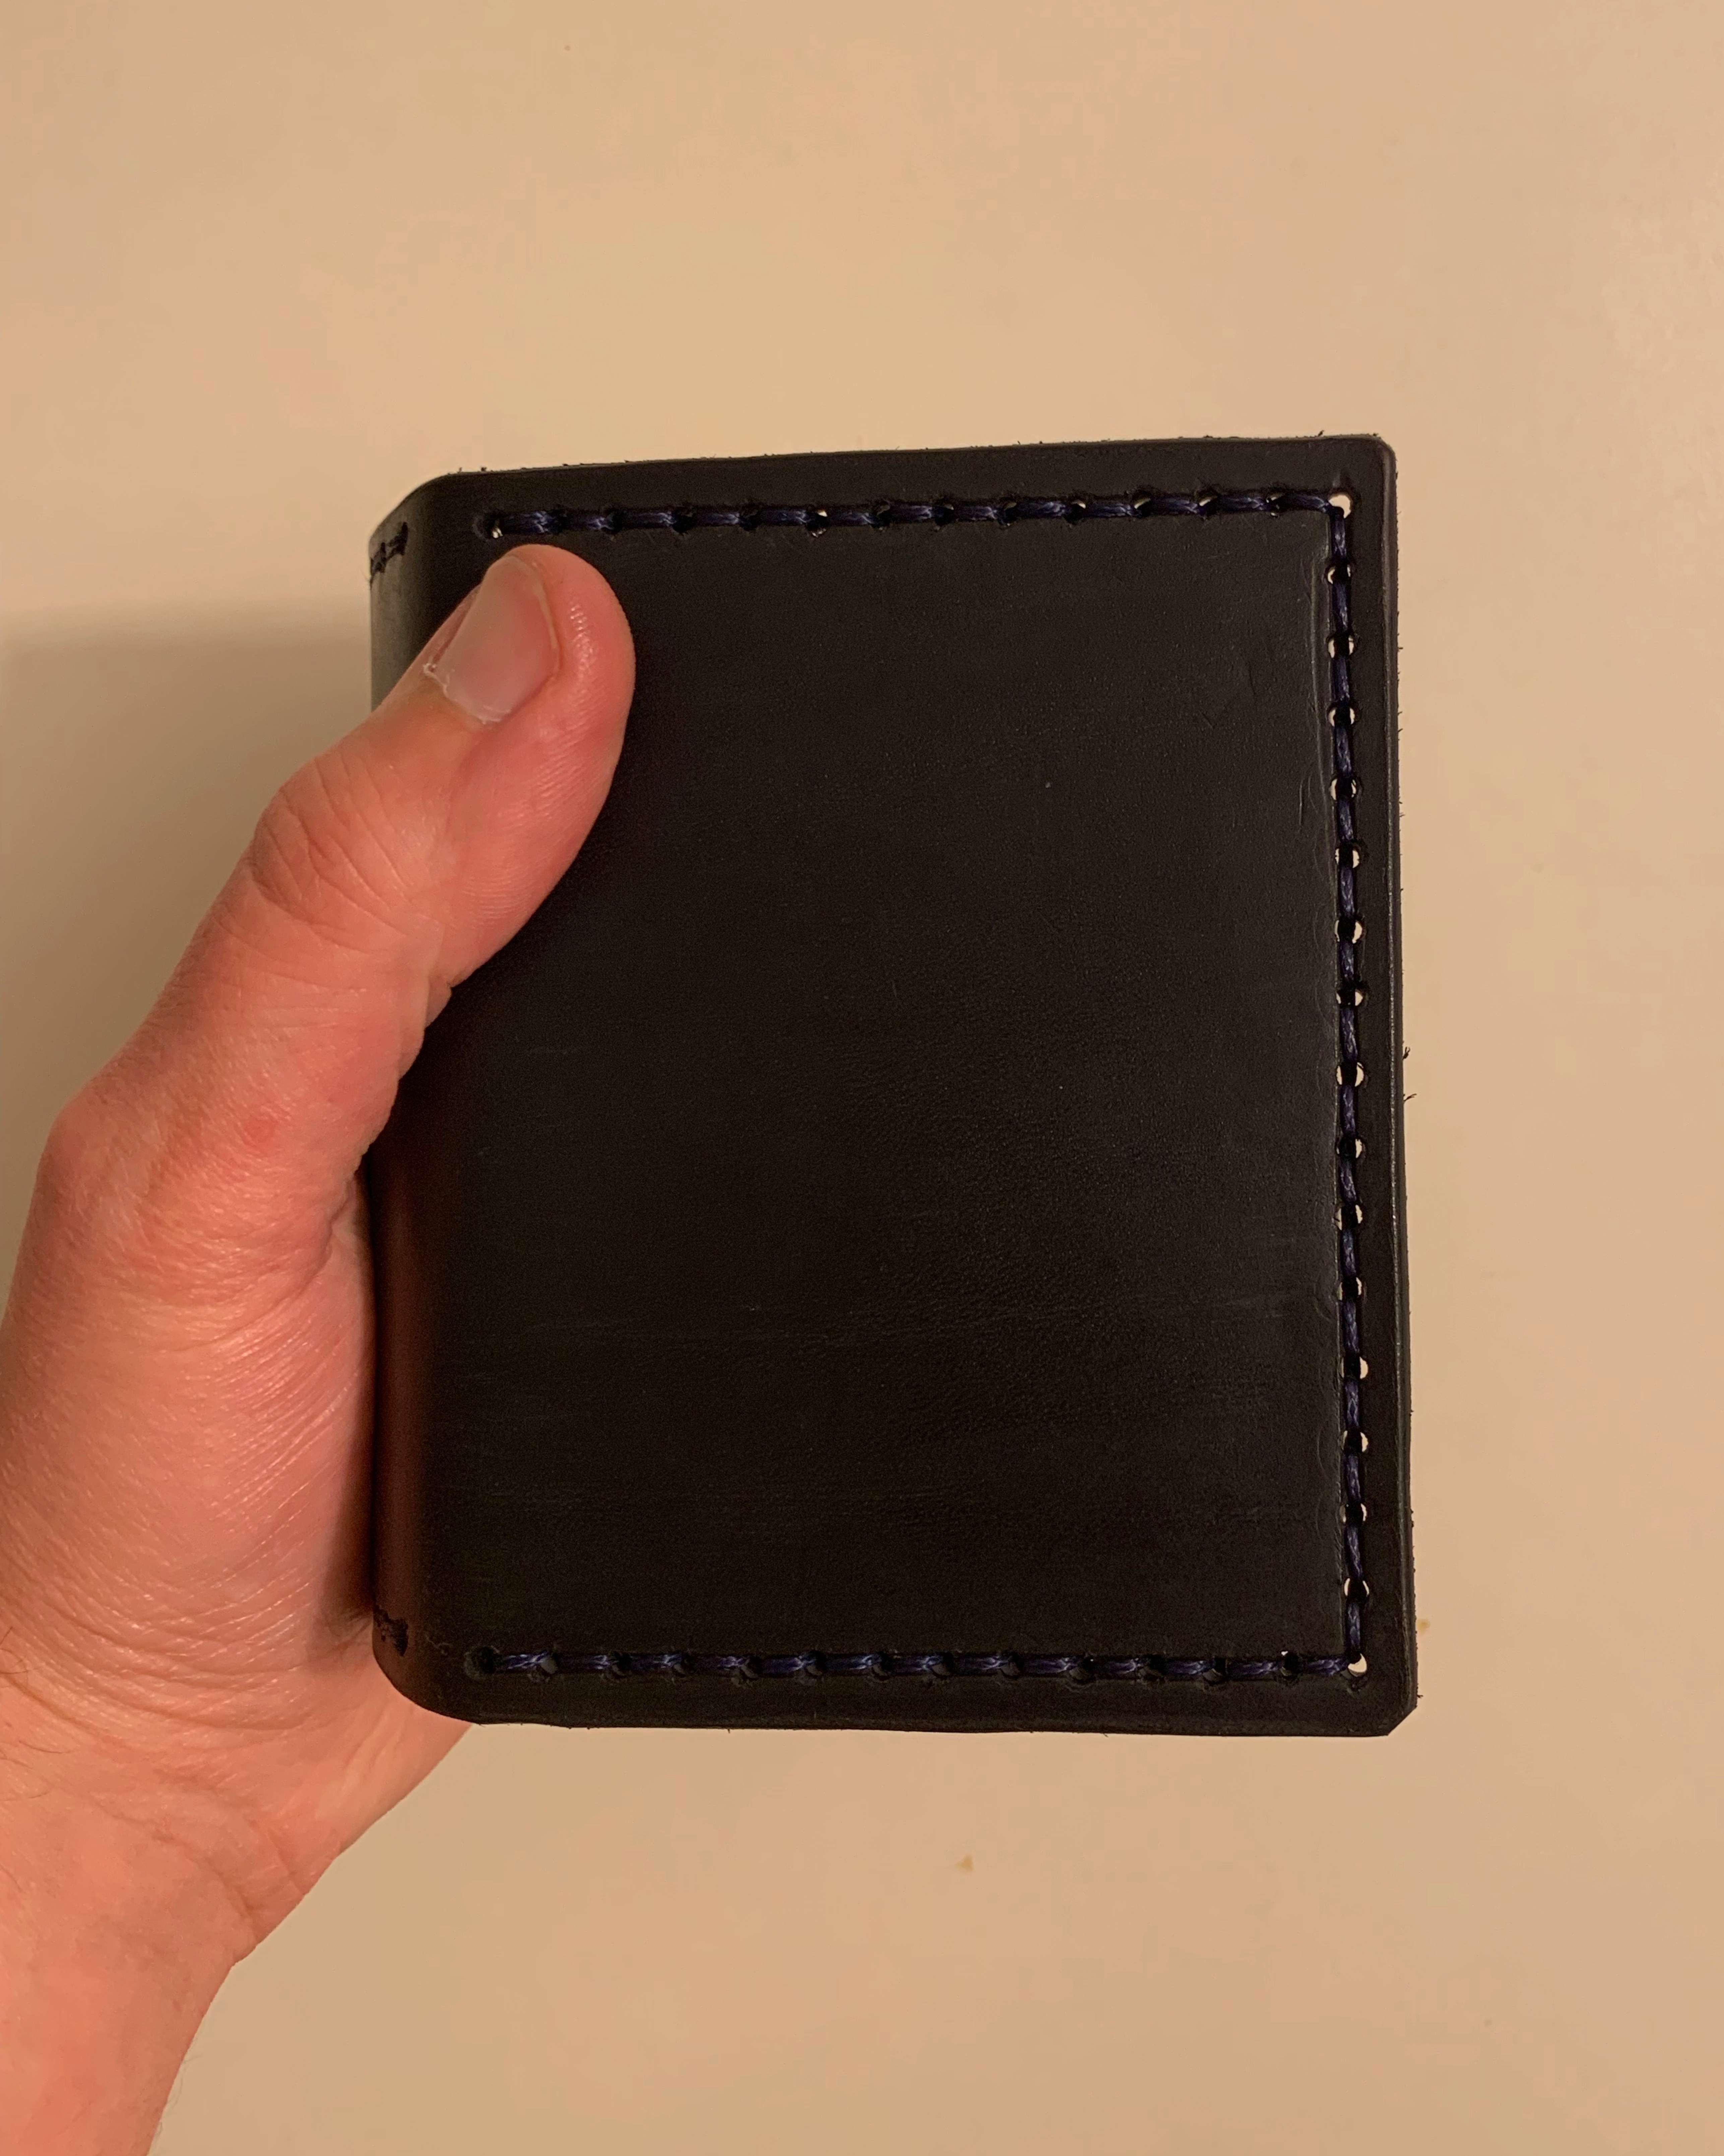
Already got a bunch of these under my belt, and this one is almost perfect - the stitching is on point, the 3D printed model turned out great, and my custom mixed black dye looks better than expected. Overall, the end result is satisfying, but didn’t excite me design wise, because it’s an older project I already made.
Hers
Hive has a chess vibe going on, minus the actual board. It’s considered a boardless board game - both players start with their pieces aside and are allowed to introduce one of them each turn. There are a couple of general rules surrounding new pieces, but in general, the lack of a predetermined pattern used to set the game up gives it a varied setup every round.
Having both wedding gifts custom made was a good idea, and I remembered showing Hive to the soon-to-be bride sometime last year. We played a few games and she really liked it, so I ran with that idea.
Better than any toaster or juicer, I guess.
Design
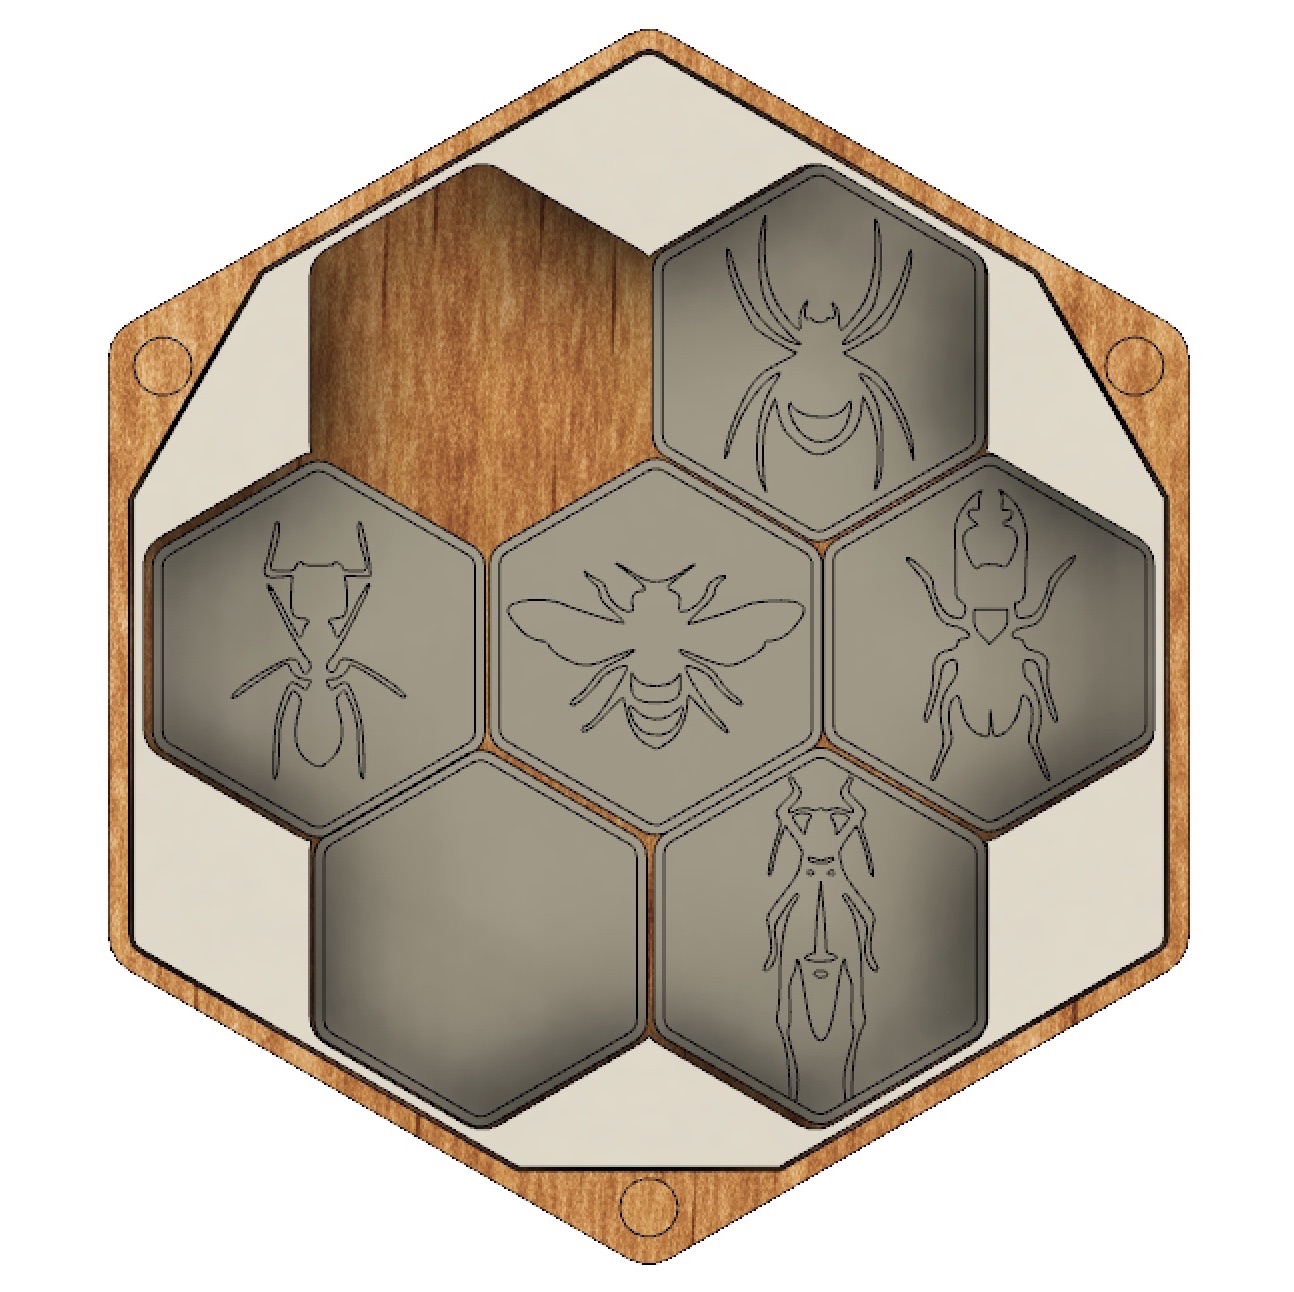
Designing a copy of Hive in CAD is very straightforward. All pieces share the same hexagonal base shape, with each one having a different picture of a bug on it. Every bug has a distinct move set, just like in chess, and some of them even have extra abilities to spice up your strategy.
The original game comes in carrying case for the regular/large sized, and a flimsy pouch of sorts for the smaller/pocket sized game. Having a storage solution is a welcomed addition, but I wanted to take that a step further and went for a box.
I went for a custom sized pieces - a bit bigger than than original ones, and slightly thinner to make the overall set less bulky.
All pieces share the same basic sketch and body in Fusion - a circumferenced polygon which was then extruded and filleted to shape. Next, I projected the top surface onto a new sketch, made a 1.5 mm offser inwards and sunk the area in to make room for the bug ‘engraving’.
The engravings were also easy - I got a reference SVG file from BoardGameGeek and imported it in Fusion. Working with vectors in CAD can be a nuisance, since every action you do on the sketch forces all vector lines to be re-calculated, resulting in very long waiting times.
In any case, after having each of the bugs sketched on a blank tile, I just extruded them a bit, but made sure the overall height is less than the top edge. This way, after everything is painted and finished, it wouldn’t be so easy to accidentally peel some of the paint off if pieces rub against each other during play or transportation.
Box and box insert
Honestly, the carrying case Hive comes in does get the job done, but looks a bit tacky.
Going with the whole hexagonal theme, I calculated the overall dimensions of all 28 pieces arranged and stacked in four rows, then designed a hexagonal enclosure around that volume.
This left me with some gaps between the inner edges of the box and the pieces inside, so I did a boolean difference of the two sets of bodies, shrank the result a bit and this gave me a separate insert of sorts. I made it friction fit inside the box, so I don’t have to deal with glueing or epoxying plastic.
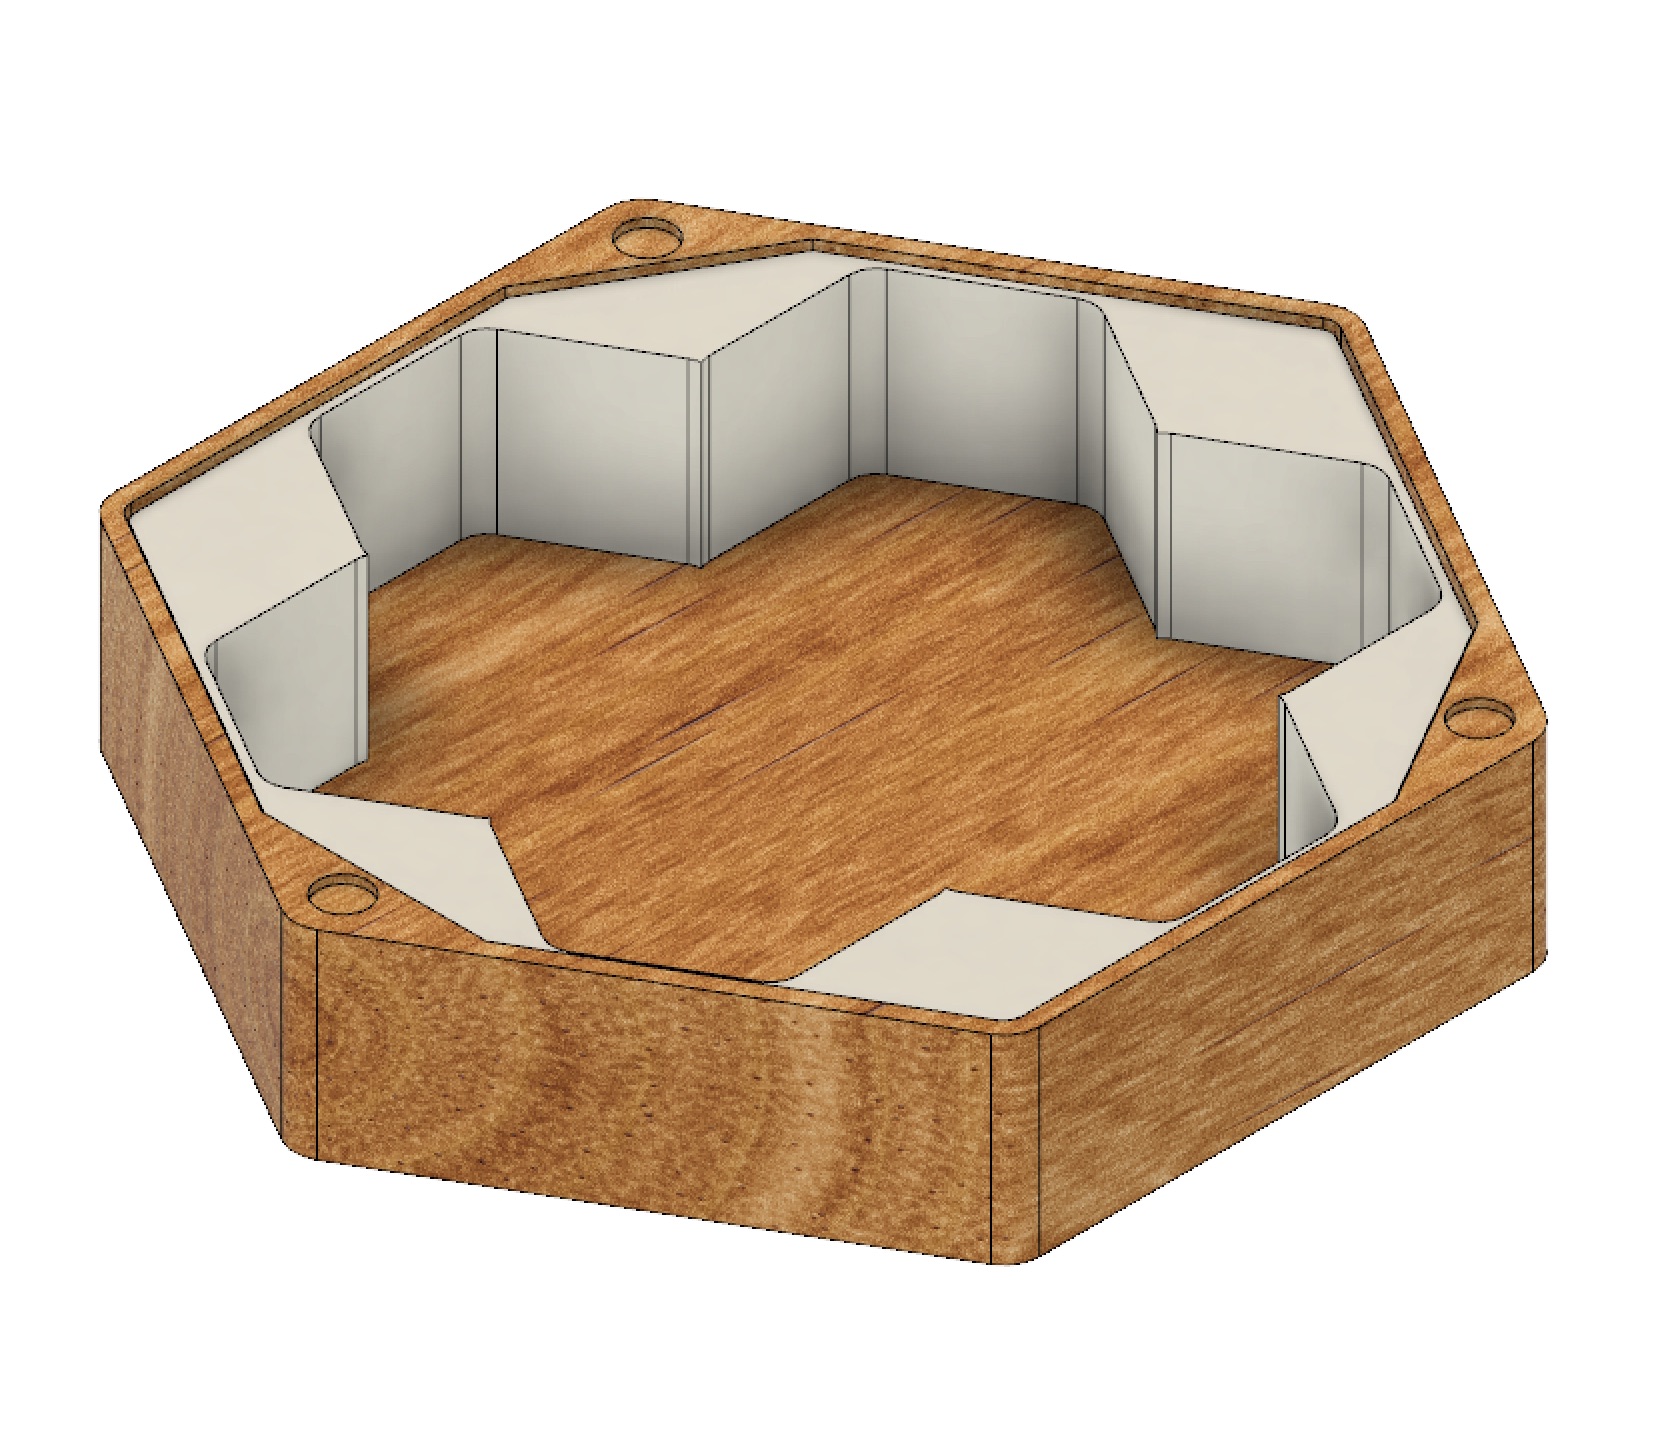
The lid was kept fairly simple - the same size as the bottom of the box with no extra writing or images engraved on it.
Finally, I wanted the box and lid to hold together with magnets (my new lazy go-to route), so I punched three sets of holes on each part to make room for the magnets. On to printing the whole thing!
Printing
With a few leftover filament rolls around, there was enough white and grey to print each of the piece sets. For the box, I went with something a bit more special and used my last remainder of Colorfabb’s light wood PLA composite. That’s basically a 60/40 mix of plastic and sawdust. The material looks, feels, and smells just like real wood. You can even sand and stain it. The only downside - it’s quite tricky to work with and might need more than one try to get right. Because of the binding agent used to blend both substances, the extruder nozzle tends to get very leaky and leaves excess material along the way. And you can’t bump up retraction rates to combat leaking, or else you’ll end up with a jammed nozzle. I intentionally made the box shape simple and not require support material, because there was enough material to print just one box.

Post processing and putting it all together
I’m not much of a painter, but have a whole box of Revell enamel paint (the small tin cans you can get at hobby stores that are used to paint miniature planes and other military models). Nobody seems to buy them here, so the whole set was heavily discounted.
All bug shapes were covered in two coats of paint, left to dry, then sealed with a clear coat.
I glued the magnets with a drop of epoxy and also set aside to dry.
The box itself needed a bit of sanding, and so did the insert. Once that was done, my version of Hive was pretty much done.

You can grab the STL files from my Thingiverse page here, but consider buying the official game if you haven’t done so first. I’ve also included a blank tile model in case future fan-made expansions pop up.
Cheers to the newlyweds!!!