A long lost childhood friend
I had to dig through my boxes of random stuff not too long ago when I found my old Magic cards - a bunch of decks and two binders full of cards. Untouched for over fifteen years.
Magic The Gathering has a pretty long history. It’s been on the market for over 25 years now, and despite the recent flow of scrutiny, is still considered the most successful trading card game of all time.
Most of the new editions are not appealing to me at all, though - the set themes got kind of repetitive, gameplay mechanics have been severely dumbed down, and the card art is just horrible. That’s no criticism towards the art team, but more towards the people directing them.
Anyway, political hurdles aside, I mostly picked this game back up for casual play with friends.
(There’s something about me always picking expensive hobbies to invest in that sometimes keeps me up at night.)
Nerd side note (what I’m currently playing)
With Standard league (a format you’re only allowed to play with the most recent card editions) being mostly trash, I chose to stick to Legacy league instead.
My old cards are still mostly viable, and I finally got around to assembling an enchantress deck, with combo elves mostly finalized next.
My third deck is a black/red/blue control brew that’s been in a constant state of change ever since I remember it.
Full deck lists to follow.
Storage
Deck boxes are a really big thing in card games. You need a safe place to store your old (and also VERY expensive) pieces of inked rectangular cardboard, so there’s a variety of solutions out there. Well, needless to say that with over a thousand hours of 3D printing and decent CAD skills, I went ahead and made a deck box myself.
Concept sketch
Here is my first attempt at sketching the box.
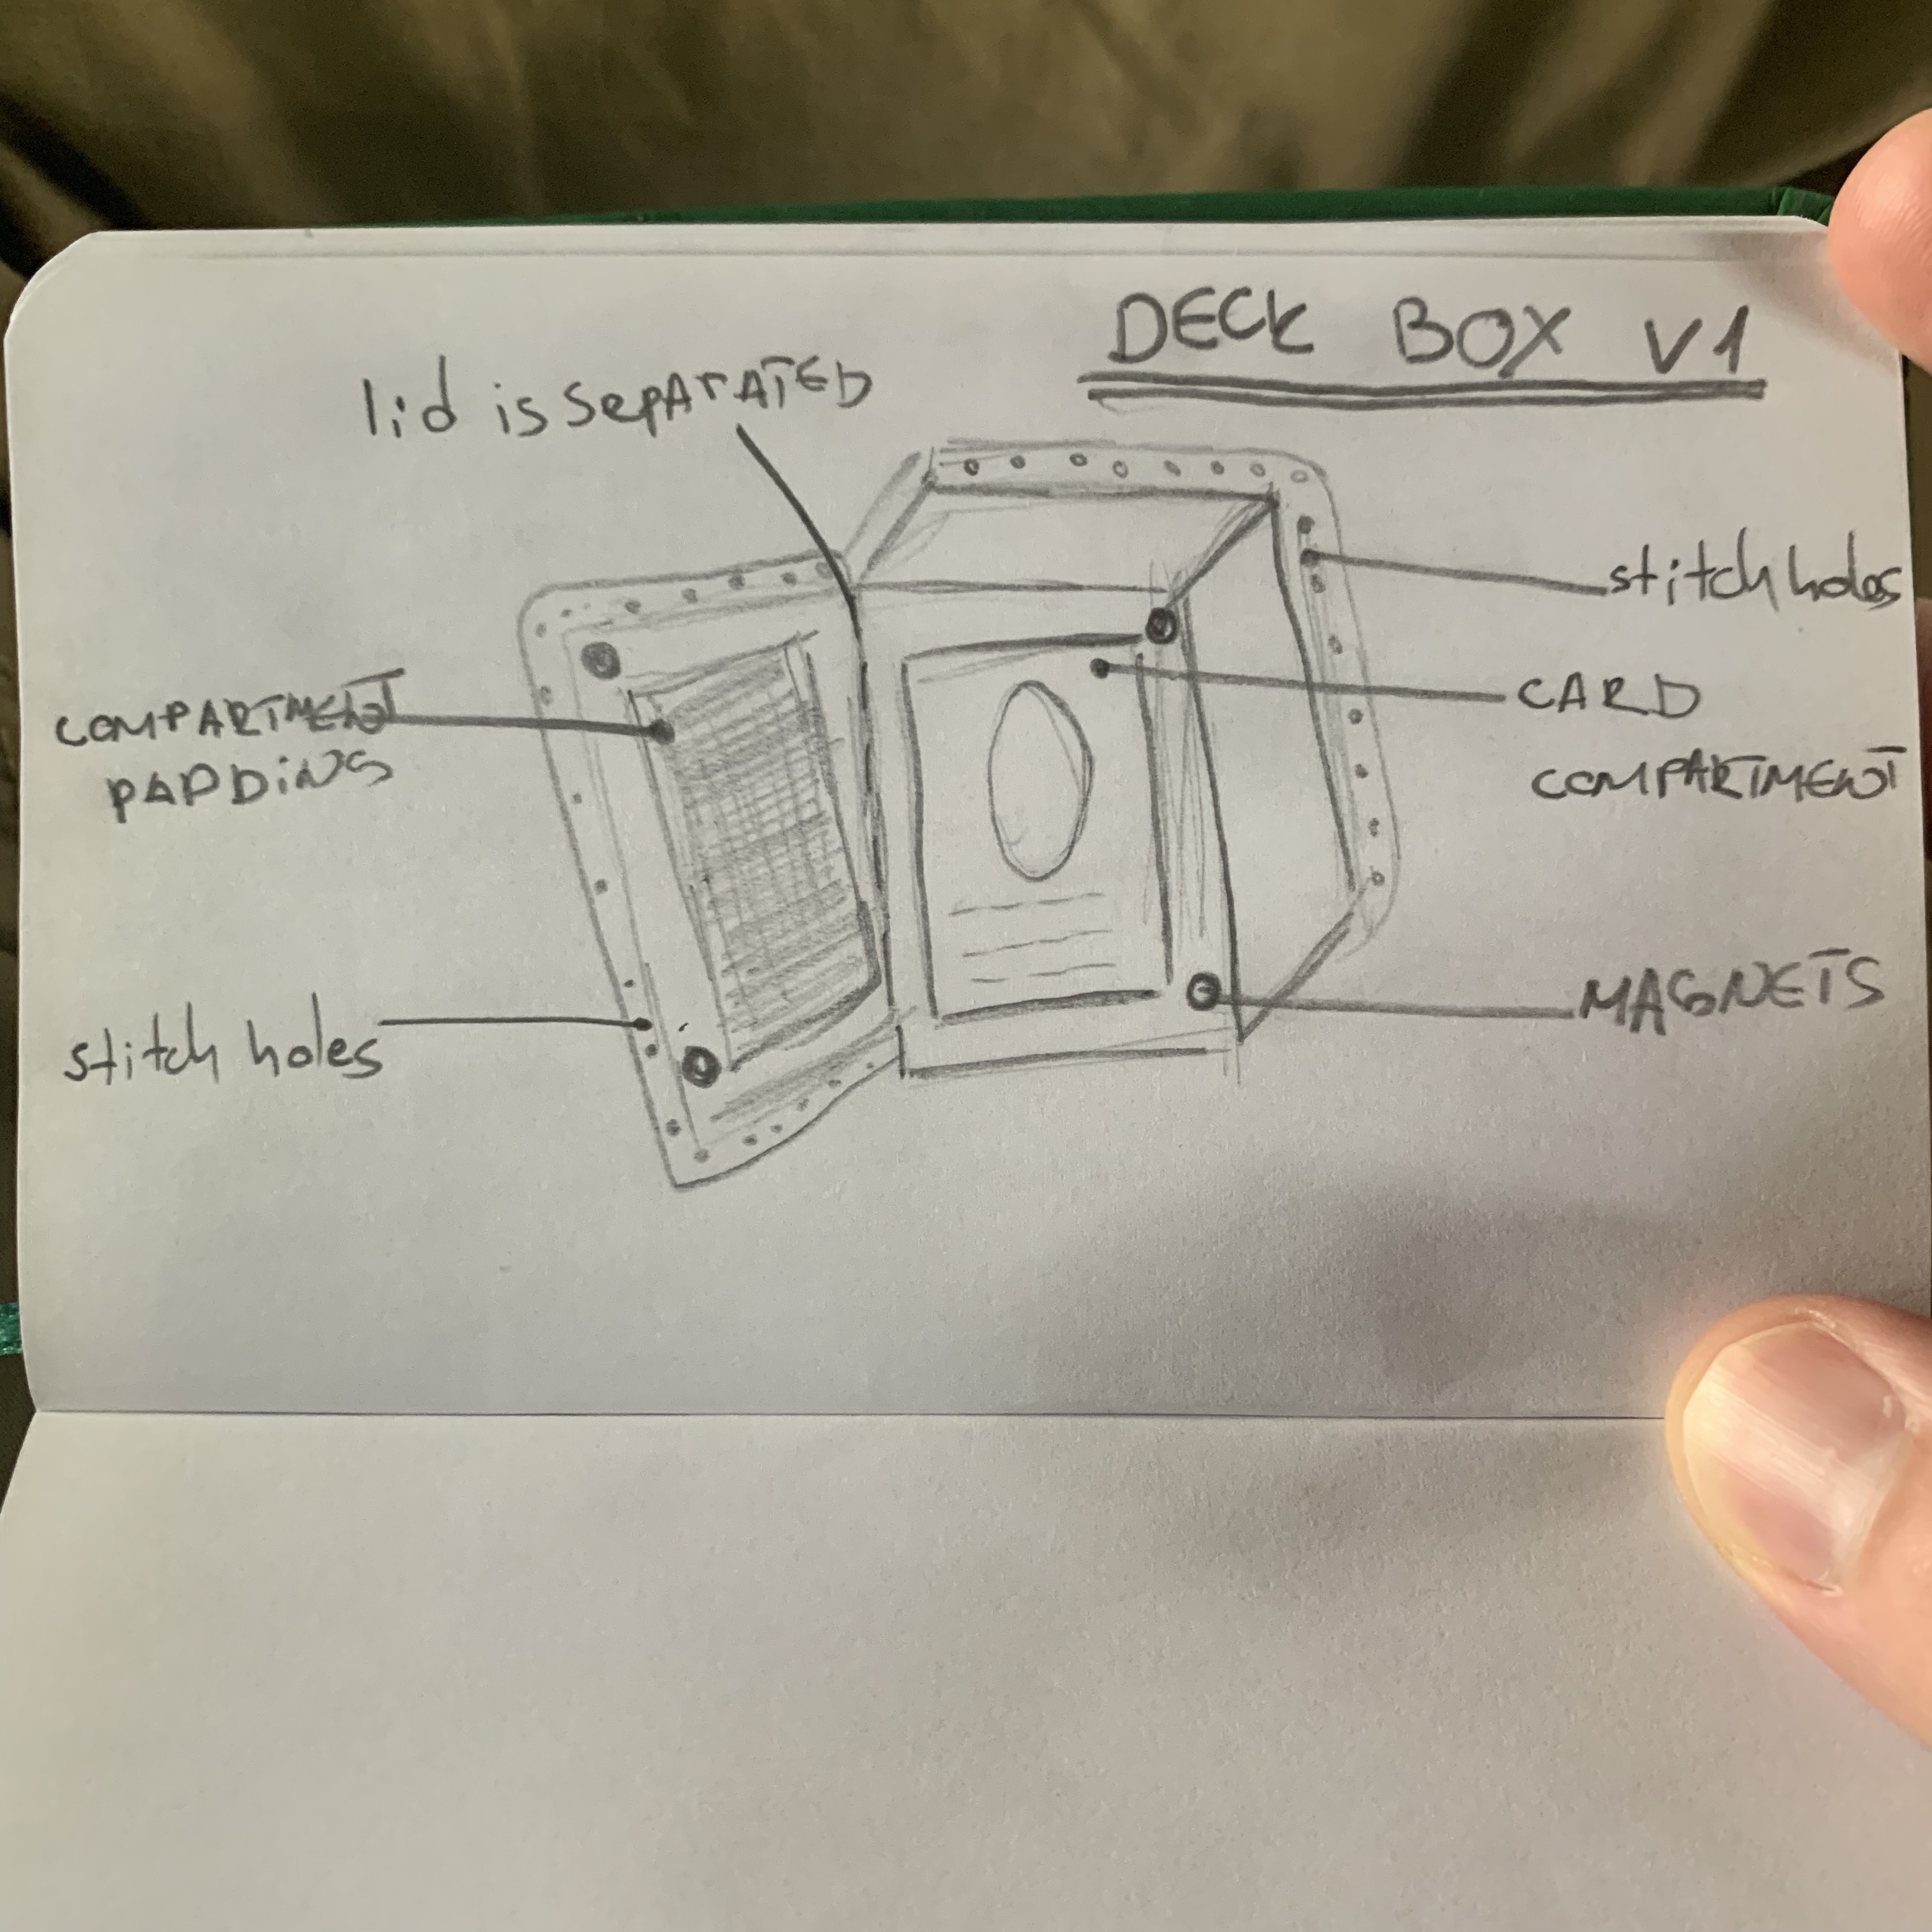
I was going for something very simple and streamlined. The box had to be sturdy with little to no moving or bending parts. A stack of cards kinda resembles a small book, so I pushed things in that direction.
A book style box it is. It had to fit all of the necessary cards and be easy enough to load and unload the whole stack.
Simple enough - this can be done with just two parts - a main compartment and a separate lid.
I’m not a fan of having hinges or other types of locking mechanisms that are printed alongside the main model, since they usually don’t hold up after heavy use.
The other thing I found while digging through my stuff was a small piece of vegetable tanned natural leather. I got it alongside a few basic leatherworking tools, but never got round to doing anything with them until now.
The piece I have is also very thick (around 5mm), so folding it into complex shapes would probably fail miserably. Also, I only had so much of it, and it’s not a good idea to experiment/potentially waste some of it given the material’s origin.
So I thought it might be cool to incorporate leather into a 3D printed project and see how far this takes me.
On leather
Leather is a very polarizing material to work with, and I have little to no prior experience crafting it.
Leather is hard, yet wobbly. Tough to cut and punch, but easy to scratch or tear.
You need it bone dry for sizing and cutting, but wet when folding and burnishing.
It tends to look better when worn out and distressed, not when it’s brand new.
Leather will last you a lifetime if you treat it properly, but will easily degrade if kept wet or very dry.
Leather knows how to stand the test of time.
Design
First things first - dimensioning. I took a pair of calipers and measured the overall dimensions of the card pile. For the uninitiated, a standard deck of Magic cards consists of 60 main ones and an additional 15 card sideboard. All cards are kept in protective sleeves, and that also adds to their overall size. To be on the safe side, I added an extra millimeter or two to negate possible shrinking of the box while it’s printed.
Outside
I wanted the box to be really sturdy, and made all outer walls 3mm thick. A standard thickness for most 3d printed objects is two perimeters (that’s 0.8 mm using a default 400 micron nozzle), with extra sturdiness provided by an internal infill pattern of your desired percentage density. Infill wouldn’t cut it in my case, so most of the model is printed solid.
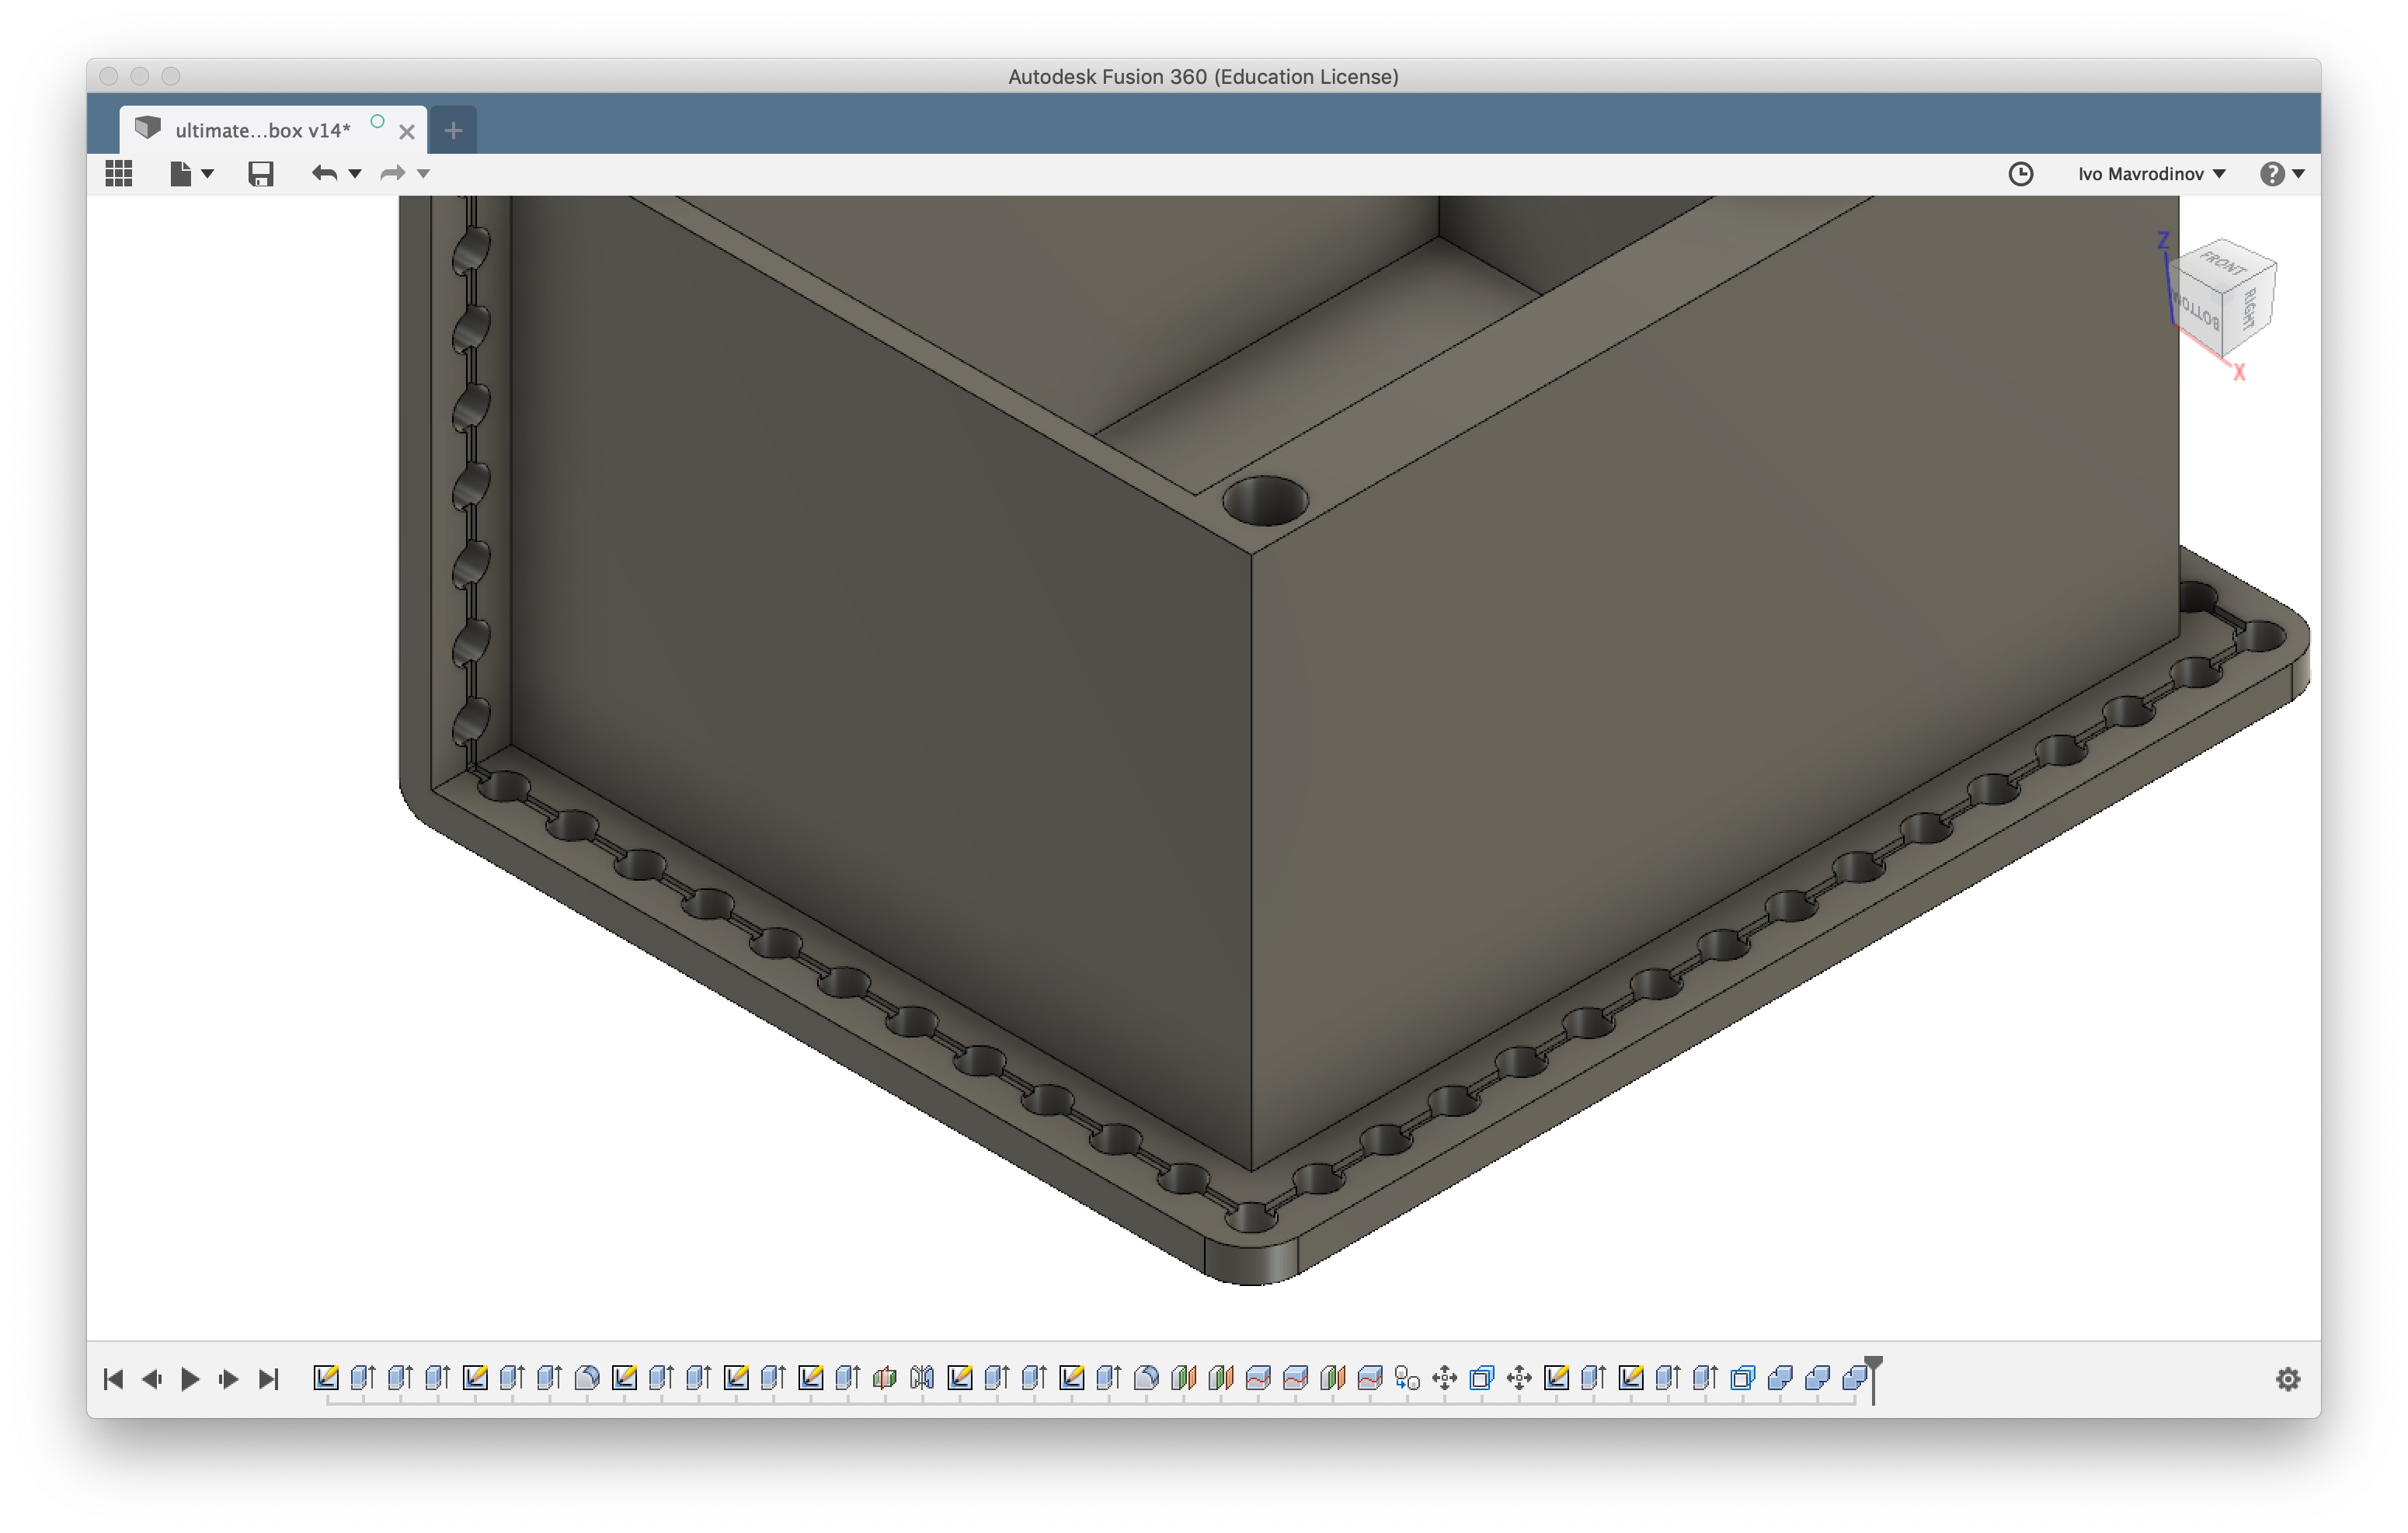
To give it that desired book cover look, I added an offset to all outer walls and rounded the corners a bit, so they look like covers. This would ensure that the edges are wide enough to have a row of stitch holes around the perimeter.
The stitch holes had to be wider than originally planned because leatherworking threads and needles are very thick and I was planning on double stitching everything, so there had to be enough wiggle room to ease the assembly process.
Stitch holes were very easy to make - I started with a single circle at the base of the box lid, and then patterned it around to the other side. If you’ve seen how leather is stitched together, you might have noticed that there are grooves running in between the holes. This ensures a very tight hold and once done, the threads would sit flush with the leather and be less prone to coming loose.
This was also easy enough to do in CAD. I just made a narrow rectangle across the hole pattern and cut it out.
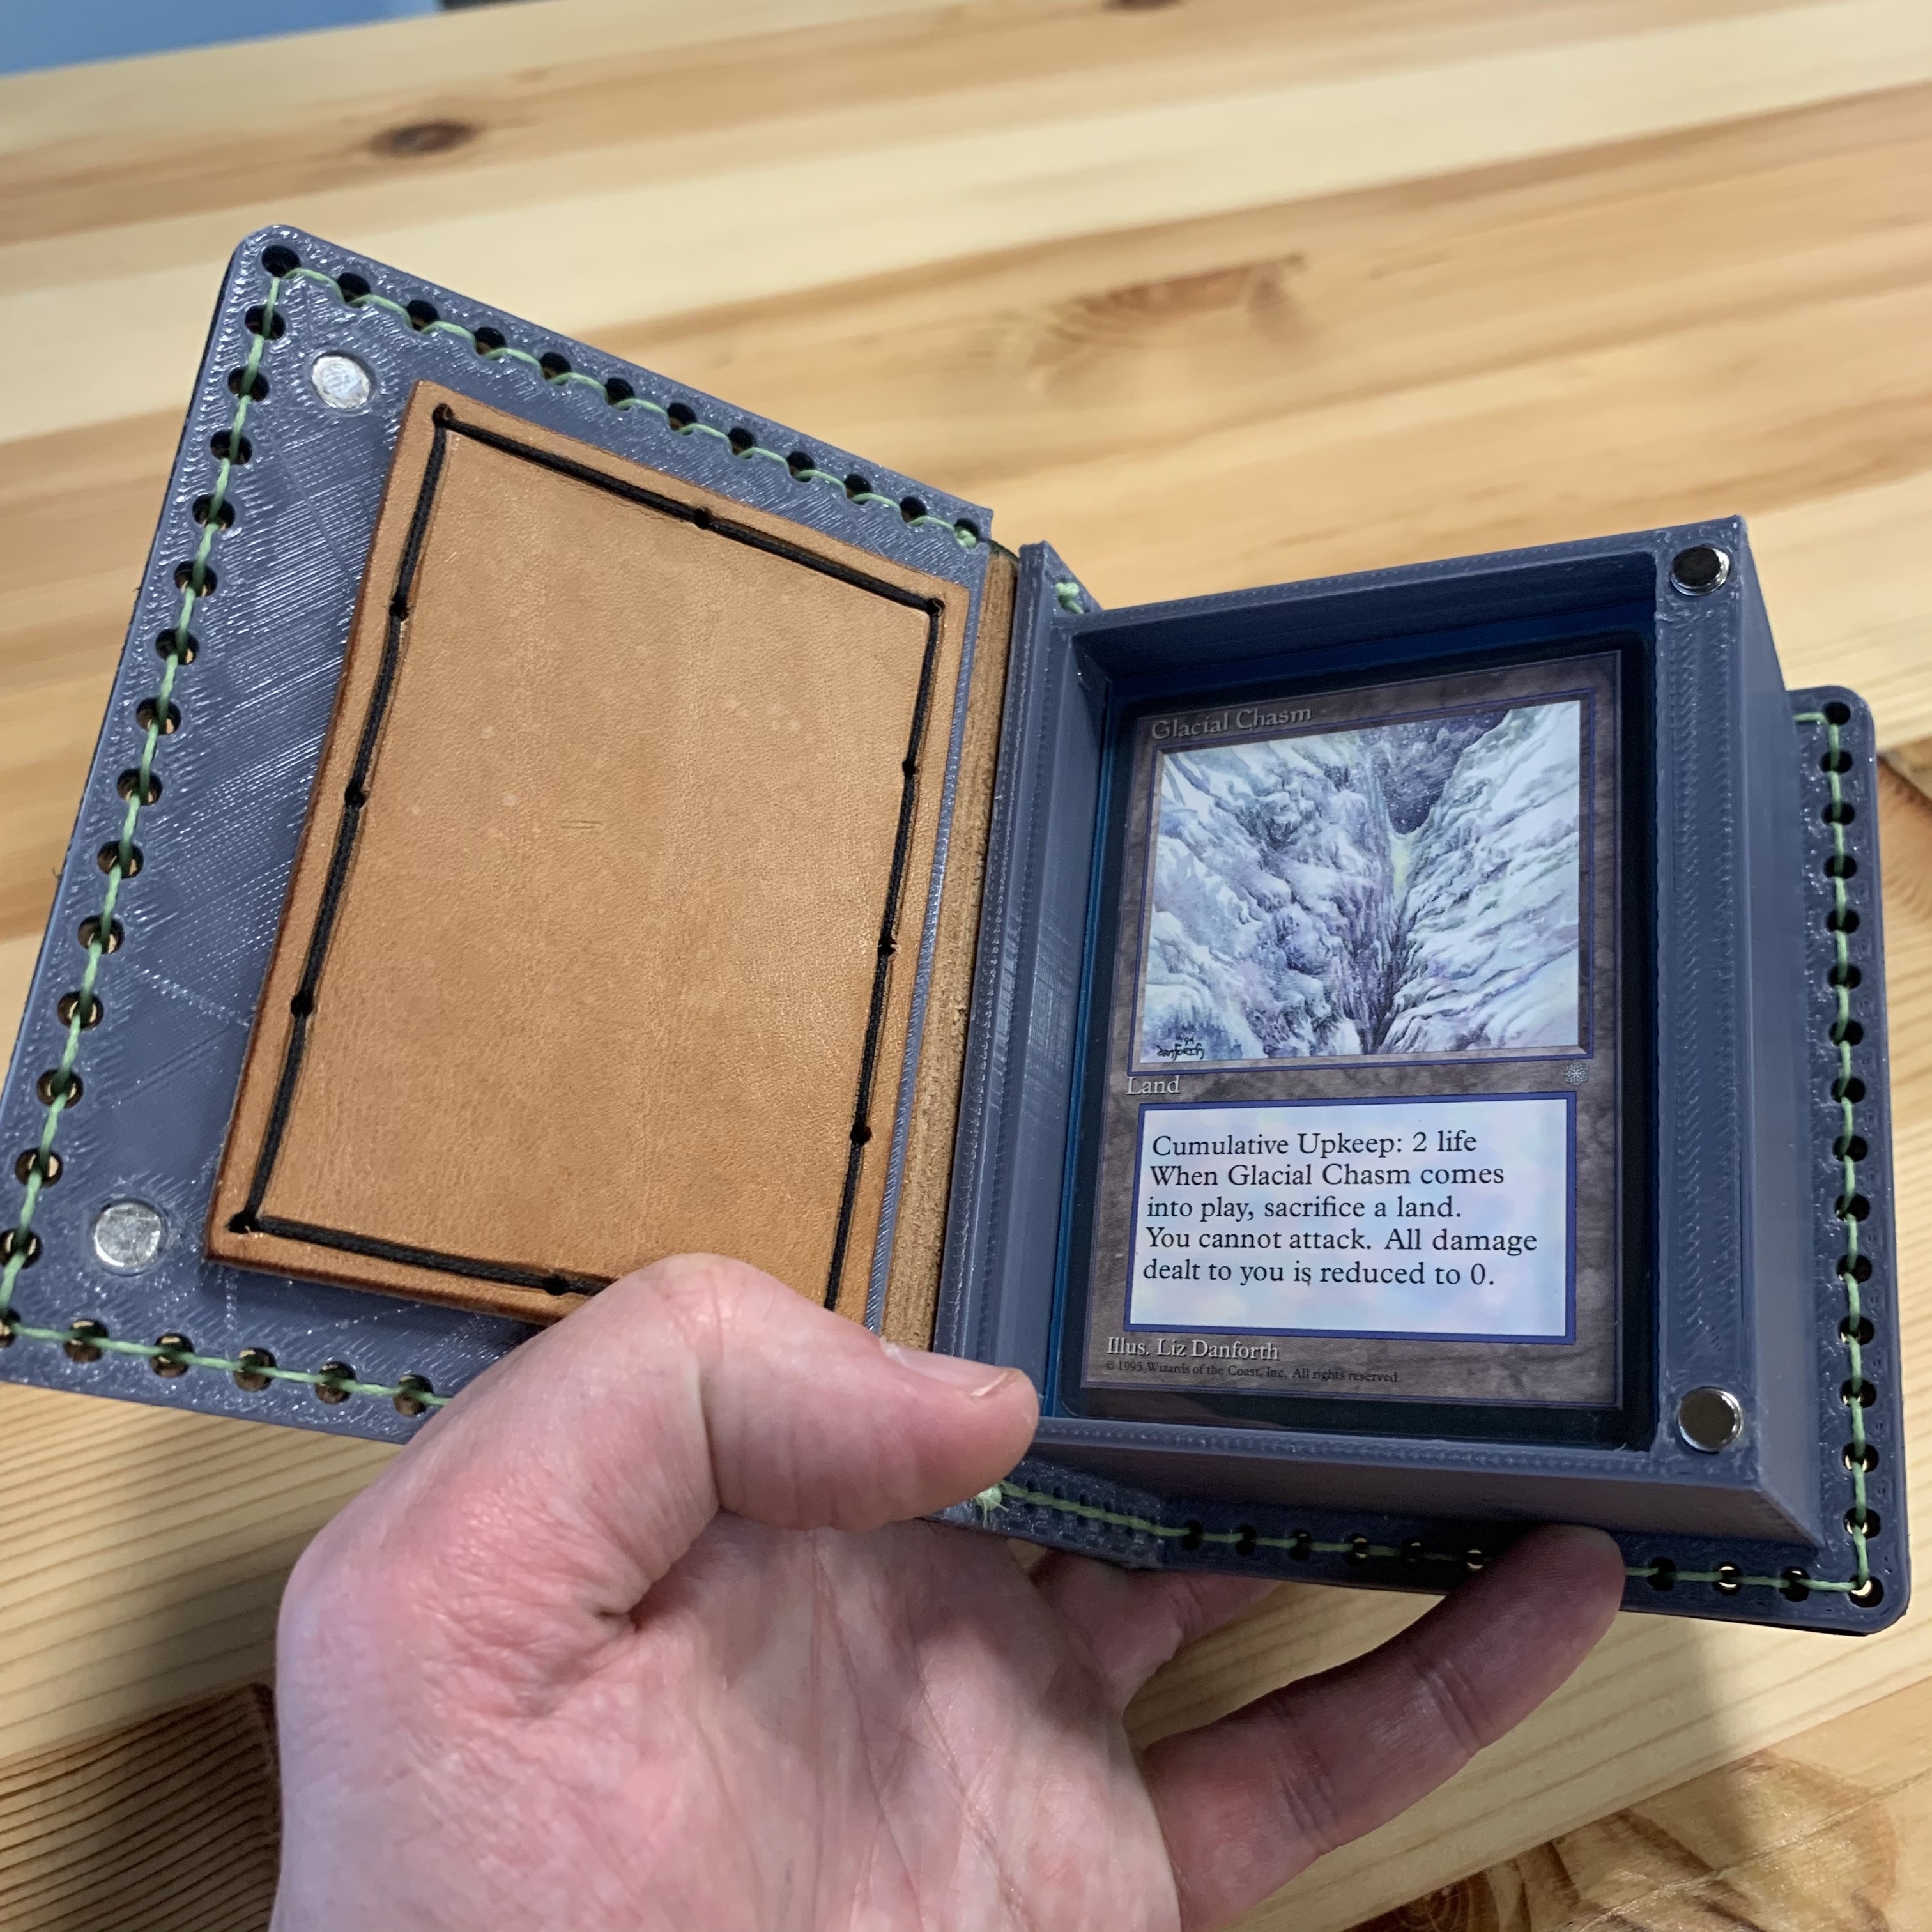
Inside
For added security, I didn’t want the edge of the card pile to be level with the lip of the enclosure.
To work around the issue, the box is a few millimeters deeper than needed, and I wanted to have a small piece of leather on the inside of the box lid. This way, once the box is closed, the deck is snuggly pushed inward and can’t slip out.
The last thing to do is add a secure way of keeping everything tightly closed. Magnets are the way to go here - they’re small, inexpensive, and easy to incorporate into any design.
First stab
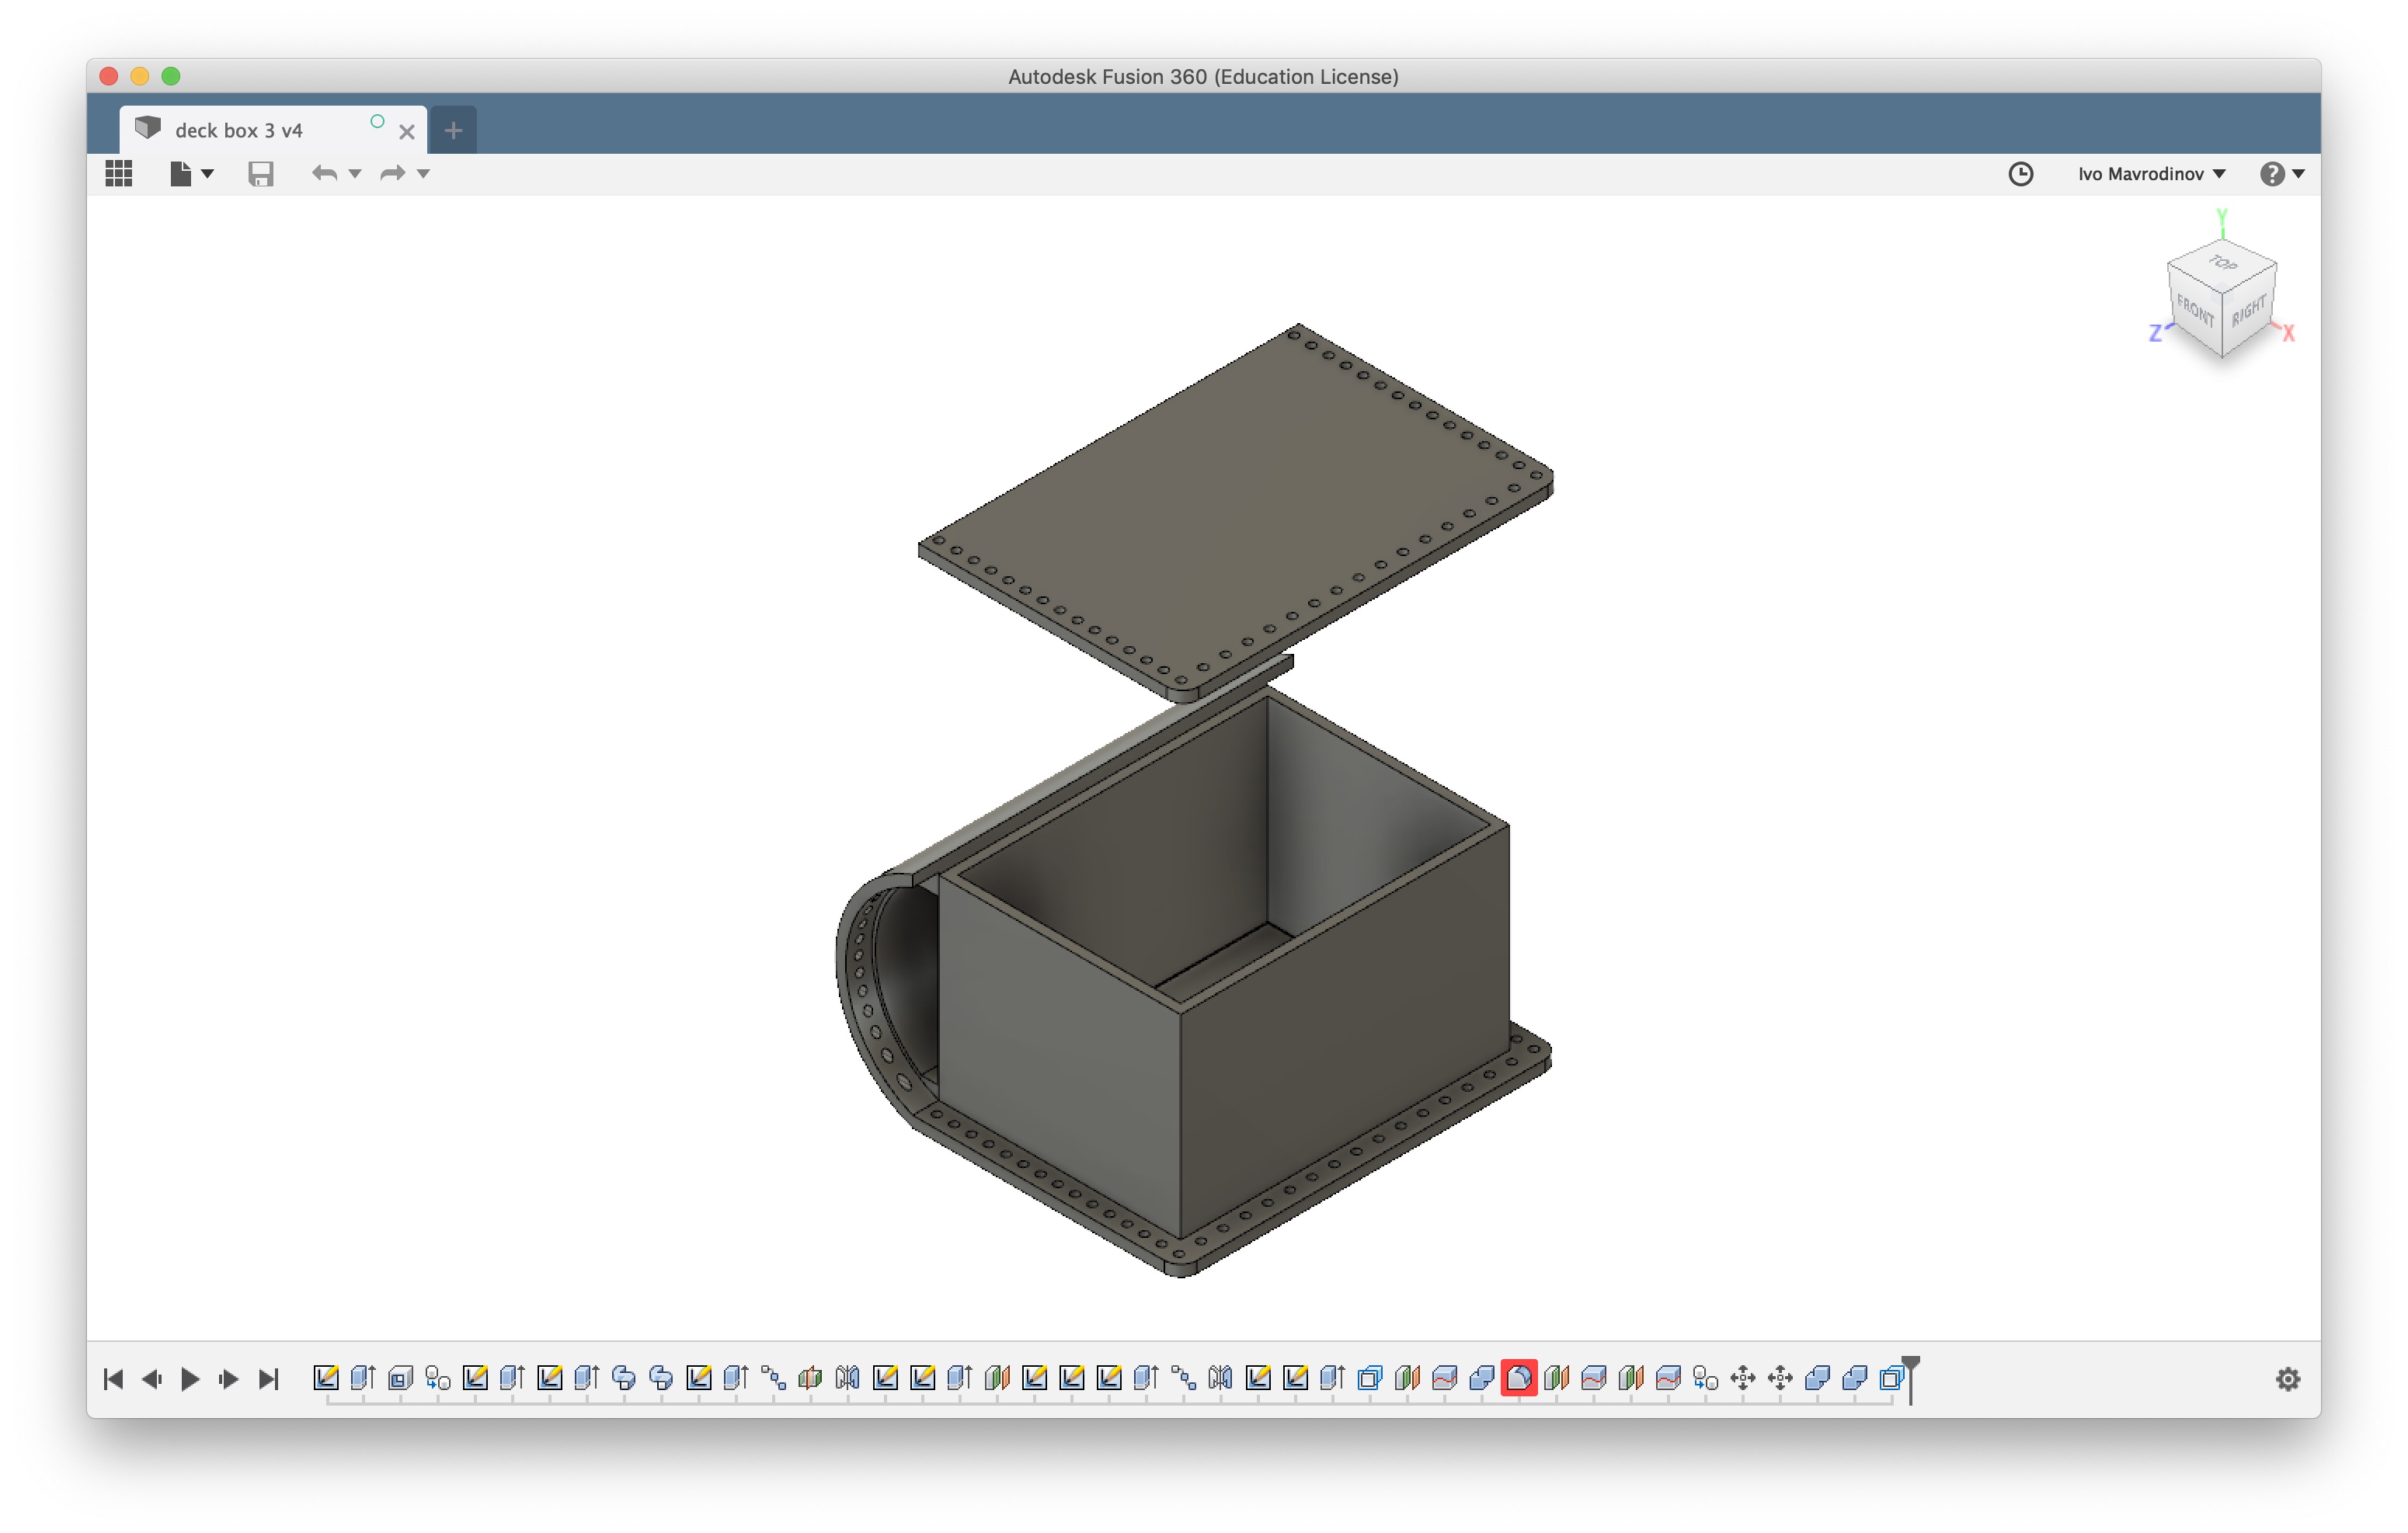
This is version 1 of the deck box. It’s pretty close to what I imagined, but with one extra addition.
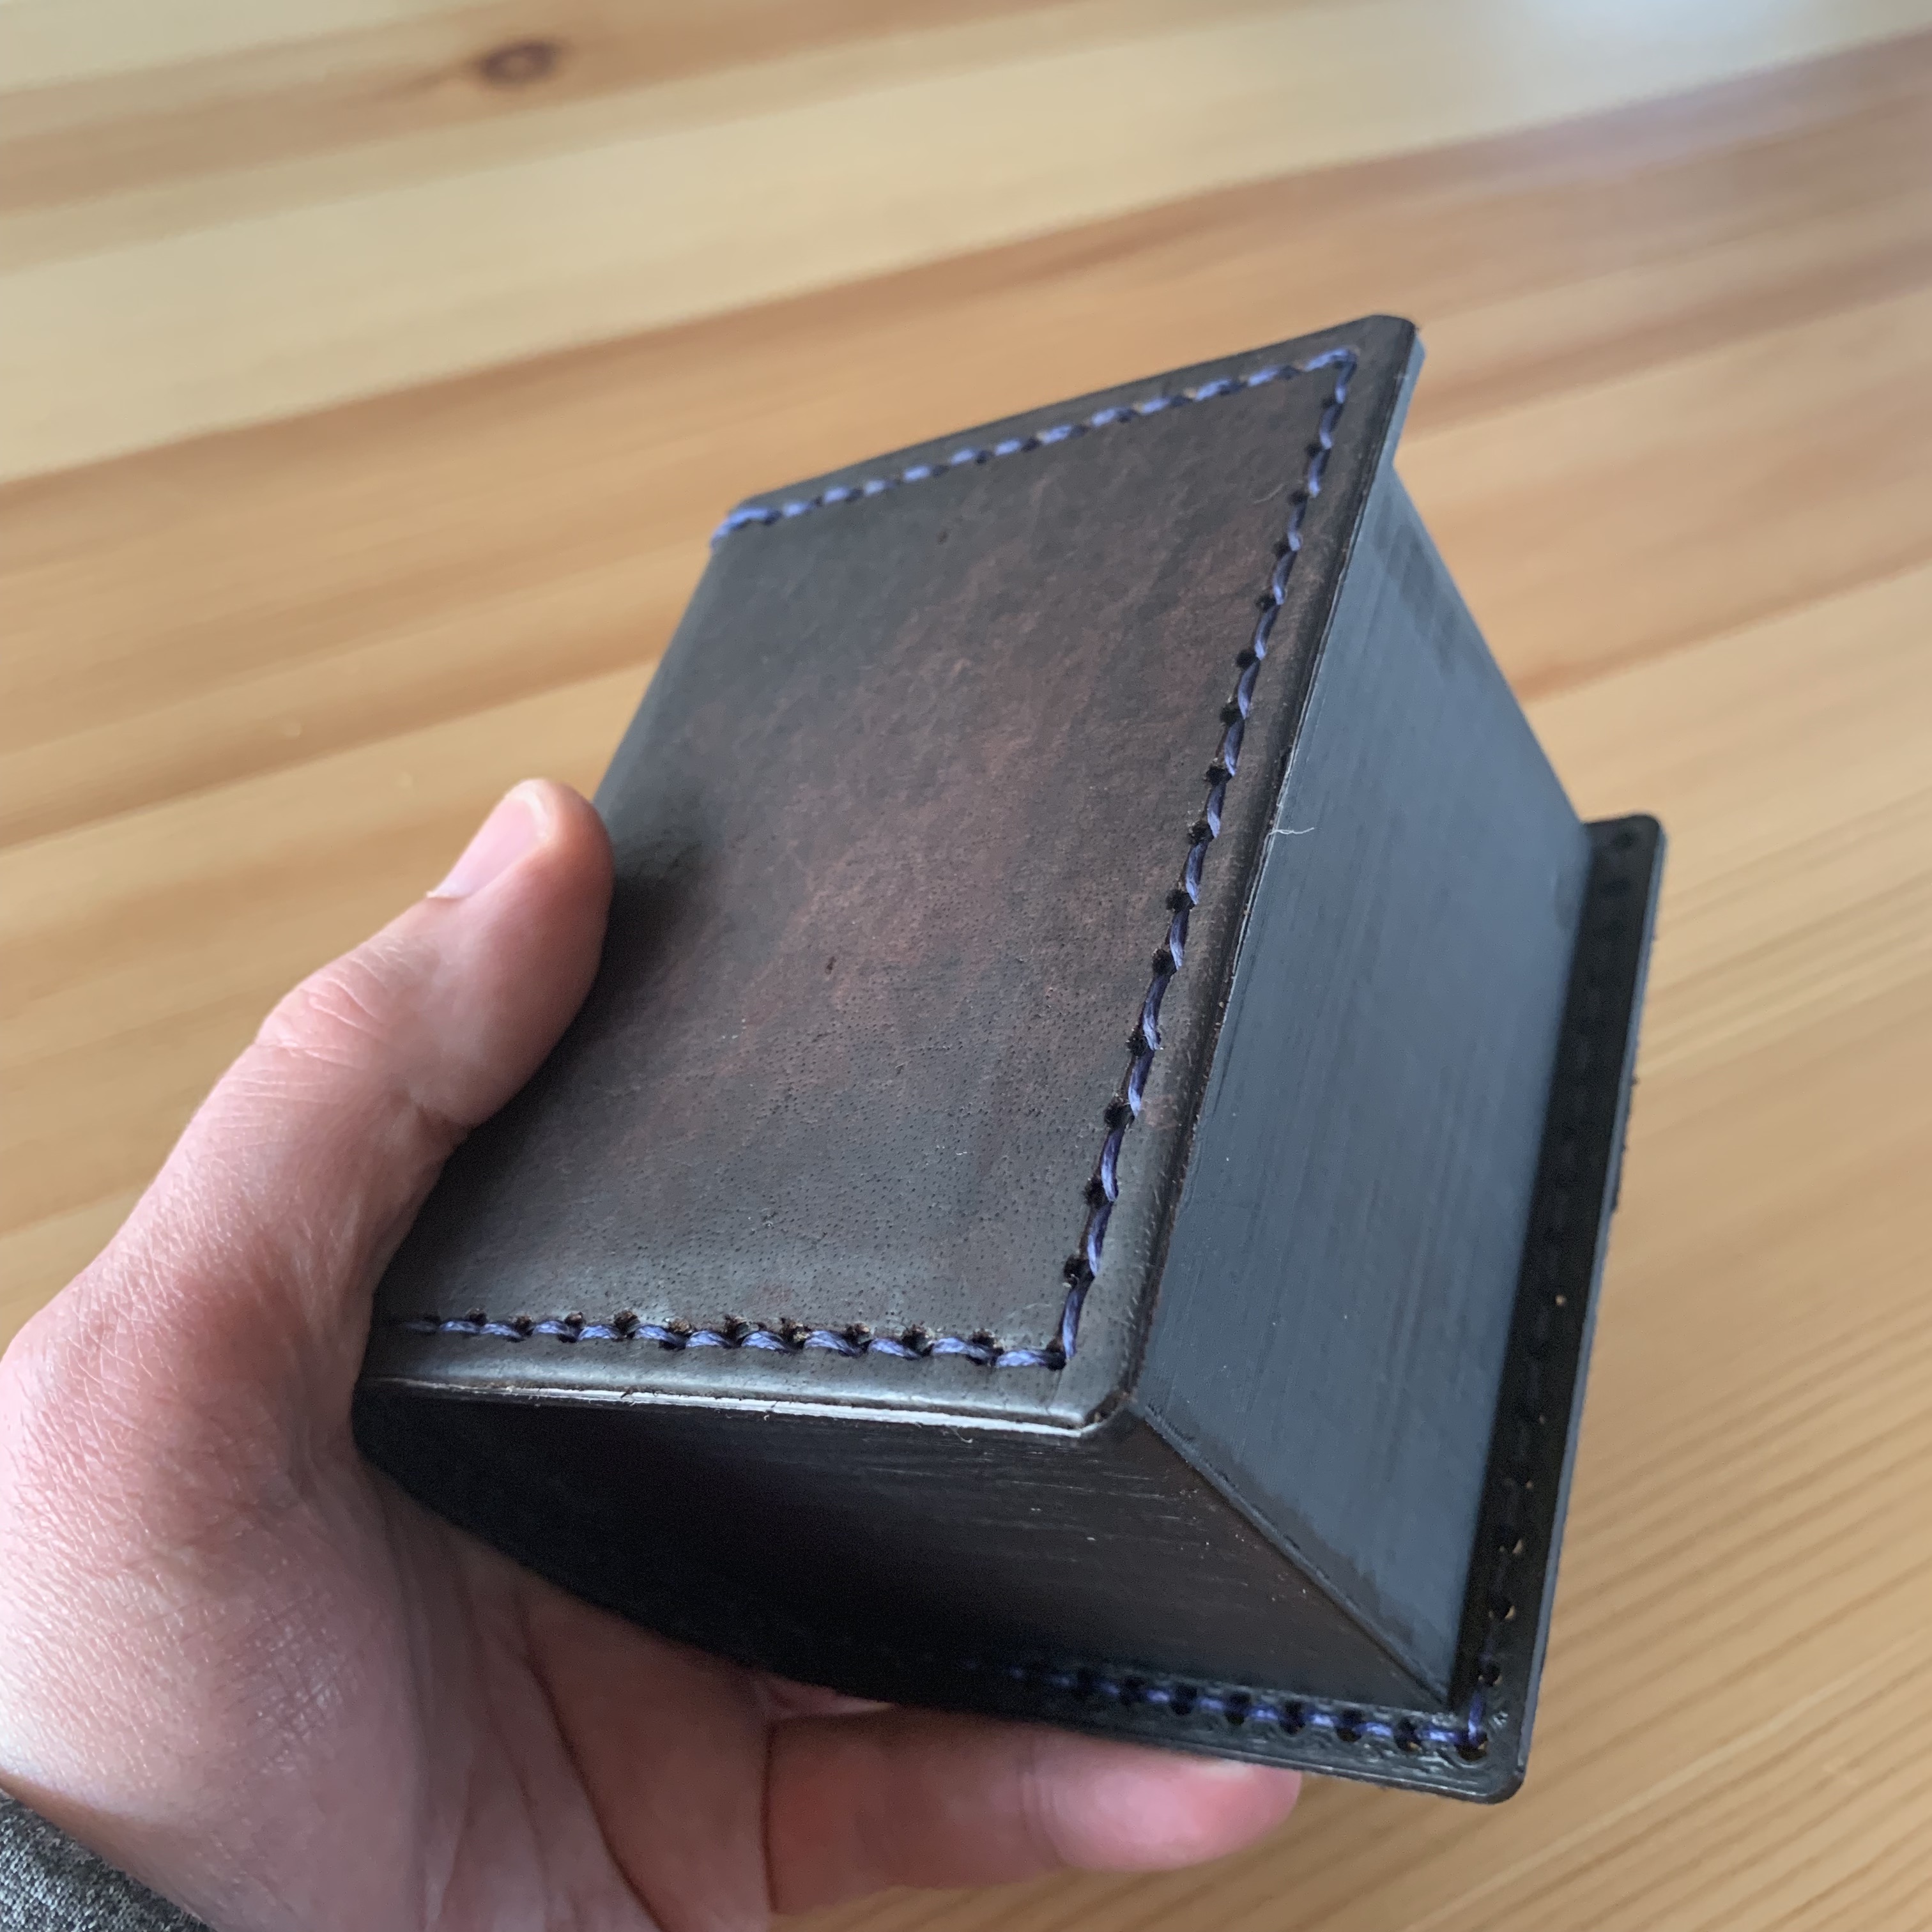
Most of the old books are bound in such a way, that the spine of the book sticks outward in a semi circular shape.
This was easy to do in 3D and it actually has a functional aspect to it. I hollowed out the curved section and turned it into a small compartment. Not spacious enough to hold extra cards, but perfect for a set of dice.
Sadly, this resulted in difficulties during 3D printing. Because the box has to be printed horizontally (on its side), the spine of the box is sticking out and sagging during printing, resulting in a very messy and uneven finish.
But that’s not all. A bigger problem I found while trying to stitch the leather is that the stitch holes on the curved part of the spine were not even and very hard to loop through. This is a fundamental problem with Fusion360 - it simply doesn’t do well when working with curved surfaces.
The leatherworking god was also not on my side
Either that, or I didn’t have the proper tools and knowledge for the job.
To make matters worse, I managed to mess up one piece of leather while trying to fit it in. Although my stitch lines were almost perfect, cutting through them was a whole’nother thing.
Punching holes was also very challenging. With just a crappy hand punch tool, it was really difficult to keep all holes properly aligned.
Lesson learned - don’t rush leatherworking. One wrong move and the whole thing is ruined.
Luckily for me, only one side of the leather was damaged, so I managed to salvage almost all of it and redo my design before trying again.
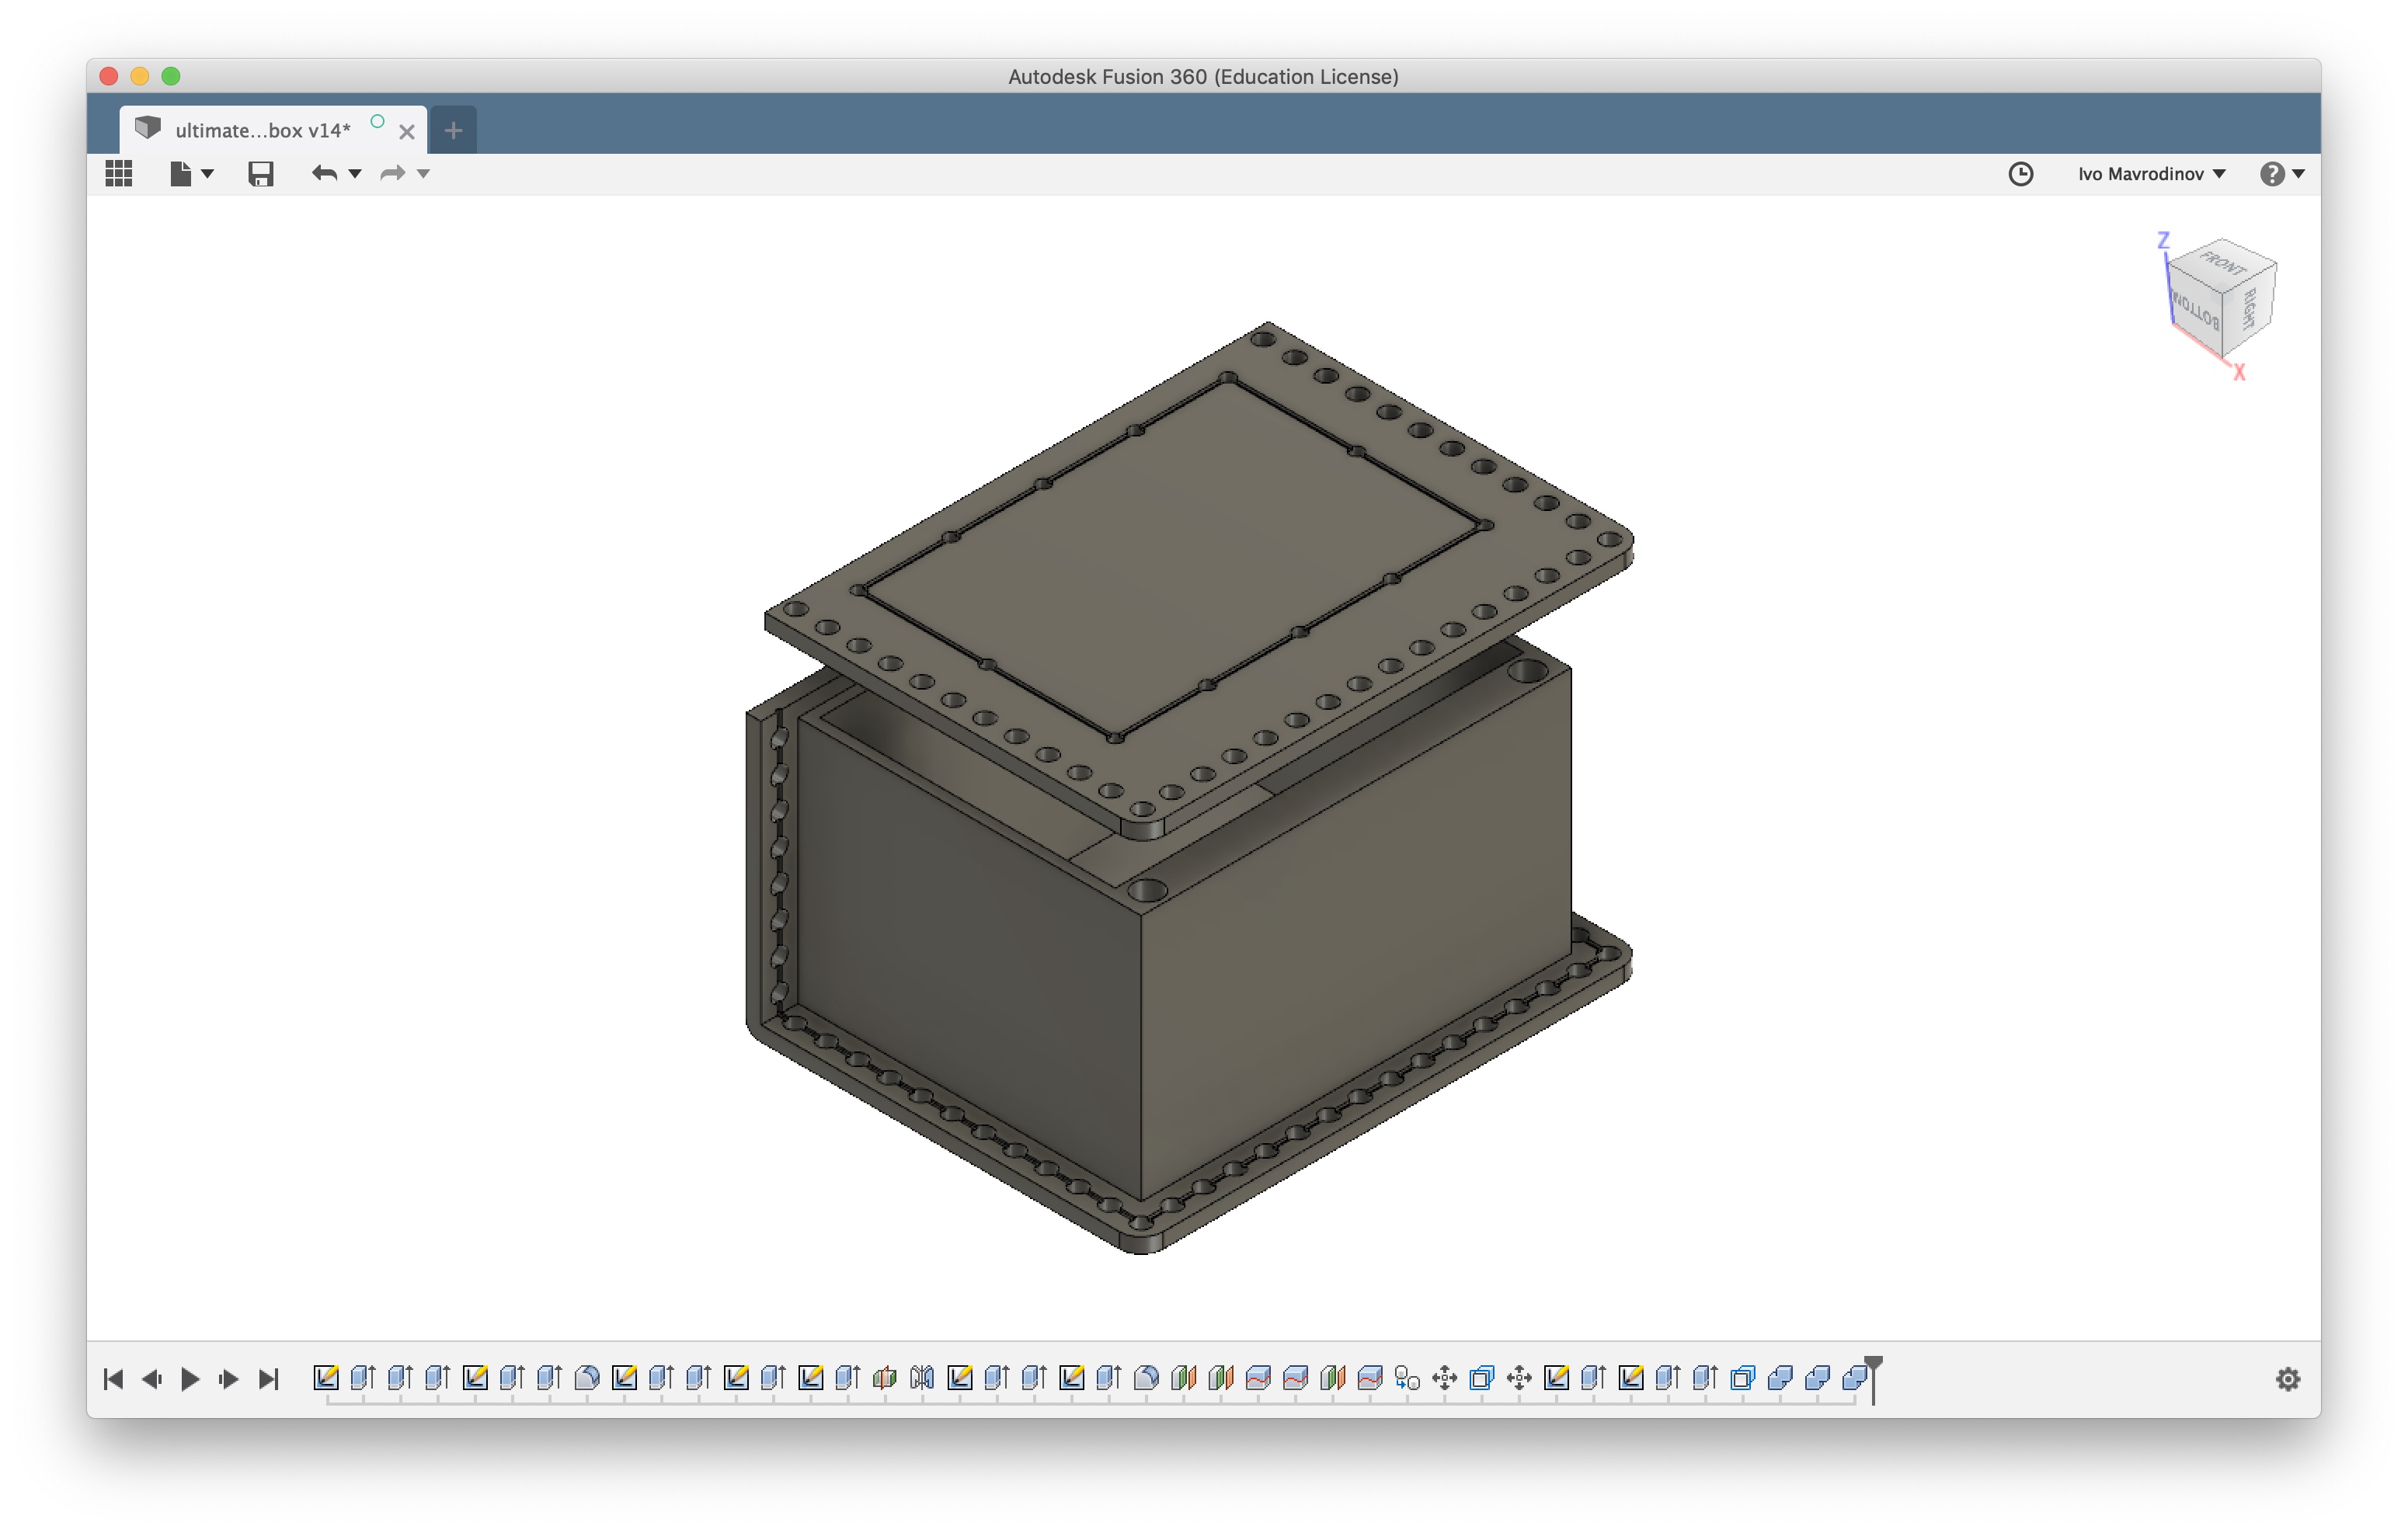
Back to the drawing board
Redesigning my initial model wasn’t too challenging.
The spine curve was cut flush with the main body, and stitch holes ware enlarged by a millimeter to ensure they’d print better.
Tying everything together (pun intended)
After version 2 was done printing, I laid it on top of the leather and traced the new dimensions.
There are only two areas where the leather has to fold - the bottom edge of the box and the flap between the lid and main body.
Thinning leather is relatively simple. I used a small fork like tool that has two short V-shaped prongs, with the area between them being very sharp. Running the tool several times alongside the fold took half of the thickness off, and I finalized the crease by dampening that area of the leather and rubbing it with a wooden tool until it was nice and thin.
With this step finished, it was time to dye the leather.
For a more distressed look, I first dampened a few random areas with hot water, let it soak in for a few minutes, then applied a generous amount of dark green dye with a cotton pad. This part can be repeated several times until the surface looks saturated enough.
The final area in need of conditioning is were the outside edges of the leather meet the box rim.
A cool little thing about leatherworking is that most tools are multi purpose. I reused the wooden tool mentioned above to rub the outer edges of the leather until they turned stiff and shiny. That’s called burnishing.
I then went ahead and stitched all three components together using specialized thread. It’s really thick, very stiff and has a waxy feel feel to it.
Several hours later, the leather was completely dry and taken its final form around the plastic box. To seal everything up, I did three rounds of mineral oil finish and then glued the magnets in place.
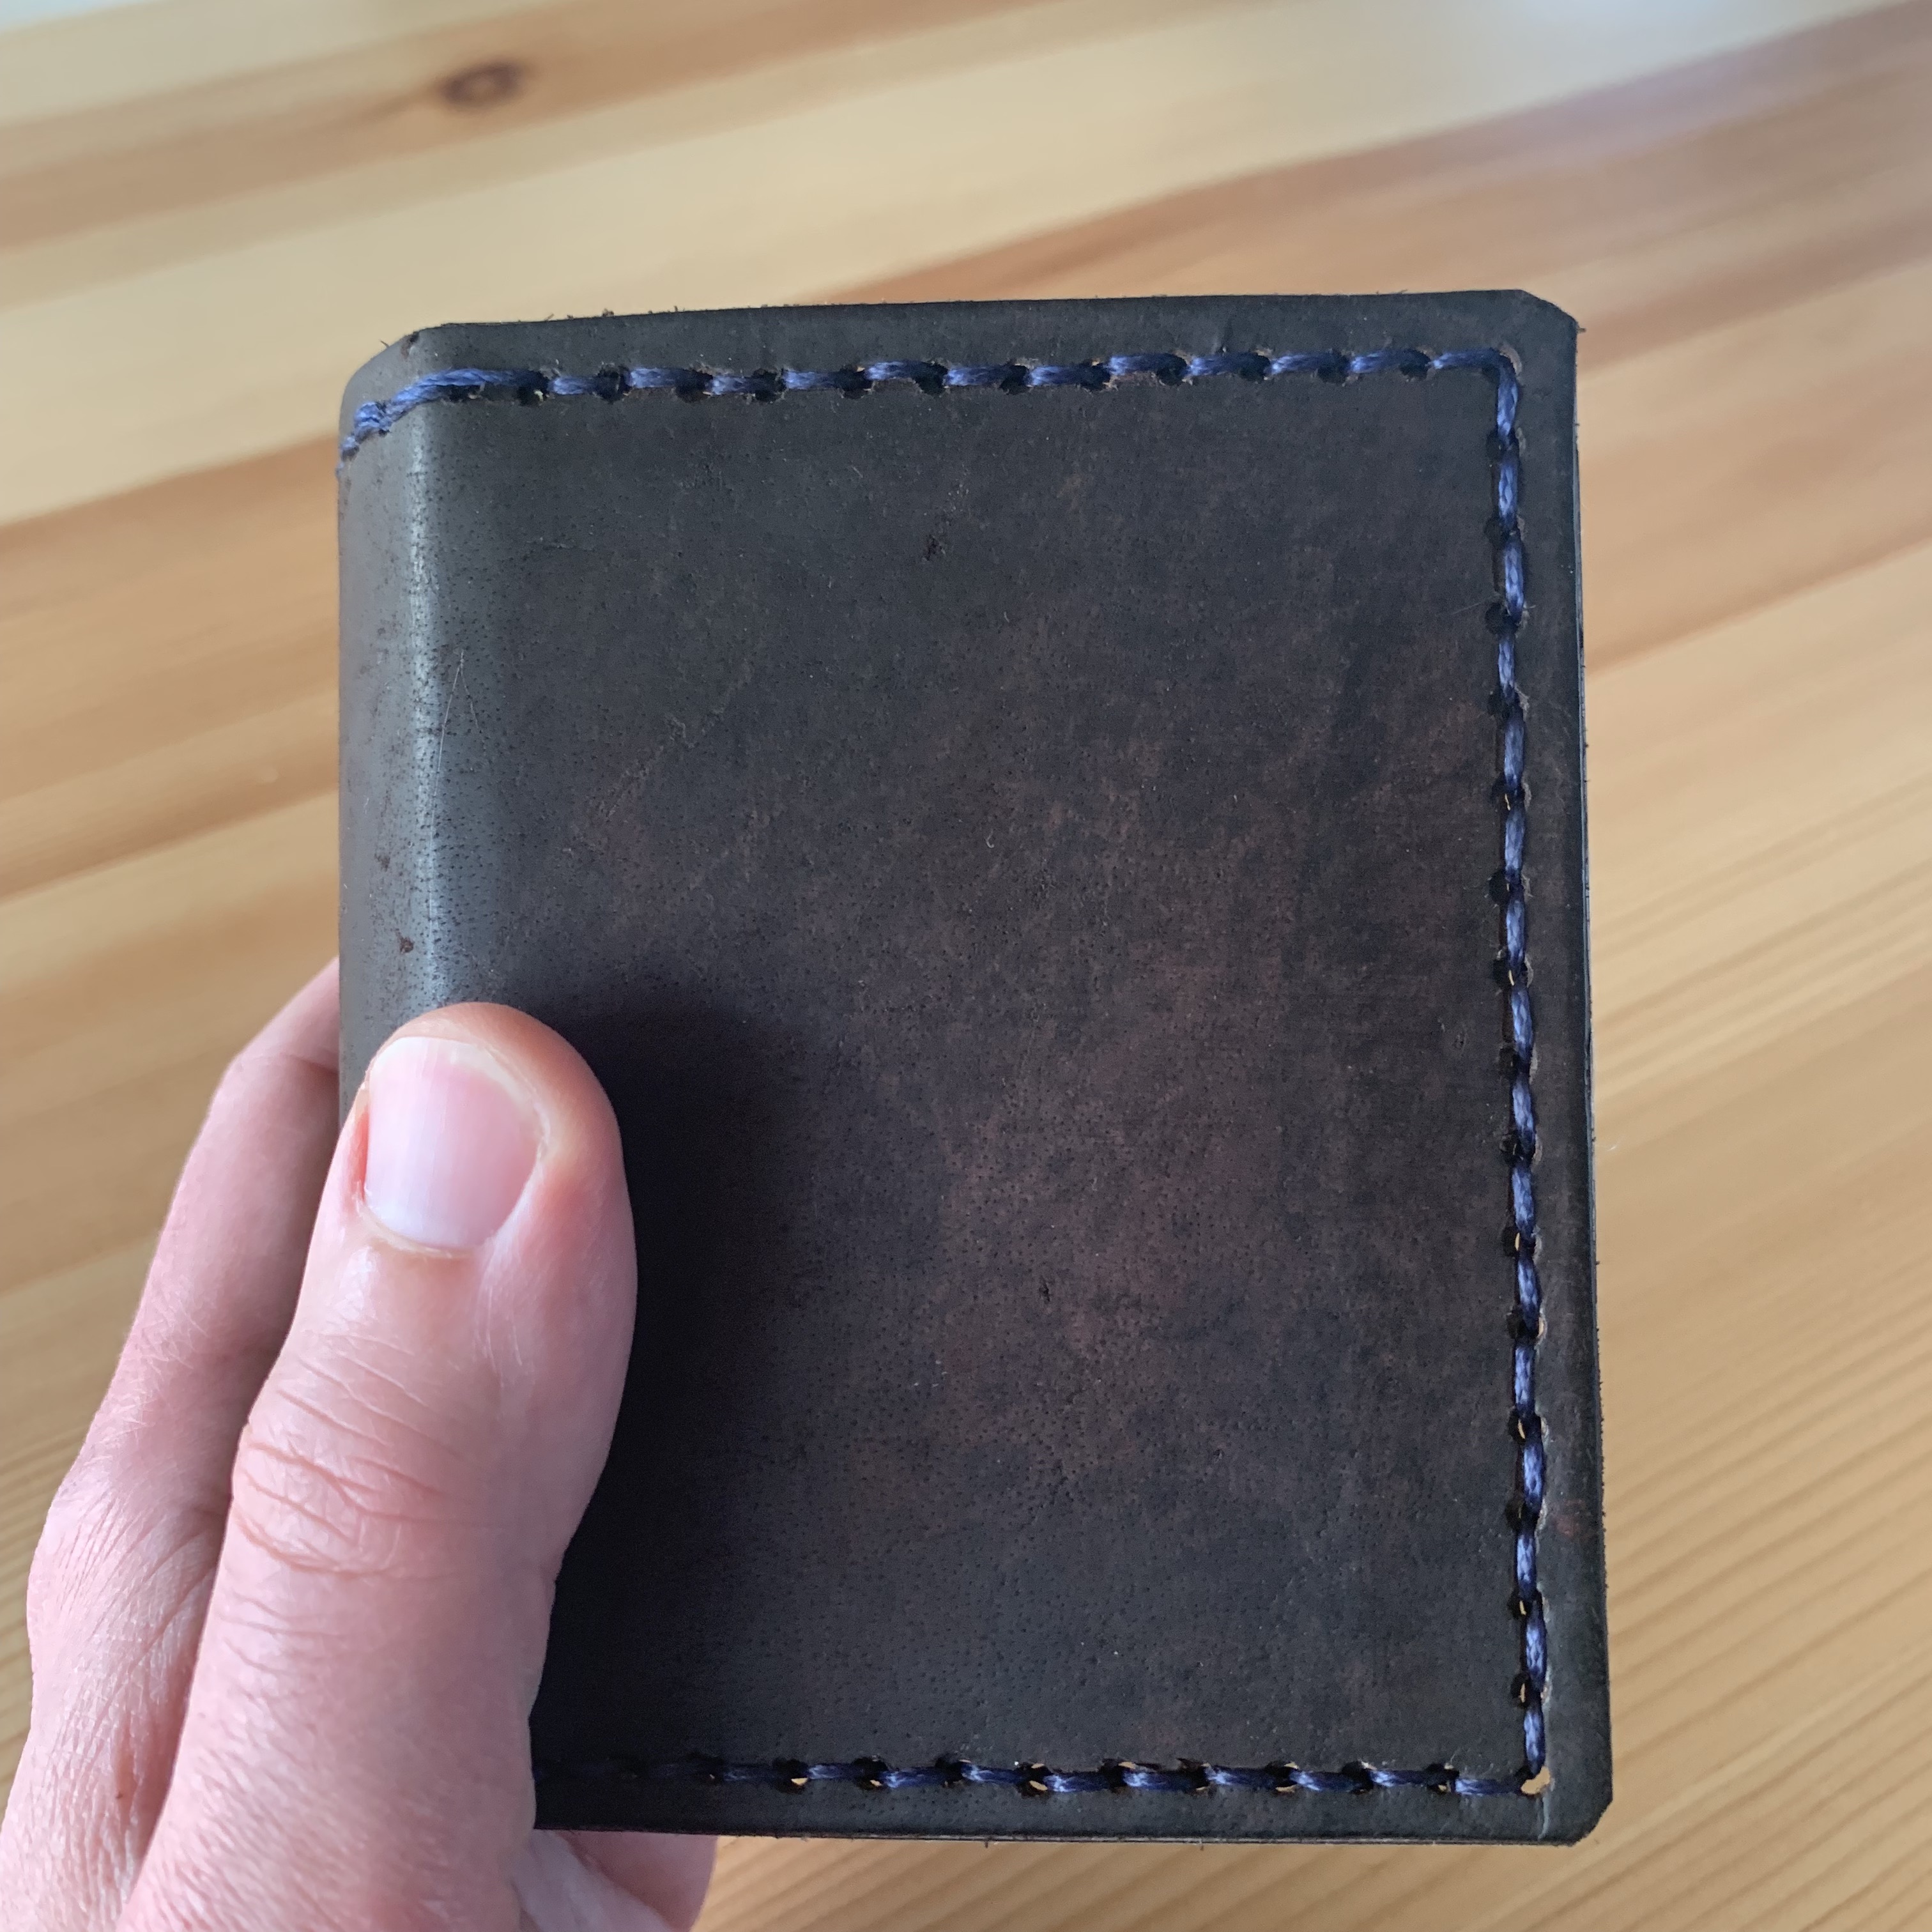
Final result

Not too bad for a first project using new tools and materials. I love the way the exterior turned out, though the inside of the box might need some tweaking.
Now I can carry my pimped up old school deck of cards around in nerdy vintage style.
Can you say the same thing with your five dolla plastic card box you got from Amazon? Exactly.
The design is available on my Thingiverse page here, and I might add another version to the project that has some extra room for dice inside.
EDIT: Ad nauseam
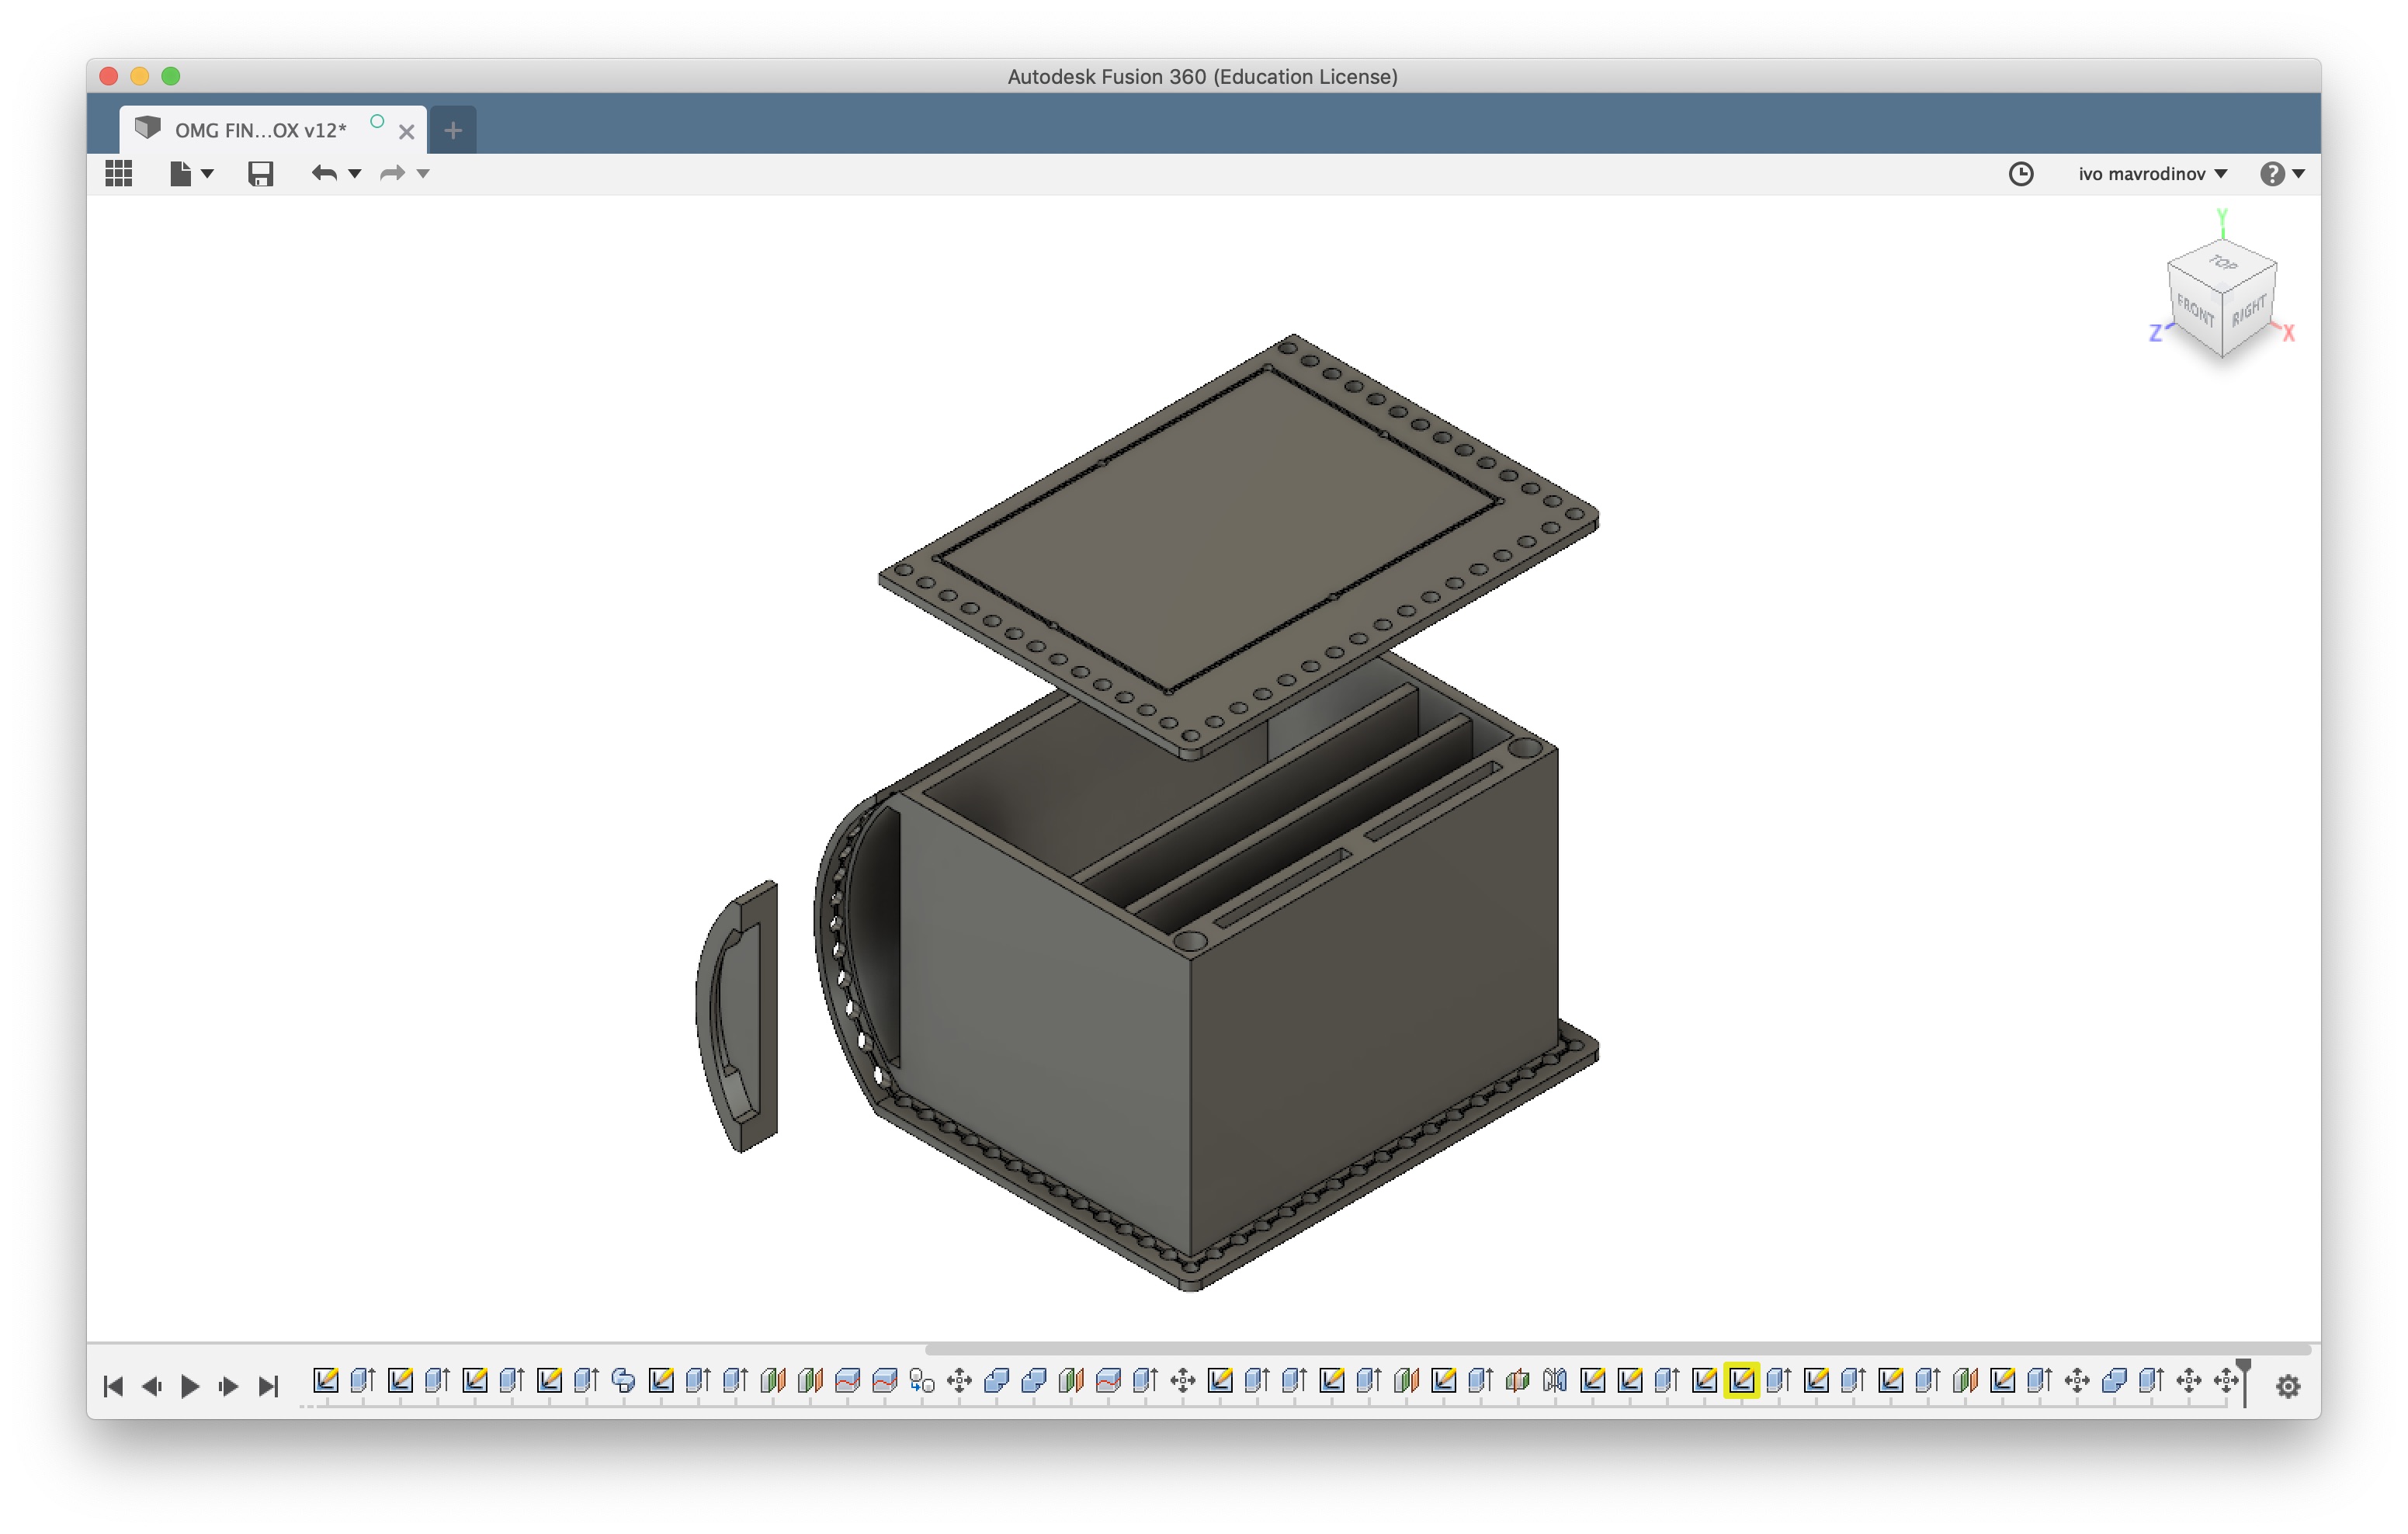
I had some extra free time over the last weekend, and with one final spare piece of leather, decided to retry my original book style design.
To get the proportions right, the box had to be wider than the previous one, and this gave me some wiggle room to try a few different layouts.
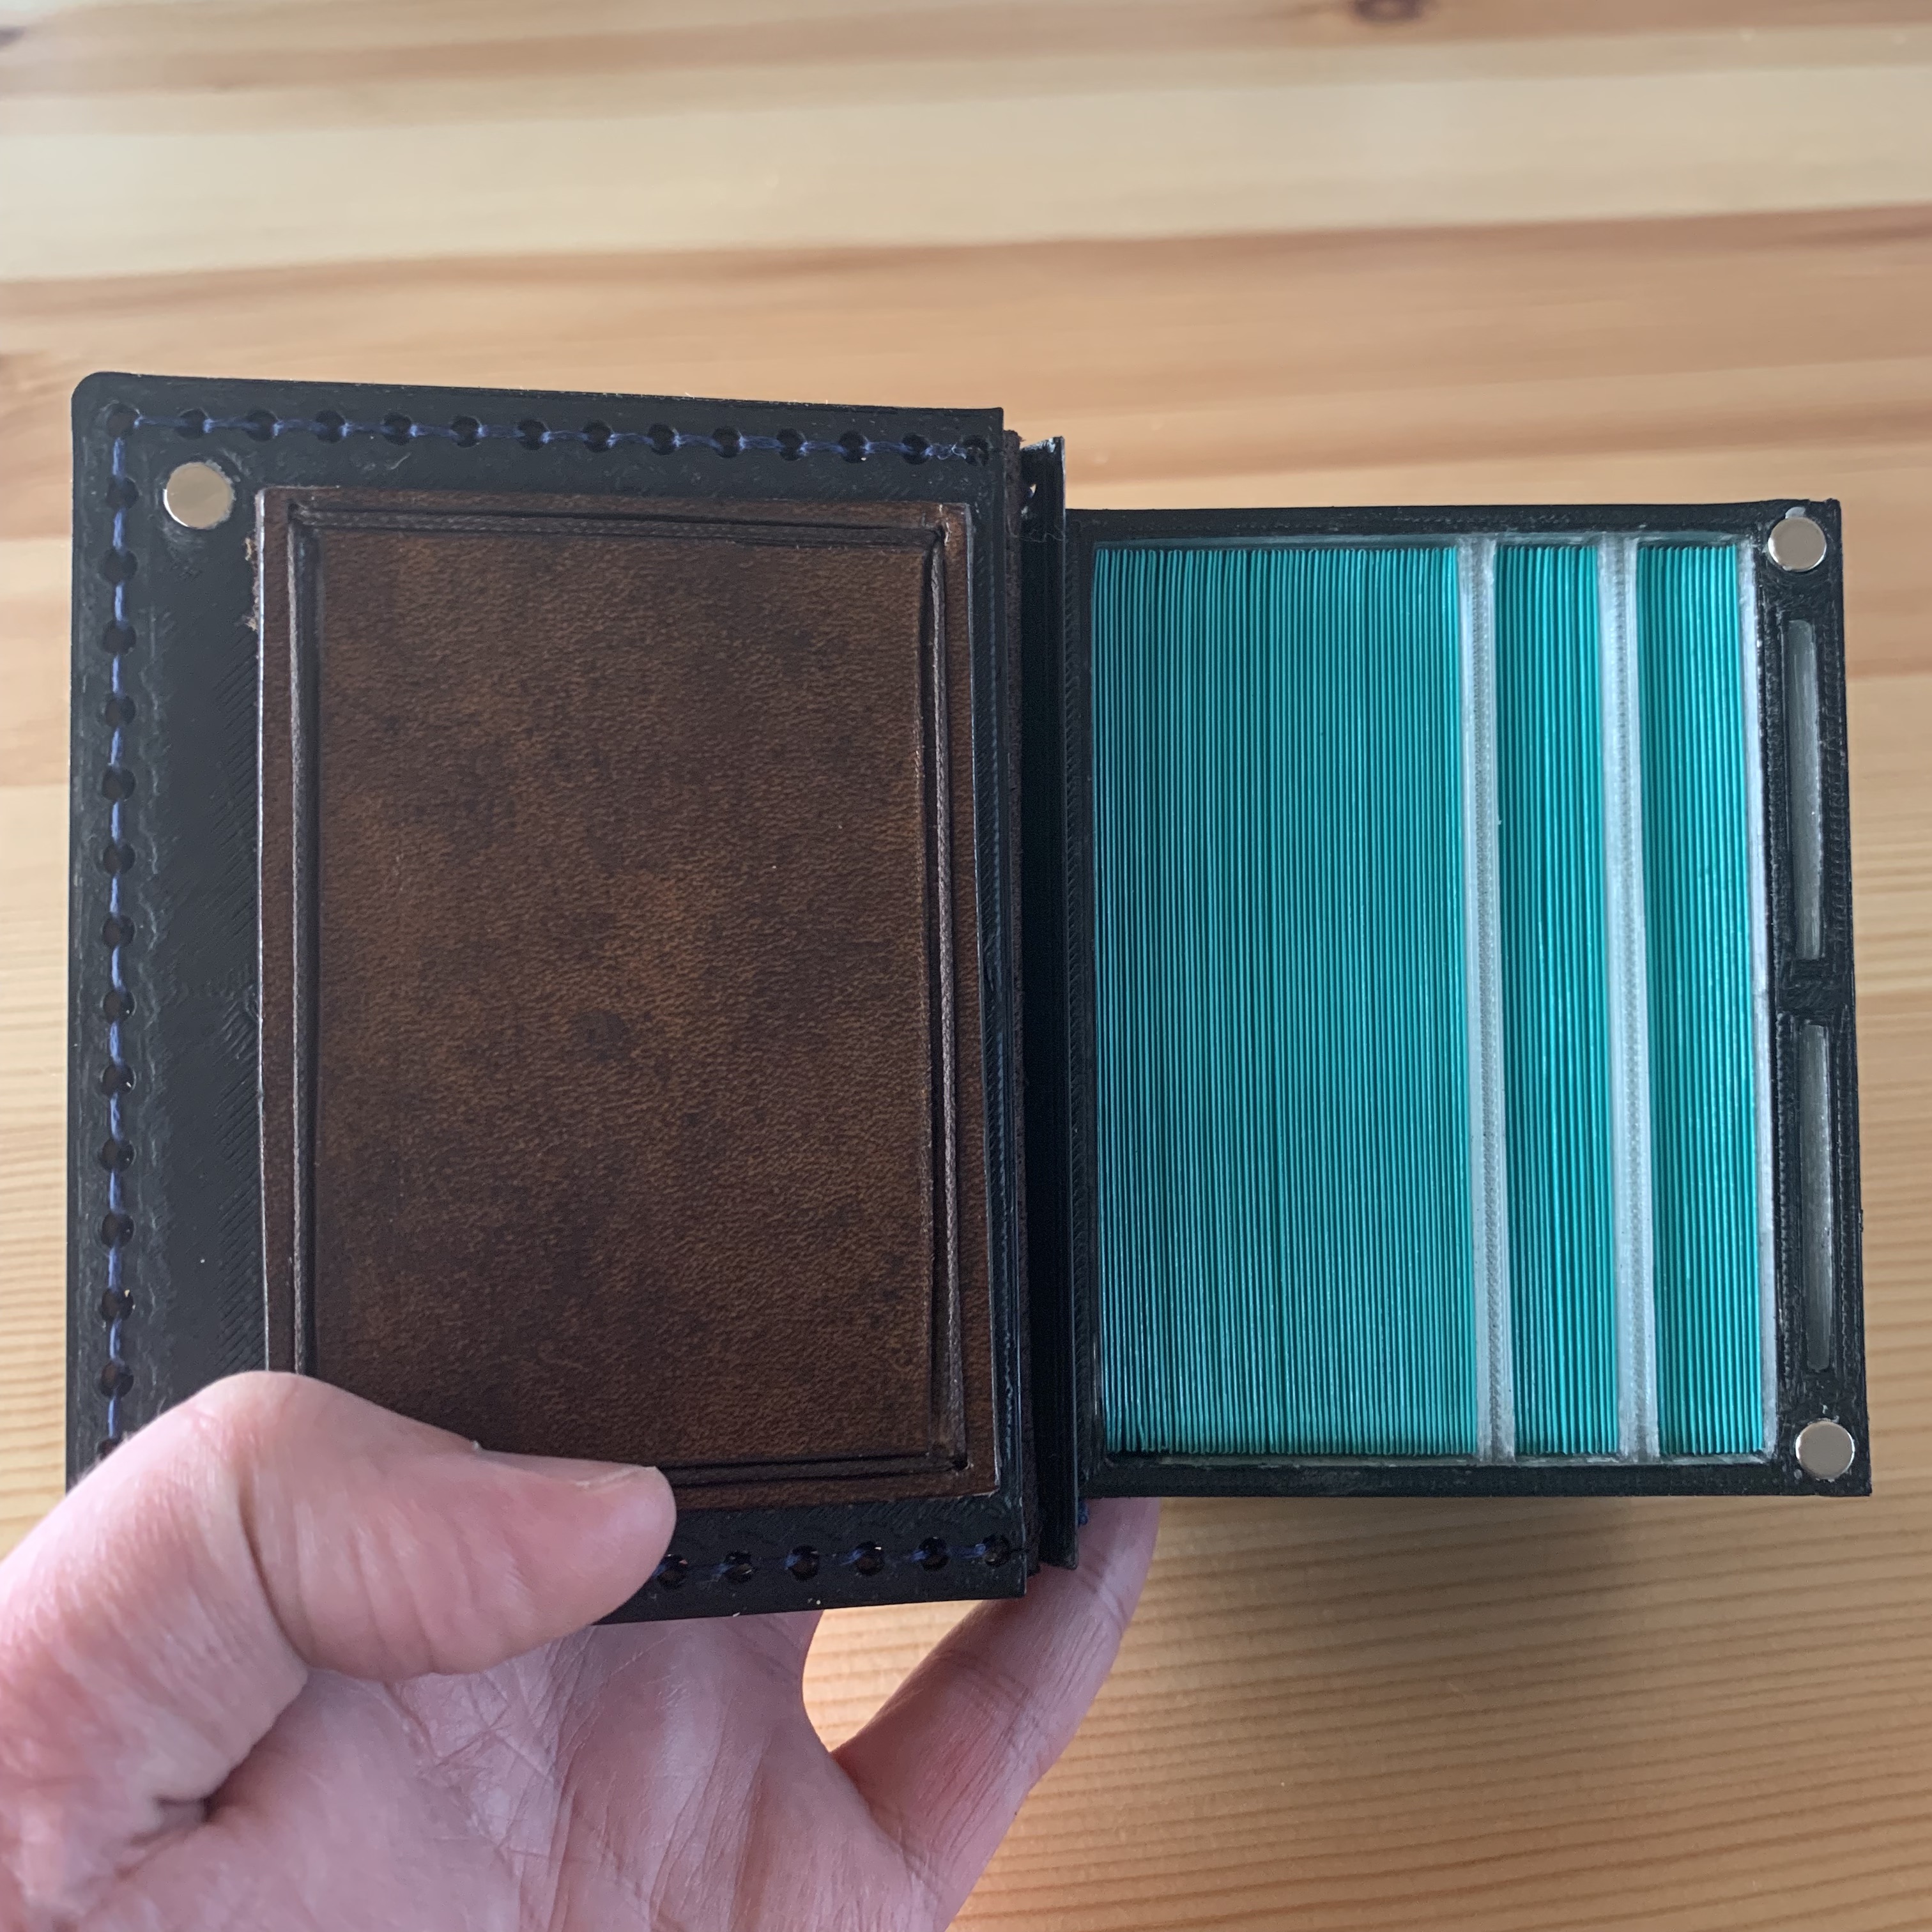
Decided to go for something a bit more compartmentalized, so I segmented the interior to house the following:
- a main area wide enough for 60 sleeved cards
- two side areas - one for a 15 card sideboard and an additional one for token cards
- two small slits on the right box wall - these can be used for storing coins or small non-card tokens
Since the spine of the book box had this extra curve to it, I didn’t want to just print it fully solid, so I hollowed that part and made it into an extra storage area.
Design files are available on my Thingiverse page here and here.
Happy gaming!